Shure Incorporated
12/43
4.
5.
•
•
•
•
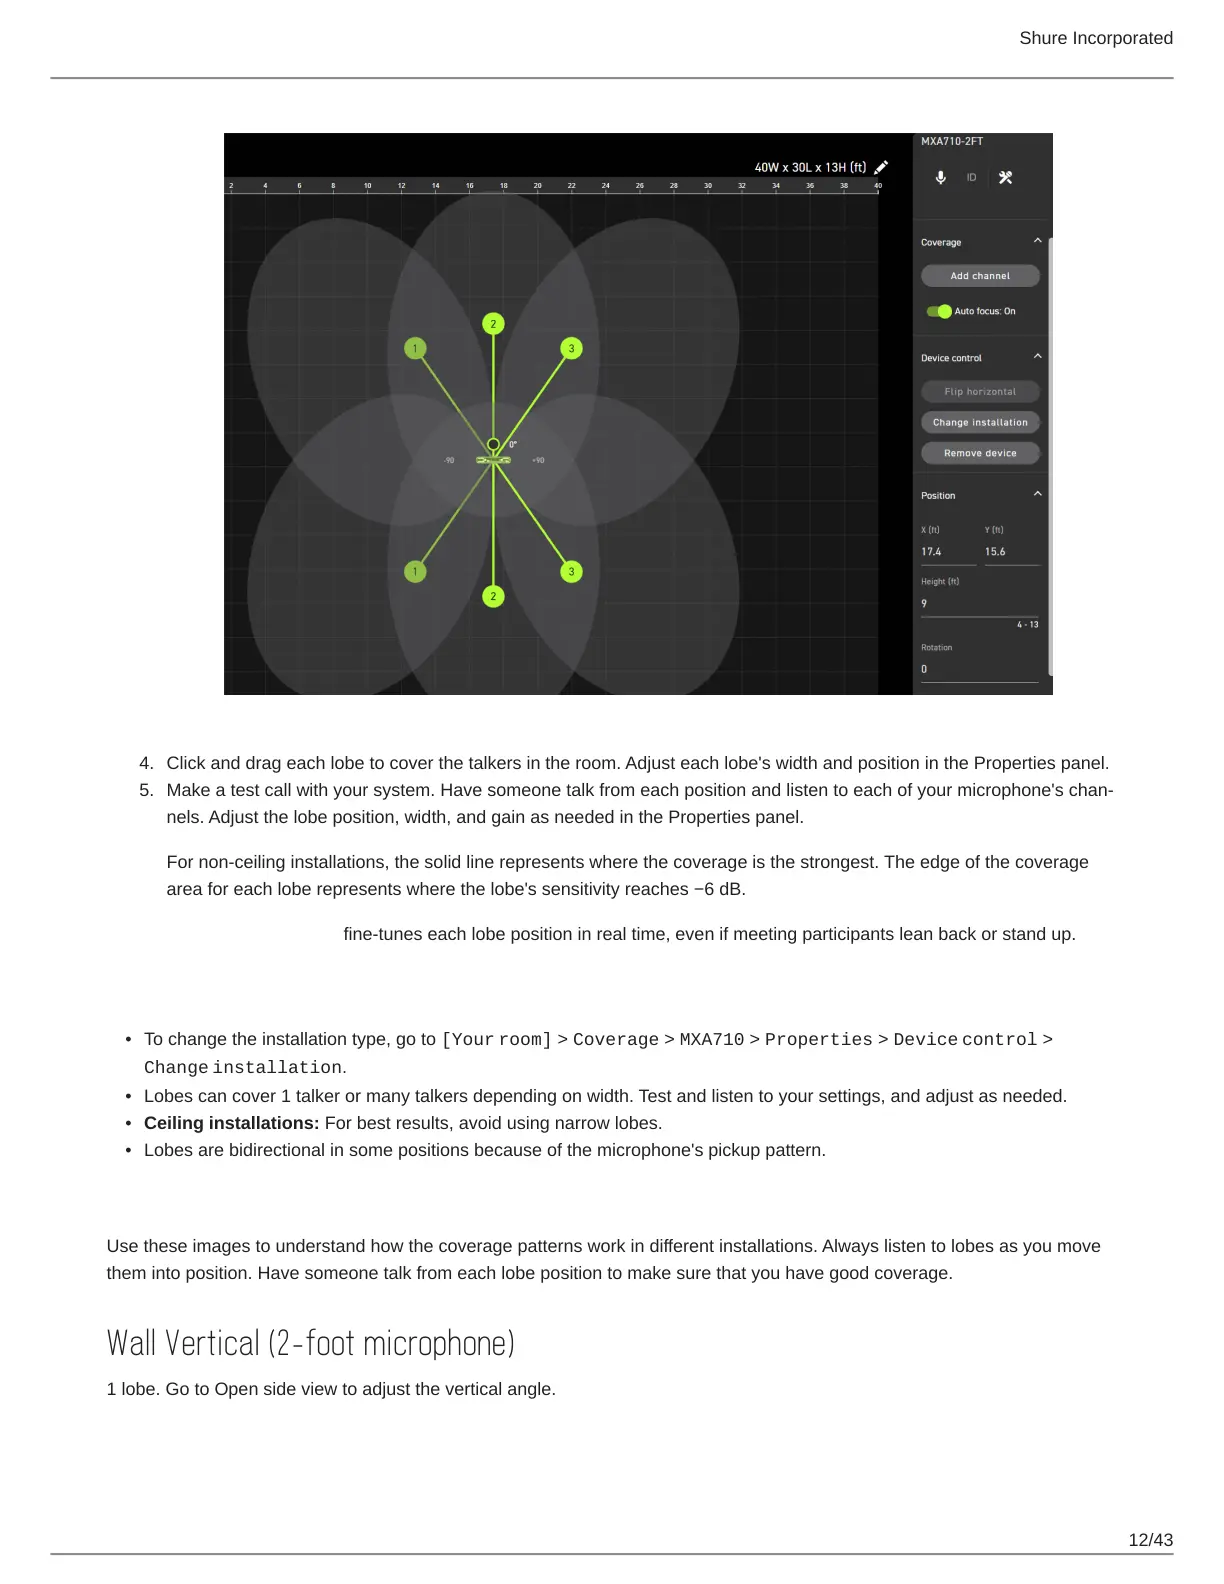
Click and drag each lobe to cover the talkers in the room. Adjust each lobe's width and position in the Properties panel.
Make a test call with your system. Have someone talk from each position and listen to each of your microphone's chan
nels. Adjust the lobe position, width, and gain as needed in the Properties panel.
For non-ceiling installations, the solid line represents where the coverage is the strongest. The edge of the coverage
area for each lobe represents where the lobe's sensitivity reaches −6 dB.
Autofocus technology fine-tunes each lobe position in real time, even if meeting participants lean back or stand up.
Tips for Great Coverage
To change the installation type, go to [Your room] > Coverage > MXA710 > Properties > Device control >
Change installation.
Lobes can cover 1 talker or many talkers depending on width. Test and listen to your settings, and adjust as needed.
Ceiling installations: For best results, avoid using narrow lobes.
Lobes are bidirectional in some positions because of the microphone's pickup pattern.
MXA710 Coverage Examples
Use these images to understand how the coverage patterns work in different installations. Always listen to lobes as you move
them into position. Have someone talk from each lobe position to make sure that you have good coverage.
Wall Vertical (2-foot microphone)
1 lobe. Go to Open side view to adjust the vertical angle.