Shure Incorporated
17/43
1.
2.
3.
•
◦
◦
Adjust the level for each microphone channel so that the gain setting works for all seating scenarios. Shure recommends set
ting the channel levels before making changes to automixer settings.
To adjust:
Perform a level check for each channel using a typical speech volume. Adjust the faders so the meters are peaking at
approximately −20 dBFS.
Adjust the equalizer settings to optimize speech intelligibility and control problematic frequencies in a room (such as a
low-frequency rumble caused by HVAC systems).
If equalizer settings cause a significant increase or decrease in levels, make any necessary level adjustments accord
ing to step 1.
When to Use the Channel and IntelliMix Gain Faders
There are 2 different gain faders that serve different purposes:
Channel Gain (Pre-Gate)
To adjust, go to: [Your room] > Device configuration > Channels
These faders affect a channel's gain before it reaches the automixer and therefore affect the automixer's gating decision.
Boosting the gain here will make the lobe more sensitive to sound sources and more likely to gate on. Lowering gain here
makes the lobe less sensitive and less likely to gate on. If you're only using direct outputs for each channel without the au
tomixer, you only need to use these faders.
IntelliMix Gain (Post-Gate)
To adjust, go to: [Your room] > Device configuration > IntelliMix
These faders adjust a channel's gain after the lobe has gated on. Adjusting the gain here does not affect the automixer's gating
decision. Only use these faders to adjust the gain of a lobe after you are satisfied with the automixer's gating behavior.
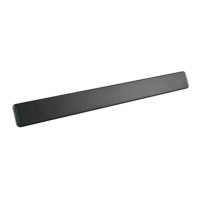
How to Install the MXA710
The MXA710 is an extremely versatile microphone. You can install it in many places in a conference room and easily get good
coverage for all talkers.
MXA710 Microphone Coverage
MXA710-2FT MXA710-4FT
Room size Medium to large Medium to large
Maximum number of lobes 4 8
Recommended distance from talkers 2 to 16 feet 2 to 16 feet
Best Practices for Installation
Before installing, open the microphone's coverage map in Designer. Look at the 4 device installation templates to under
stand how the lobes behave when you move them around and use different widths. Lobes also have Autofocus technolo
gy, which fine-tunes each lobe position in real time, even if meeting participants lean back or stand up. Templates are
available for:
Wall horizontal
Wall vertical