Shure Incorporated
19/43
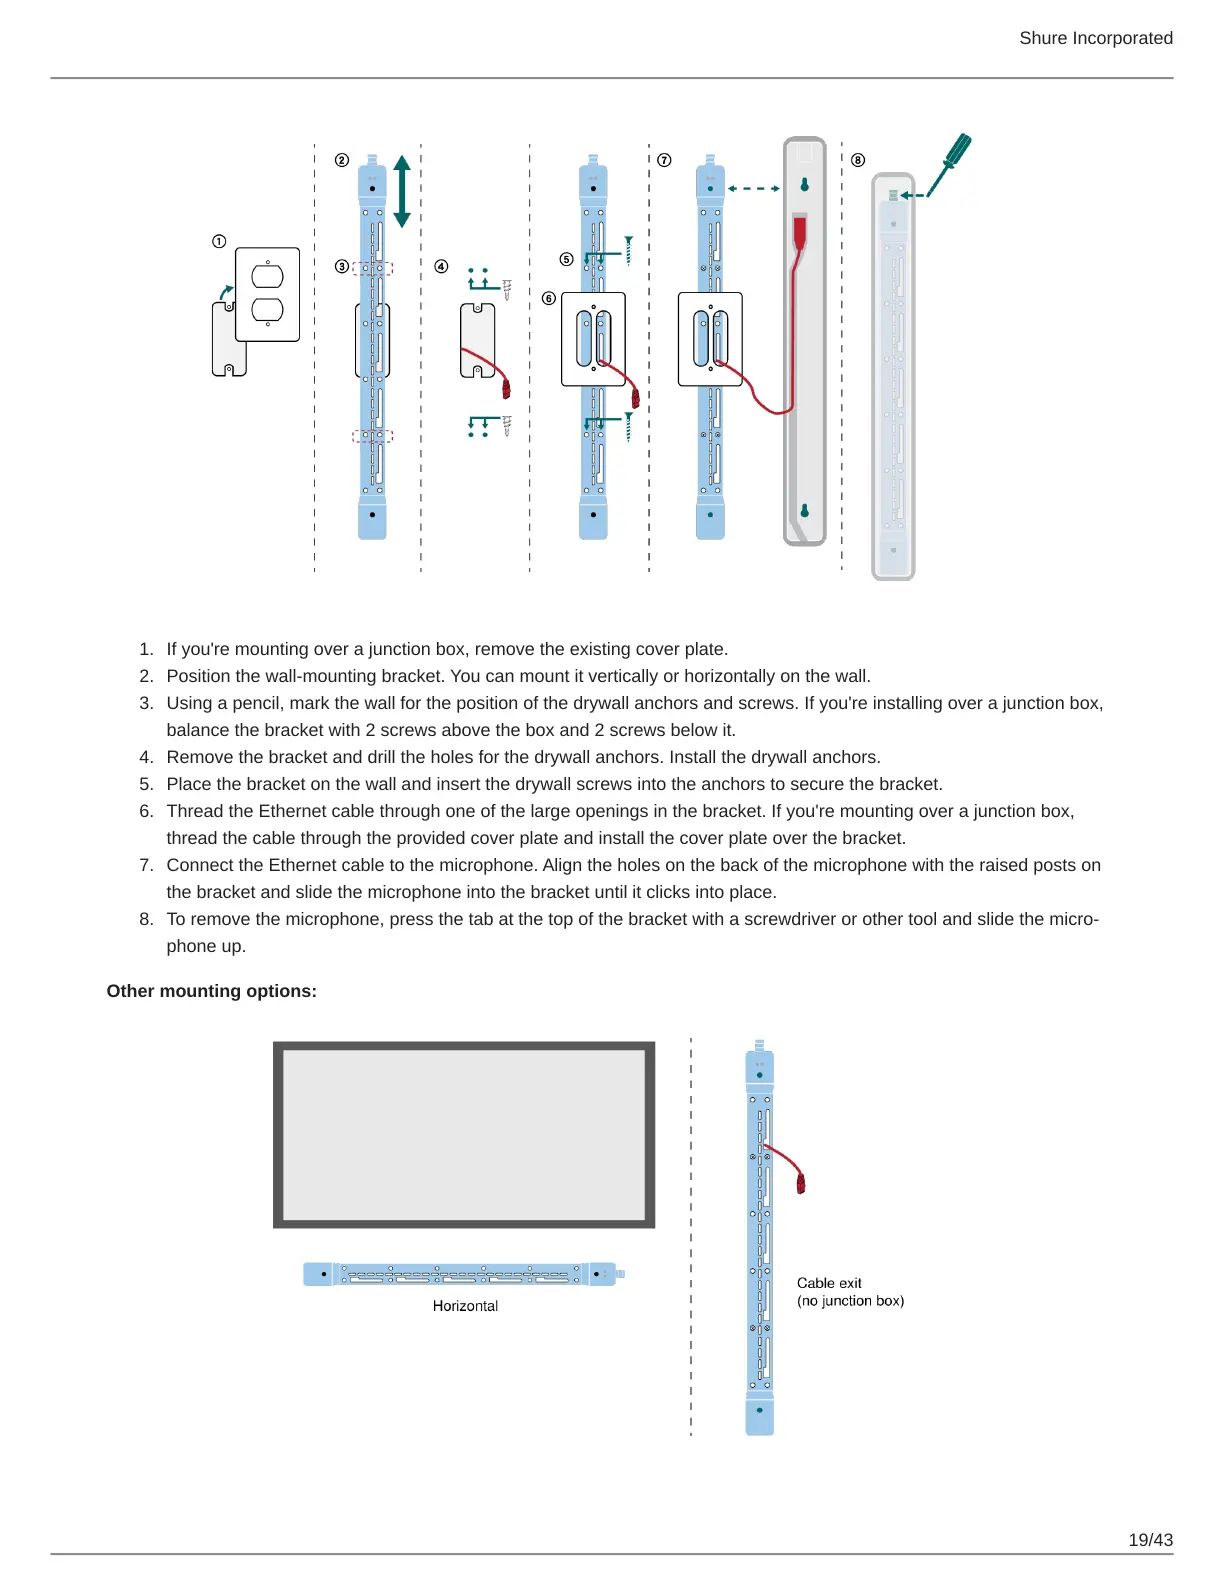
1.
2.
3.
4.
5.
6.
7.
8.
If you're mounting over a junction box, remove the existing cover plate.
Position the wall-mounting bracket. You can mount it vertically or horizontally on the wall.
Using a pencil, mark the wall for the position of the drywall anchors and screws. If you're installing over a junction box,
balance the bracket with 2 screws above the box and 2 screws below it.
Remove the bracket and drill the holes for the drywall anchors. Install the drywall anchors.
Place the bracket on the wall and insert the drywall screws into the anchors to secure the bracket.
Thread the Ethernet cable through one of the large openings in the bracket. If you're mounting over a junction box,
thread the cable through the provided cover plate and install the cover plate over the bracket.
Connect the Ethernet cable to the microphone. Align the holes on the back of the microphone with the raised posts on
the bracket and slide the microphone into the bracket until it clicks into place.
To remove the microphone, press the tab at the top of the bracket with a screwdriver or other tool and slide the micro
phone up.
Other mounting options: