Chapter 10 Operating Instructions
CLV 42x bar code scanner
10-10 © SICK AG · Division Auto Ident · Germany · All rights reserved 8 009 981/O078/16-08-2004
Appendix
10.4.3 Starting "CLV Setup"
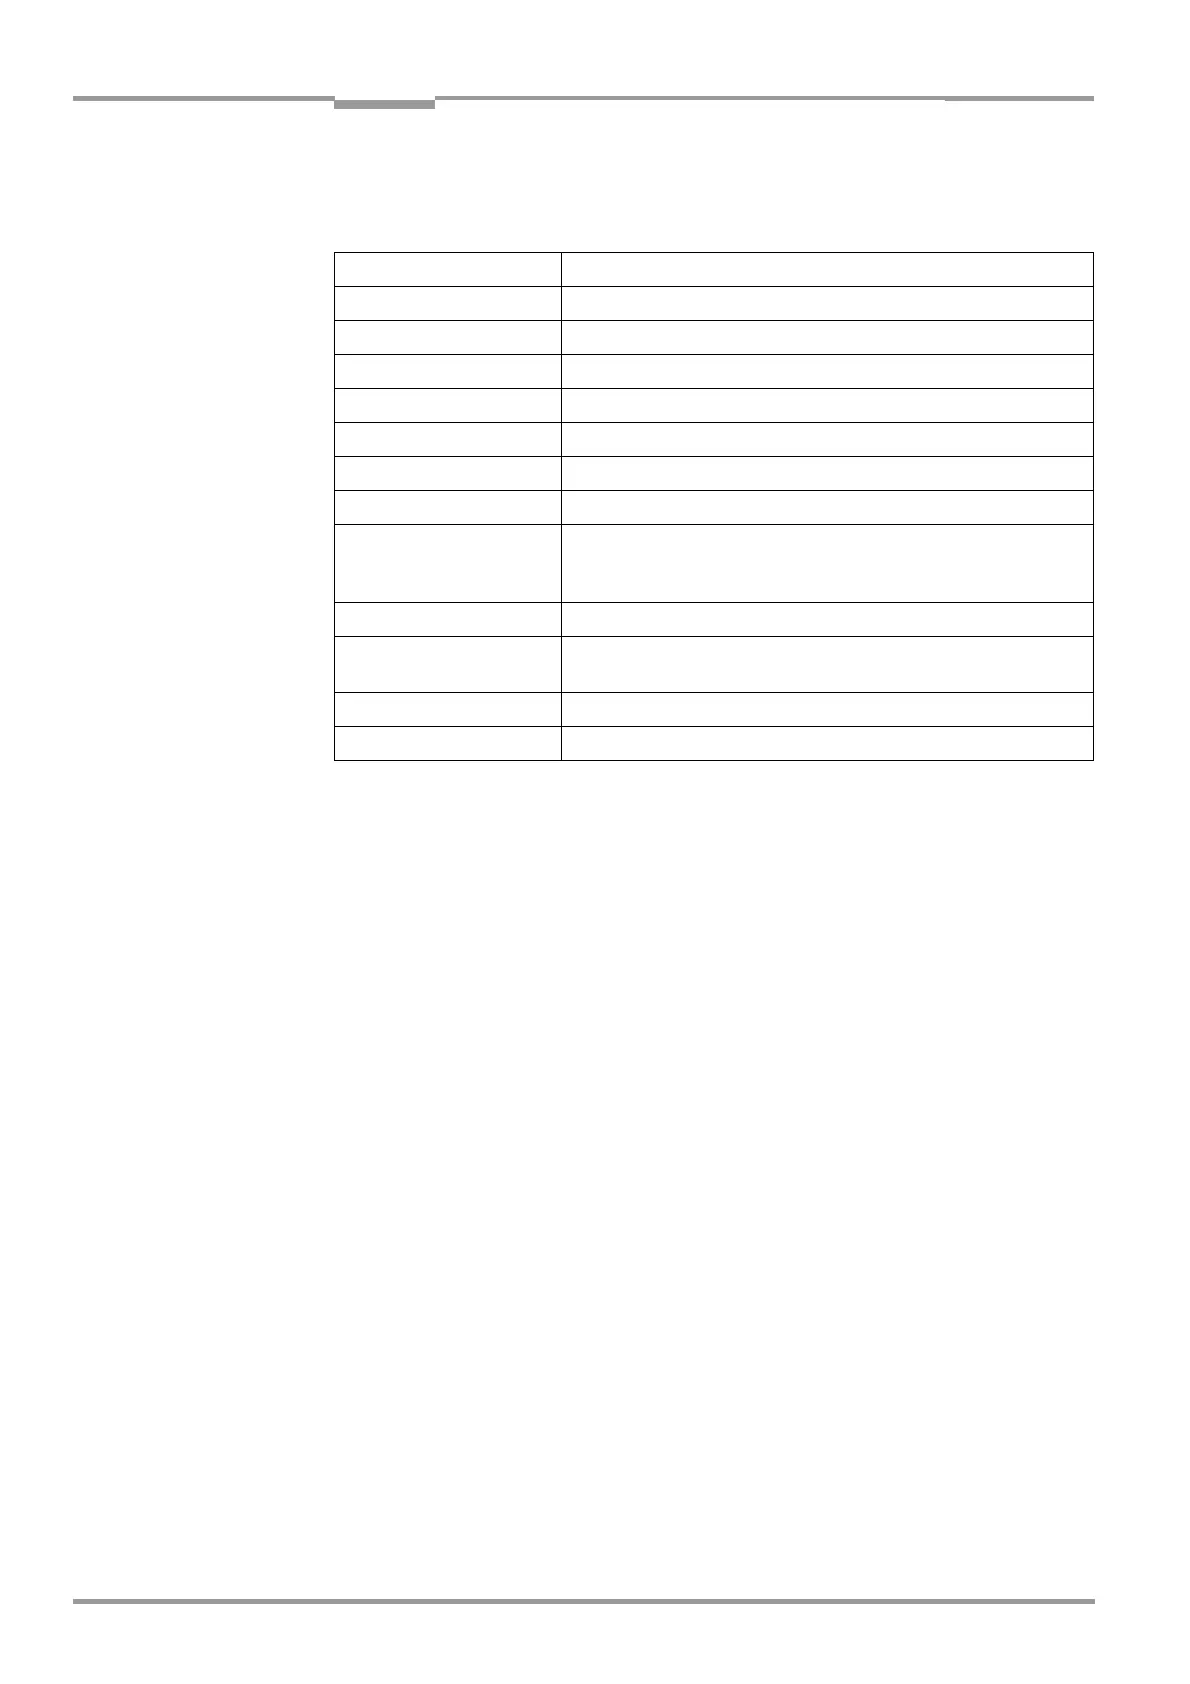
The "CLV Setup" program is launched with the following default settings:
1. Switch on your PC and start Windows.
2. Select CLV SETUP from the Start menu.
The SICK logo is then followed by the initial screen.
3. Confirm the initial screen with "OK".
CLV Setup then checks whether a CLV is connected to the COM 1 port on the PC and
whether the communication parameters on the PC match those on the CLV. If this is the
case, the "
Connected" status is displayed with the CLV specification in the bottom right
corner of the screen, in the status bar. The detected CLV type is displayed in the toolbar
in the
DEVICE drop-down list (in this case: CLV 42x).
The software then loads the internal device description of the CLV and the defaults settings
of the parameters/parameter values from its database and displays these on the tabs. The
software then copies the current parameter set from the memory (RAM) of the CLV. This is
displayed on the tabs instead of the default settings.
You can edit the current parameter set on the tabs. The default values are displayed when
the device is used for the first time.
Troubleshooting
If CLV Setup cannot establish communication, it displays "No connection" in the status bar
on the bottom, right-hand side. There are two possible causes for this. Either the CLV is not
connected or the communication parameters on the CLV do not match those on the PC. In
this case, CLV Setup enters the CLV type of the device it last communicated with in the
DEVICE drop-down list on the toolbar. The default setting is CLV 41x the first time CLV Setup
is started. The software then loads the internal device description for this type and the
default settings of the parameters/parameter values from its database and displays these
on the tabs.
Communication COM 1; 9,600 bd; 8 data bits; 1 stop bit; no parity
Transmit control character Start: STX, Stop: ETX
Receive control character Start: STX, Stop: ETX
Unit of measure metric (depending on the selected installation)
Browser user dependent
Language as selected for the installation
Company name as entered for the installation
User name as entered for the installation
Establish connection to CLV
automatically
at startup: yes
on scanner selection: yes
when the terminal emulator is started/closed: yes
Initial screen yes
Storage confirmation
prompt
yes
Last type selected CLV 41x
File storage location "data" (configuration files for CLV)
Table 10-3: Default settings of CLV Setup (extract)