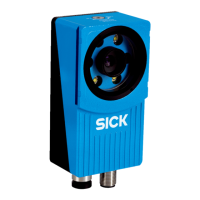
The EDS file for the Inspector PIM60 can be found in the Documentation folder on the Inspector
CD.
The Inspector PIM60 has two Output assemblies that can be used for controlling the Inspector.
To do this the connection has to be set first, see Operating Instructions for Inspector PIM60.
The slim command channel assembly (instance no. 100) is used for controlling the Inspector
in the following ways:
• Select reference object
• Image trig
The command channel assembly (instance no. 102) is also used for controlling the Inspector.
With this assembly you have access to all functions in the command channel, see Section B.3,
“Command descriptions” (page 54).
The two output assemblies are described in detail, see Section 5.3.6, “Assemblies command
channel” (page 36).
5.3.1 Basic principles
The command channel has a set of basic principles:
• In order to be able to change the configuration via EtherNet/IP this must be enabled. This
is done In the dialog Interfaces and I/O Settings from the InspectorPIM60 menu. Check Ethernet
and EtherNet/IP in the tab Interfaces. In the same dialog and tab EtherNet/IP check Allow
changes via EtherNet/IP.
• It is possible to block configuration changes by deselecting the setting Allow changes via
EtherNet/IP in the EtherNet/IP tab in the dialog Interfaces and I/O Settings in InspectorPIM60
menu.
• Writing a parameter can typically only be done when the device is in Edit mode. Reading
a parameter can be done in both Edit and Run mode.
• The commands is sent with help of output assembly 102 and the result is received with
input assembly 101.
• The result for a sent command can be received at the earliest in the next PLC cycle. The
PLC program will have to wait for the result for an undefined number of seconds.
• Make sure that the PLC program waits for a response with the same command and ID as
the sent command.
5.3.2 Command syntax
To send commands through the command channel use output assembly 102. The command
channel has the following syntax:
<arg 6><arg 5><arg 4><arg 3><arg 2><arg 1><identifier><command>
Replace <command> with the commands id, see Table B.3, “Command ID numbers - for Eth-
erNet/IP” (page 54).
The result of a command, sent over output assembly 102, can be received through input
assembly 101. The syntax for ACK message is:
<retV-
al6>
<retV-
al5>
<retV-
al4>
<retV-
al3>
<retV-
al2>
<retV-
al1>
<error
code>
<identi-
fier>
<com-
mand>
The combination of a command with its parameters will either change the devices configur-
ation or fetch information from the device. For more command examples see Section B.1,
“Command syntax” (page 52) and Section B.6, “Command examples” (page 75).
5.3.3 Select reference object
There are two ways to select reference object with EtherNet/IP and command channel.
8015726/2013-11
©SICK AG • Advanced Industrial Sensors • www.sick.com • All rights reserved
Subject to change without notice
34
Reference Manual
EtherNet/IP
Interfaces
Inspector PIM
 Loading...
