Operating Instructions
LMS5xx
Mounting
8013796/ZM63/2017-05-09 © SICK AG · Germany · All rights reserved · Subject to change without notice 53
Chapter 5
5 Mounting
Claims under the warranty rendered void!
The housing of the LMS5xx is sealed. Type-dependent, the devices have a diffent quantity
of sealing stickers across their components. Claims under the warranty against SICK AG will
be rendered void if the screwed housing is opened and/or the seals are damaged.
The housing is only allowed to be opened by SICK authorized service personnel.
The only exception in this case is the process of replacing an LMS500 Lite/Pro Indoor or
LMS511 Heavy Duty Outdoor with an appropriate replacement device. Here, the system
connector is transferred from the existing device to the replacement device. See section 8.2
“Exchanging an LMS5xx” on page 91.
5.1 Overview of the mounting steps
Selecting a mounting location for the LMS5xx
Mounting and adjusting the LMS5xx
5.2 Preparations for mounting
5.2.1 Components to be mounted
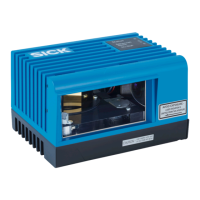
An LMS5xx, weight approx. 3.7 kg
5.2.2 Material and accessories necessary
Optional Mounting kit or mounting kits with mounting material (not in the delivery)
or
Optional protection hood or weather protection hood with mounting kit(s) (not in the
delivery)
or
As an alternative if a fixing bracket is provided by the user
– Stable mounting bracket that provides adjustable alignment of the LMS5xx in the x
and y axis
– 4 M6 screws for the LMS5xx, screw length dependent on the wall thickness of the
mounting bracket used
5.2.3 Necessary tools
4 M6 screws for mounting the SICK fixing bracket on the support, screw length as a
function of the wall thickness of the support
tool set
 Loading...