Operating Manual Matrix
Copyright Silca 2012 25
9 CUTTING
ATTENTION: Please see the following warnings to ensure completely safe cutting
operations:
• Always work with dry hands.
• Check that the machine is earthed.
• Wear the safety goggles even when the machine has a safety shield.
• Start the motor only after completing the following operations:
-
tting keys into the clamps
-
tting and calibrating tools.
• Keep your hands out of the way of the cutter in motion.
• For each cutting operation make sure the clamp is in the horizontal position (reference notch 0) except
when keys need inclined cuts.
• Cut the key only if calibration has taken place:
-
insert the necessary tools
-
turn on the key-cutting machine
-
disable the tracer point spring
-
proceed with calibration
9.1 FITTING KEYS
1) Take the clamp carriage towards the operator until you feel the limit switch click.
2) Insert the original key into the left-hand clamp and the key to be cut into the right-hand clamp, taking care to:
-
type of stop on key (Ch. 8.6.1)
-
choice of key seat (Ch.8.6.1).
-
secure the keys with the knobs (E) (E1).
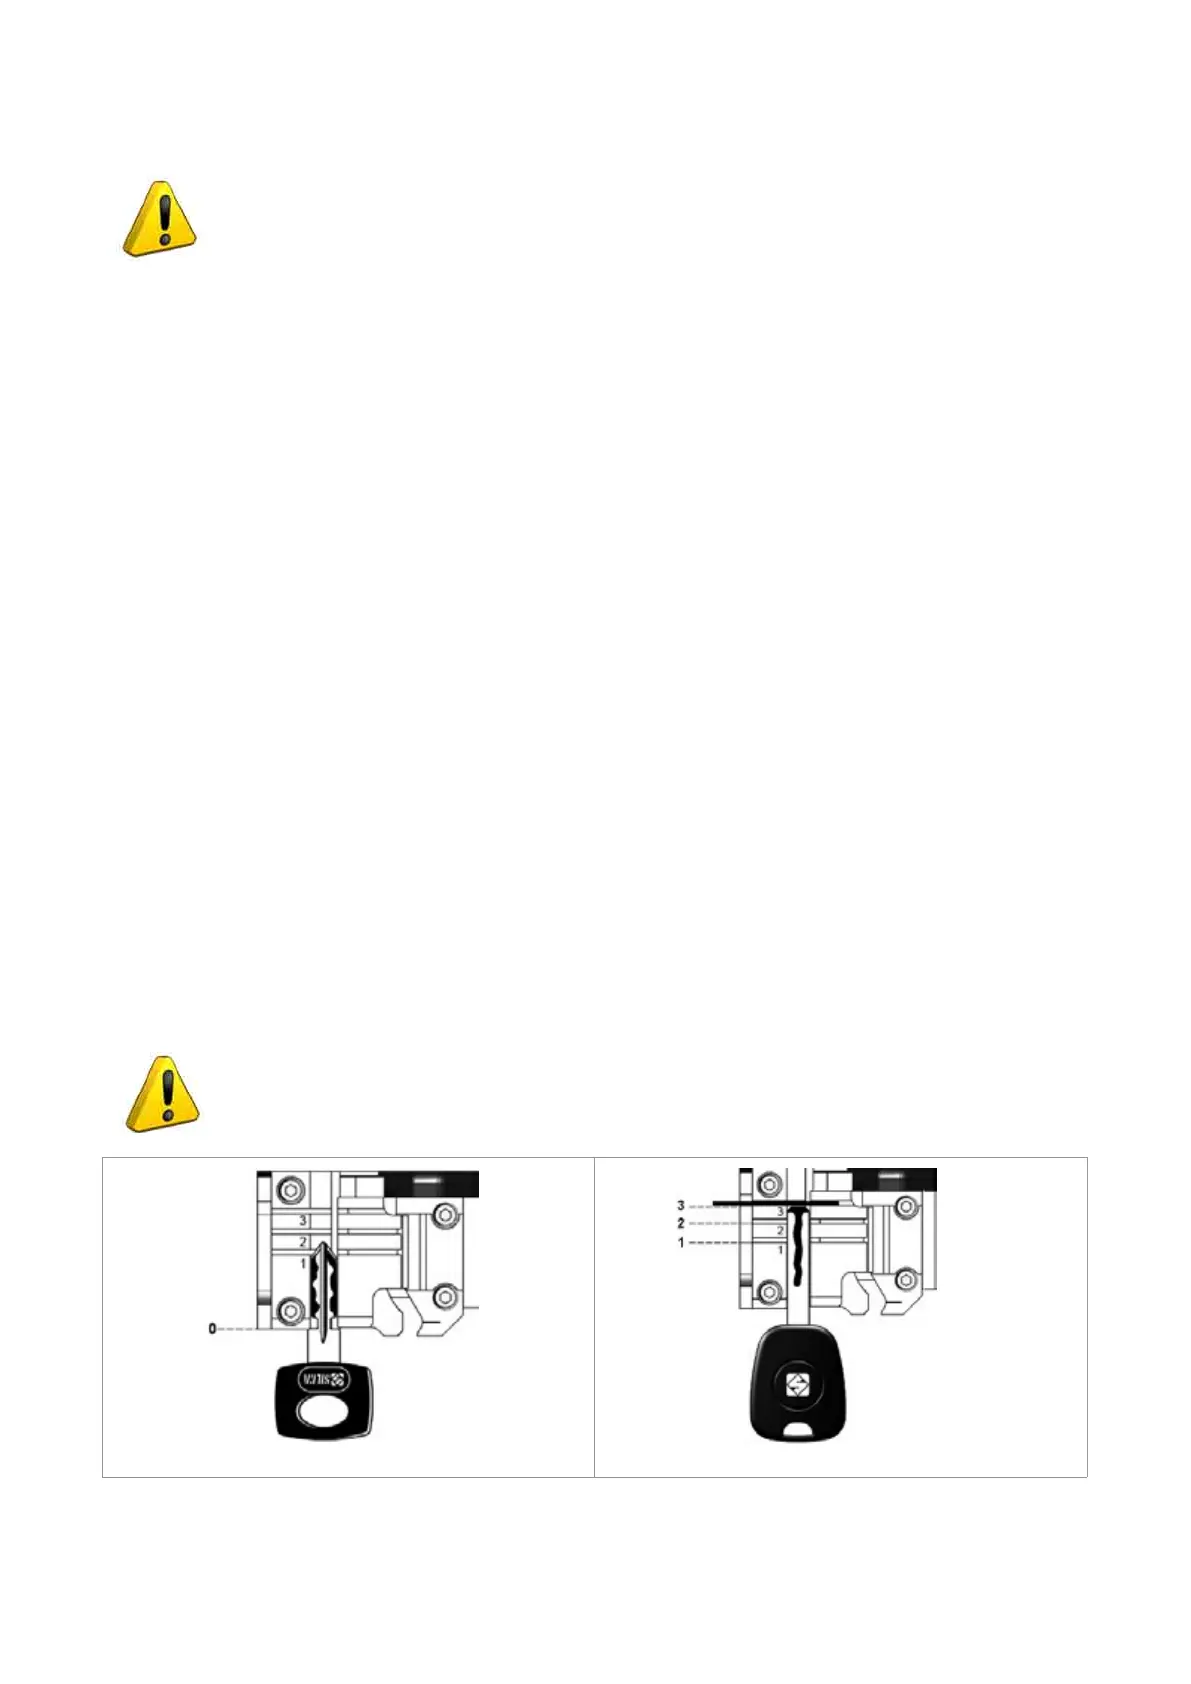
9.2 KEY STOP
The notches 0-1-2-3 on the clamp are used according to the type of key stop:
-
0: for keys with back stop (towards head - Fig. 40).
-
1-2-3: for keys with tip stop (Fig. 41)
Choice of stops 1 - 2 - 3 is determined by the length of the key stem.
ATTENTION: the cutting path must always lie within the clamp surface.
Fig. 40 Fig. 41