A
B
1 2
3
Preparations – 21
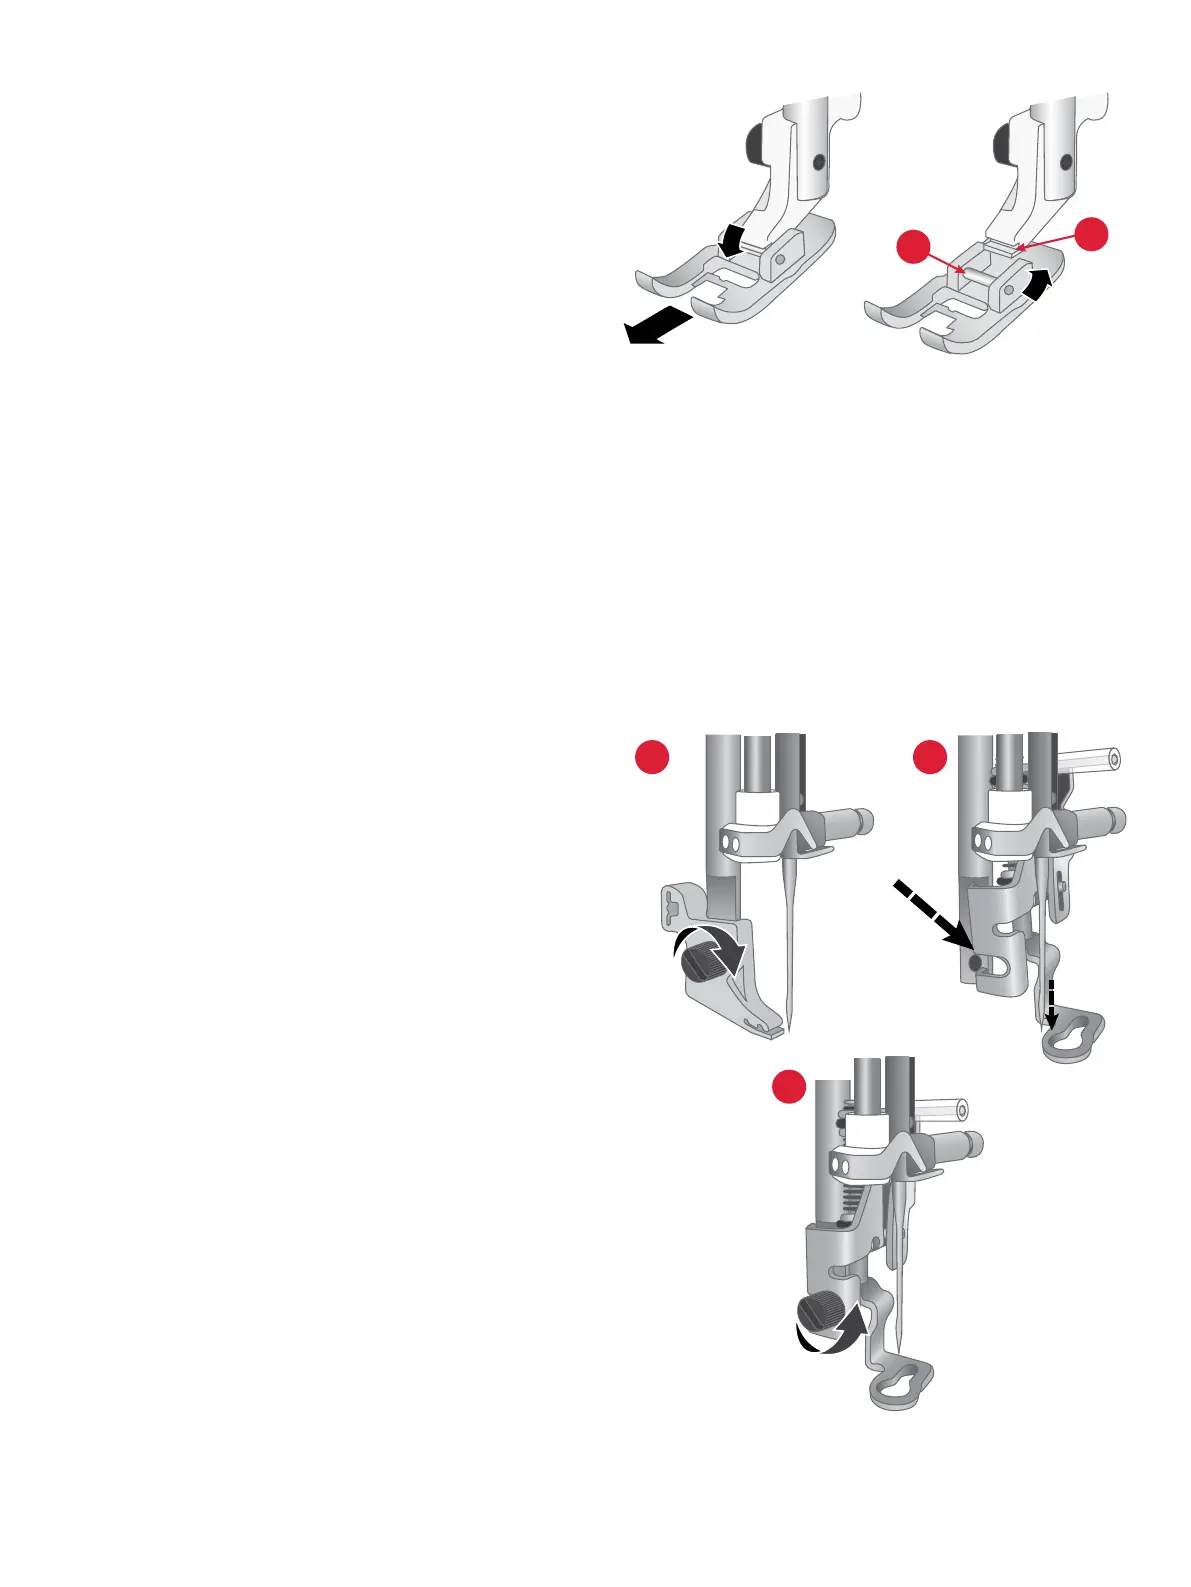
1. Make sure that the needle is in the highest position. Pull the
presser foot down and towards you.
2. Line up the cross pin (A) on the foot with the gap in the
presser foot ankle. Push the foot into the gap until the foot
snaps into place (B).
1. Using the screwdriver, remove the presser foot ankle.
2. Position the Embroidery Foot onto the presser foot bar from
behind, lining the hole on the foot up with the hole on the
presser foot bar. Lower the needle into the opening of the
foot by turning the handwheel towards you. The arm of the
presser foot should rest on top of the needle screw.
3. Insert and tighten the presser foot ankle screw using the
screwdriver.
Changing the Presser Foot
Attaching the Embroidery Foot