Embroidery Preparations – 23
Designs
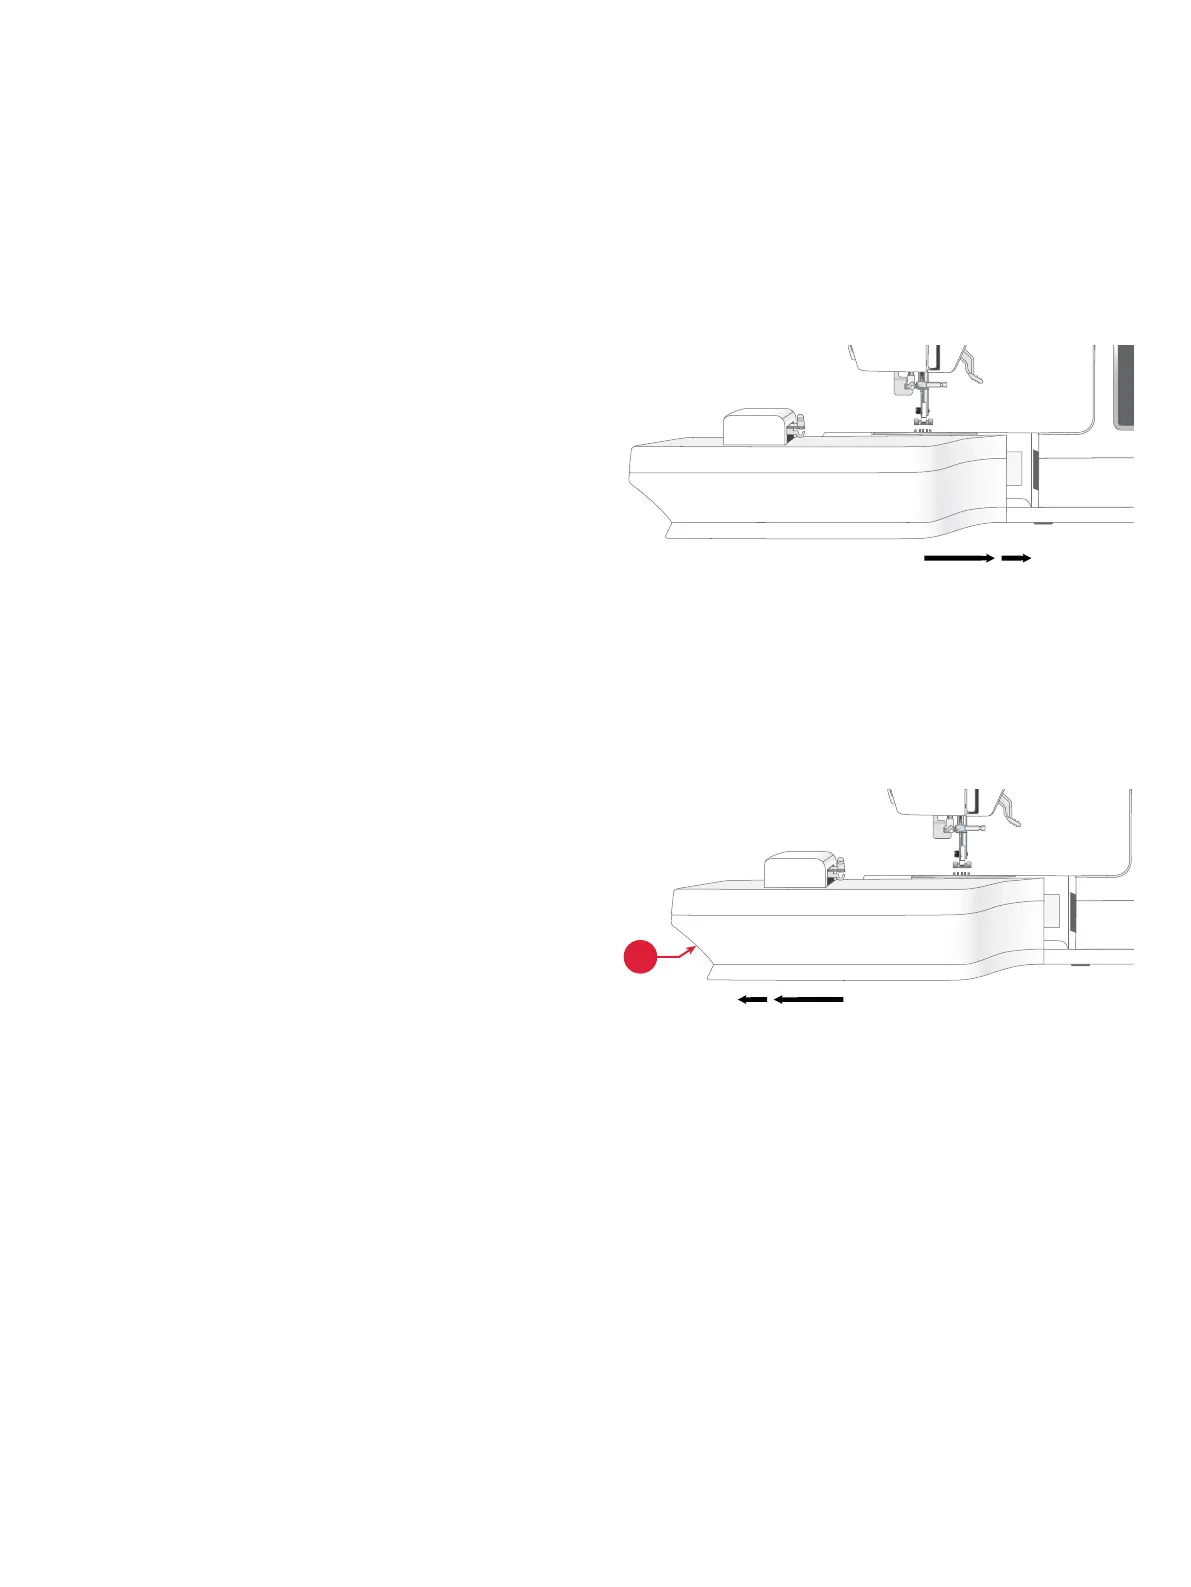
Connect the Embroidery Unit
Remove the Embroidery Unit
Over 150 designs are included in the machine memory. These
designs, along with the ten built-in embroidery fonts, are
shown on the screen in the Embroidery Mode.
Note: Your machine can only load embroidery les in the .VP3
format.
1. Slide the accessory tray o.
2. Slide the embroidery unit onto the free arm of the machine
until it plugs rmly into the socket at the front of the ma-
chine.
3. After sliding the embroidery unit on, a pop-up message
tells you to clear the embroidery area and remove the hoop
before calibration. Touch OK. The machine will calibrate
and the embroidery arm will move to the ready position.
The machine enters the embroidery mode every time the
unit is attached.
1. Press the button at the left, underneath the embroidery unit
(A) and slide the unit to the left to remove it.
2. Store the embroidery unit in the original white styrofoam
packing material.