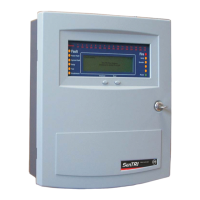
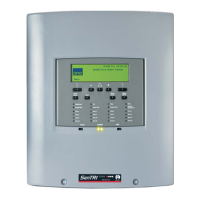
How to set the system clock
&
An incorrect setting of the
system clock will affect any time
related sensor configuration and
consequently results in incorrect
event time information.
a. Press the MENU ON/OFF key and then the F2
key to select [Set Up].
b. Press the F4 key to select [User Code]. Check
that 'User Code' followed by a flashing cursor
appears on the screen. Key in the PIN code and
press the Enter button.
c. Press the F1 key to select [Set Clock]. The
system clock is displayed on the screen. Check
that the hour digits are flashing.
d. Press the F2 or F3 key to [Retard] or
[Advance] to the desired setting.
e. Press the F1 key to select [Next]. Check that
the Minute digits are now flashing.
f. Press the F2 or F3 key to [Retard] or
[Advance] to the desired setting.
g. Press the F1 key to select [Next]. Check that
the Date digits are now flashing.
h. Press the F2 or F3 key to [Retard] or
[Advance] to the desired setting.
i. Press the F1 key to select [Next]. Check that
the Month digits are now flashing.
j. Press the F2 or F3 key to [Retard] or
[Advance] to the desired setting.
k. Press the F1 key to select [Next]. Check that
the Year is now flashing.
l. Press the F2 or F3 key to [Retard] or
[Advance] to the desired setting.
m. Press the F4 key to select [Enter]. Check that
the display now shows the new time and date.
"
Any changes made to the time
and date will be automatically sent to the
repeat panels in the system. The system
clock adjusts automatically for Day light
saving, if set up during commissioning.
Now 'Save' the changes made to the clock
settings.
How to use the external printer
These functions assume there is an external printer
connected to the panel.
To Switch On the Printer
a. Press the MENU ON/OFF key.
b. Press the F1 key to select [Control].
c. Press the F3 key to select [Printer]. Check that
'Printer' appears on the screen.
d. Press the F3 key to select [On] and then press
the F2 key to select [Enter]. Check that the
message 'Printer is on' appears on the display
and a printout is given to show that the action
has been successfully carried out.
To action a Paper Feed
a. Press the MENU ON/OFF key.
b. Press the F1 key to select [Control].
c. Press the F3 key to select [Printer]. Check that
'Printer' appears on the screen.
d. Press the F2 key to select [Paper Fd]. Note the
display and menu prompts are cleared.
e. Check that the printer performs eight line feeds.
To conduct a Printer Test
a. Press the MENU ON/OFF key.
b. Press the F1 key to select [Control].
c. Press the F3 key to select [Printer]. Check that
'Printer' appears on the screen.
d. Press the F1 key to select [Test]. Note the
display and menu prompts are cleared.
e. Check that the printer provides a listing of all the
characters it is capable of printing.
To Switch Off the Printer
a. Press the MENU ON/OFF key.
b. Press the F1 key to select [Control].
c. Press the F3 key to select [Printer]. Check that
'Printer' appears on the screen.
d. Press the F3 key to select [Off]
e. Press the F2 key to select [Enter].
f. Check that the message 'Printer is off' appears
on the display to show that the action has been
successfully carried out.
22
Operating instructions