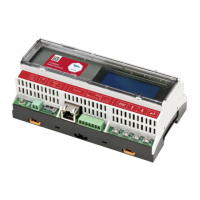
Chapter 4: Connecting Environmental Sensors (Optional)
Control and Communication Gateway Installation Guide - MAN-01-00132-1.2
► To configure sensors in the SolarEdge gateway:
When using sensors provided by SolarEdge, enabling the sensors as described above
automatically sets their configuration (available from SolarEdge gateway CPU version 2.07xx). If
the CPU version is lower, configure the sensors as described below.
Configure the working range of the sensor that covers the sensor specification. Refer to the table on page
22.
1 Select Range under the specific configured sensor and then select the applicable range:
V1 – select a range between 0 – 2 Vdc or 0 – 30 mVdc.
V2 – select a range between 0 – 10 Vdc or 0 – 2 Vdc .
I – select a range between 0 – 20 mA.
A screen similar to the following is displayed, depending on the selected sensor:
0 – 2V
0 – 3 0 m V
2 Select the Type of the connected sensor from the following:
Temp. A m b i e n t
Temp. M o d u l e
W i n d S p e e d
W i n d D i r e c t i o n
I r r a d i a n c e G l o b a l
I r r a d i a n c e D i r e c t
I r r a d i a n c e D i f f .
I r r a d i a n c e P O A
3 Select Two Points to configure two points on the sensor graph using the measurement signal and
measurement range data from the sensor datasheet.
P 0 < 0 . 0 , 0 . 0 >
P 1 < 1 . 0 0 0 , 1 . 0 0 0 >
4 Set the point values as follows:
Use the Up and Down buttons to adjust the value.
Press the Enter button to move to a character.
Long press the Enter button (until Applied message appears) – apply the value
Long press the Esc button (until Aborted message appears) – erase all characters
S e t P o i n t
( V , D e g C )
1 0 , 7 0
5 If required, repeat steps 1 through 4 above to configure additional sensors.
6 Check that the Sensors status screen on the LCD displays a screen similar to below, and verify that
the sensor's readings are within the range that appears in its datasheet. Refer to Sensors Status on
page 34.
S e n s o r s
V 1 : X X X . X X X D e g C
V 2 : X X X . X X X W / m 2
I : D i s a b l e d