Verifying the Connection
After connecting and configuring a communication option, perform the following
steps to check that the connection to the monitoring server has been successfully
established.
1.
Access the Status screen:
a. If not already ON - turn ON AC to the inverter by turning ON the circuit breaker
on the main distribution panel.
b.
Open SetApp and follow the instructions on the screen (scan the inverter bar-
code; move the ON/OFF/P switch to P position (for less than 5 sec) and release).
The mobile device creates a Wi-Fi connection with the inverter and displays the
main Commissioning screen.
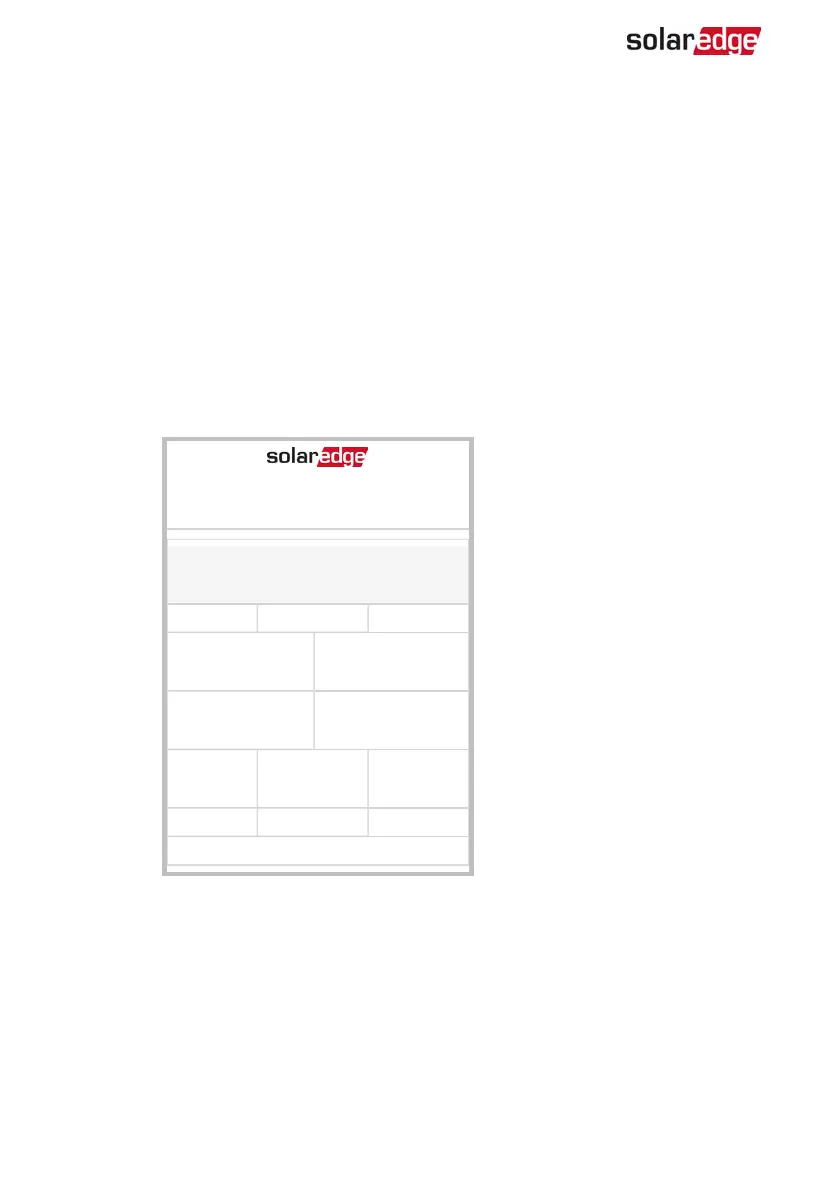
Status
Inverter
SN 07318000C
Power Voltage Frequency
Optimizers
Connected
S_OK
Server Connected
Status
Production
Switch
ON
CosPhi
1.00
Limit
No Limit
Country
Netherlands
Voltage Temp Fan
Commissioning
2.
Check that S_OK- Server Connected status appears in the main inverter section.
3. Scroll down to the Communication section and check that the communication
options are as required. For more information refer to
Communication Status
on
page 43.
-Three Phase System Installation Guide MAN-01-00505-1.2
60 Verifying the Connection