4
Repeat
step
3
to
set
other
items,
then
press
the
center
of
the
controller.
• When changing the sequence
of
[YYYYIMMIDD], first select [YYYY/
MMIDD] with
.....
/~,
then change it with
~'Y.
5
Verify
that
[OK]
is
selected,
then
press
the
center
of
the
controller.
To
cancel
the
date/time
setting
operation
Press the
MENU
button.
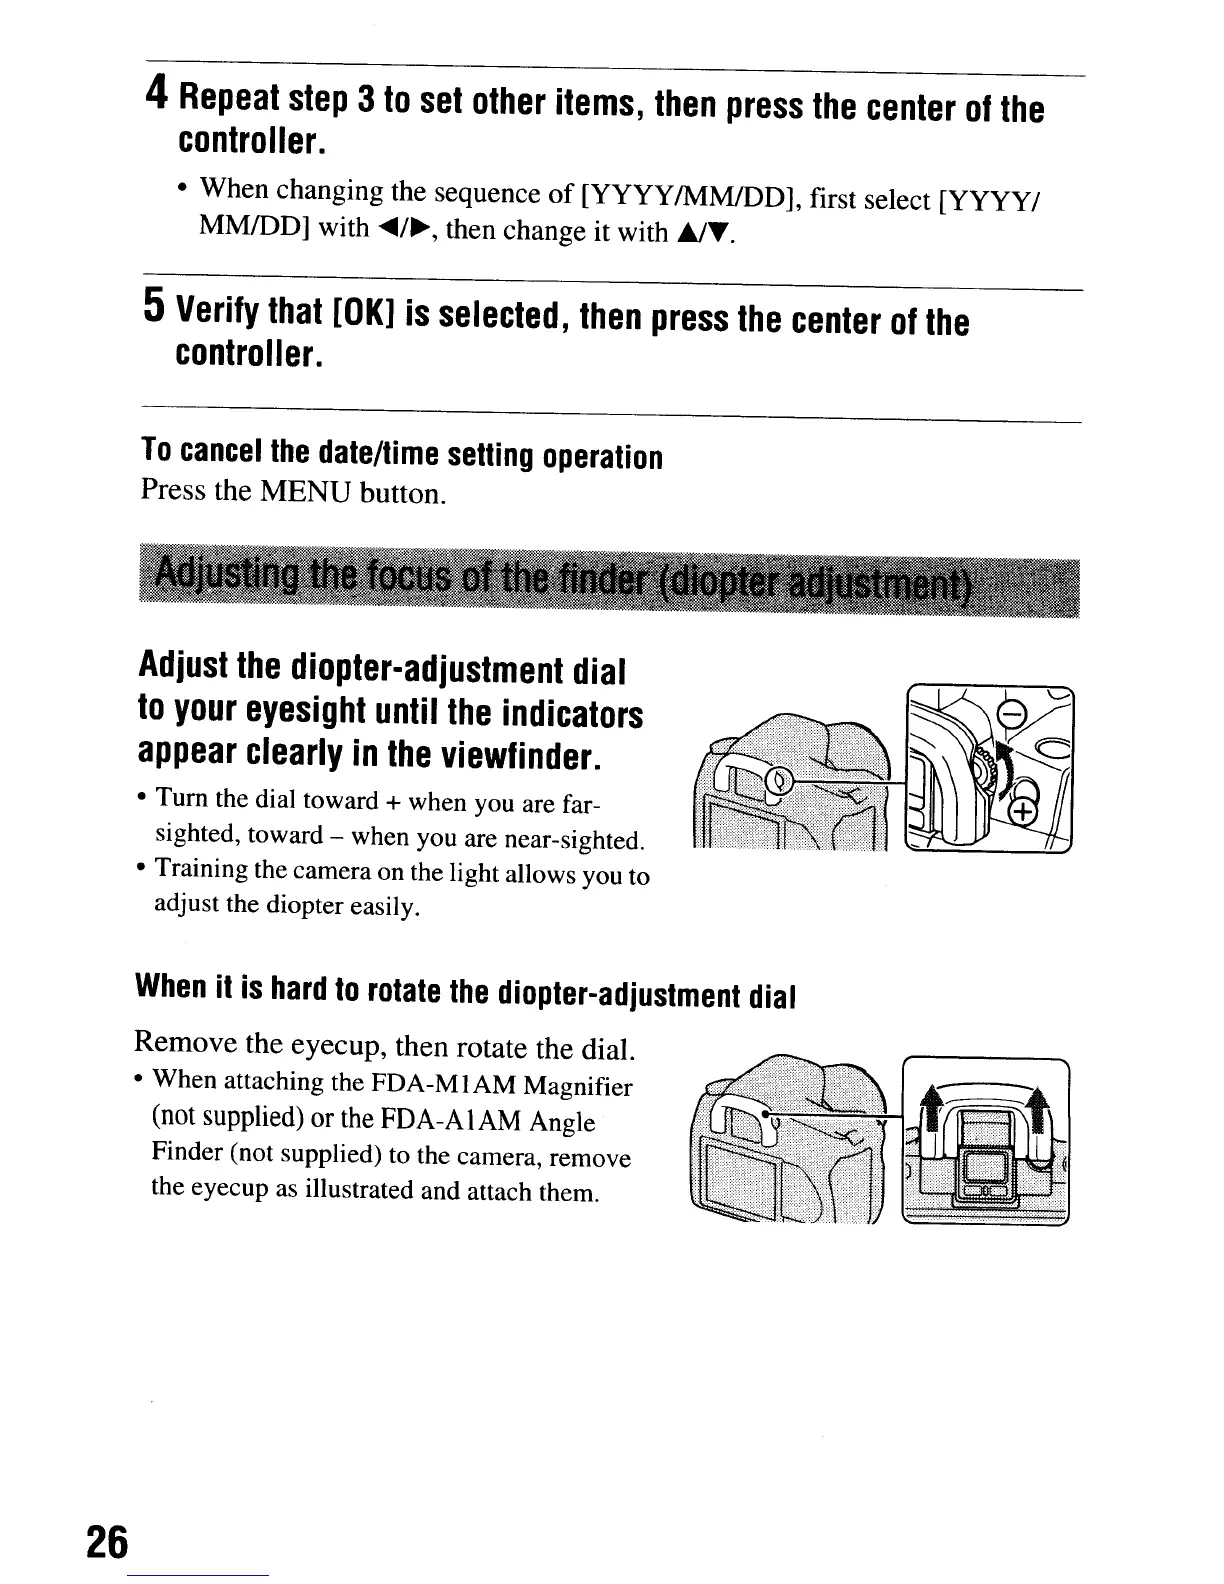
Adjust
the
diopter-adjustment
dial
to
your
eyesight
until
the
indicators
appear
clearly
in
the
viewfinder.
• Turn the dial toward
+
when you are far-
sighted, toward - when you are near-sighted.
• Training the camera on the light allows you to
adjust the diopter easily.
When
it
is
hard
to
rotate
the
diopter-adjustment
dial
Remove the eyecup, then rotate the dial.
• When attaching the FDA-MIAM Magnifier
(not
supplied)
or
the
FDA-AIAM Angle
Finder (not supplied) to the camera, remove
the eyecup as illustrated and attach them.
26
4
Repeat
step
3
to
set
other
items,
then
press
the
center
of
the
controller.
• When changing the sequence
of
[YYYYIMMIDD], first select [YYYY/
MMIDD] with
.....
/~,
then change it with
~'Y.
5
Verify
that
[OK]
is
selected,
then
press
the
center
of
the
controller.
To
cancel
the
date/time
setting
operation
Press the
MENU
button.
Adjust
the
diopter-adjustment
dial
to
your
eyesight
until
the
indicators
appear
clearly
in
the
viewfinder.
• Turn the dial toward
+
when you are far-
sighted, toward - when you are near-sighted.
• Training the camera on the light allows you to
adjust the diopter easily.
When
it
is
hard
to
rotate
the
diopter-adjustment
dial
Remove the eyecup, then rotate the dial.
• When attaching the FDA-MIAM Magnifier
(not
supplied)
or
the
FDA-AIAM Angle
Finder (not supplied) to the camera, remove
the eyecup as illustrated and attach them.
26