[I]
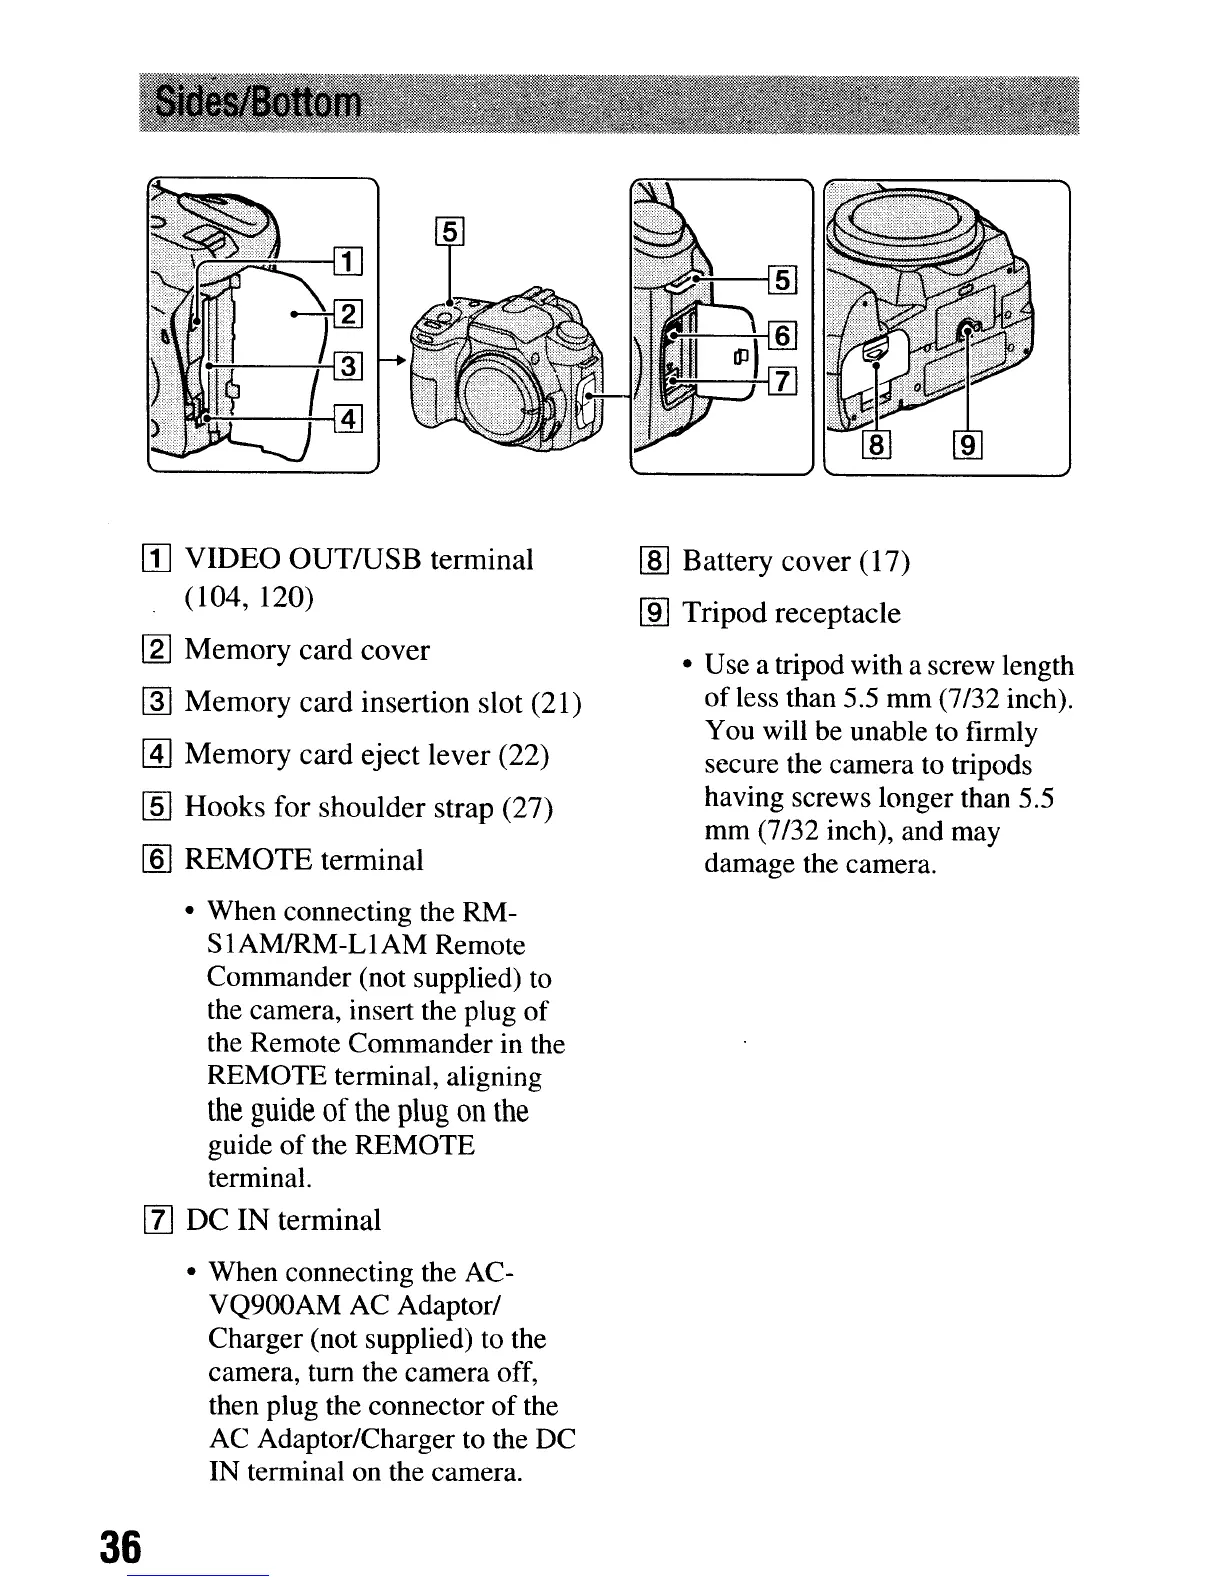
VIDEO
OUTIUSB
terminal
(104, 120)
[2]
Memory
card
cover
rnJ
Memory
card
insertion
slot (21)
@]
Memory
card
eject
lever
(22)
[ID
Hooks
for
shoulder
strap
(27)
[ID
REMOTE
terminal
• When connecting the RM-
S
1AMIRM-L1AM Remote
Commander (not supplied) to
the camera, insert the plug
of
the Remote Commander in the
REMOTE terminal, aligning
the
guide
of
the
plug
on
the
guide
of
the REMOTE
terminal.
[I]
DC
IN
terminal
• When connecting the AC-
VQ900AM AC Adaptor/
Charger (not supplied) to the
camera, turn the camera off,
then plug the connector
of
the
AC Adaptor/Charger to the
DC
IN terminal on the camera.
36
I:ID
Battery
cover
(17)
[ID
Tripod
receptacle
• Use a tripod with a screw length
of
less than 5.5
mm
(7/32 inch).
You will be unable to firmly
secure the camera to tripods
having screws longer than 5.5
mm
(7/32 inch), and may
damage the camera.
[I]
VIDEO
OUTIUSB
terminal
(104, 120)
[2]
Memory
card
cover
rnJ
Memory
card
insertion
slot (21)
@]
Memory
card
eject
lever
(22)
[ID
Hooks
for
shoulder
strap
(27)
[ID
REMOTE
terminal
• When connecting the RM-
S
1AMIRM-L1AM Remote
Commander (not supplied) to
the camera, insert the plug
of
the Remote Commander in the
REMOTE terminal, aligning
the
guide
of
the
plug
on
the
guide
of
the REMOTE
terminal.
[I]
DC
IN
terminal
• When connecting the AC-
VQ900AM AC Adaptor/
Charger (not supplied) to the
camera, turn the camera off,
then plug the connector
of
the
AC Adaptor/Charger to the
DC
IN terminal on the camera.
36
I:ID
Battery
cover
(17)
[ID
Tripod
receptacle
• Use a tripod with a screw length
of
less than 5.5
mm
(7/32 inch).
You will be unable to firmly
secure the camera to tripods
having screws longer than 5.5
mm
(7/32 inch), and may
damage the camera.