Overview 1-5
Chapter 1 Overview
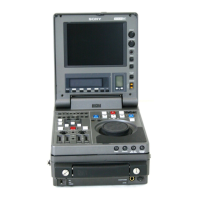
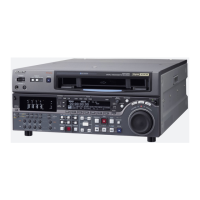
1-3-1 Display Panel
1 LCD monitor
Displays the playback or E-E pictures.
Time data, status information, and
setup menus, etc are superimposed on
the LCD monitor.
2 BRIGHT (brightness)/
CONTRAST knob
Adjusts the brightness and contrast of
the LCD monitor 1. Adjustments
have no effect on the recorded or
output video.
3 WARNING indicator
Lights when the battery is exhausted
or an error occurs.
It flashes in the following cases.
• When the end of battery power is
near
• When the number of memorized shot
marks reaches to 200 during shot
mark reading or when you start
reading shot marks after 200 marks
have been read.
• When the tape’s recording mode
does not agree with the playback
mode set on the unit (SP TAPE
switch position) during playback of a
Betacam SP tape (if setup menu item
127 is set to ON (page 6-13)).
4 Timecode operation buttons
HOLD button: Stops the progress
of the timecode generator. Press
this button before setting
timecode or user bits to hold
those values.
RESET button: Resets the CTL,
TC, and U-BIT values displayed
in the sub LCD !º to 0. Resetting
the CTL value erase all edit
points that have been set.
For more information, see section 2-5
“Setting Timecode”.
1 LCD monitor
2 BRIGHT (brightness)/
CONTRAST knob
3 WARNING indicator
4 Timecode operation
buttons
5 CTL/TC/U-BIT button
6 LIGHT switch
7 METER switch
8 Audio level meter
9 UP and DOWN buttons
0 Sub LCD
!¡ Audio monitor speaker
!™ Sub LCD operation buttons F1 to F4
!£ PAGE button