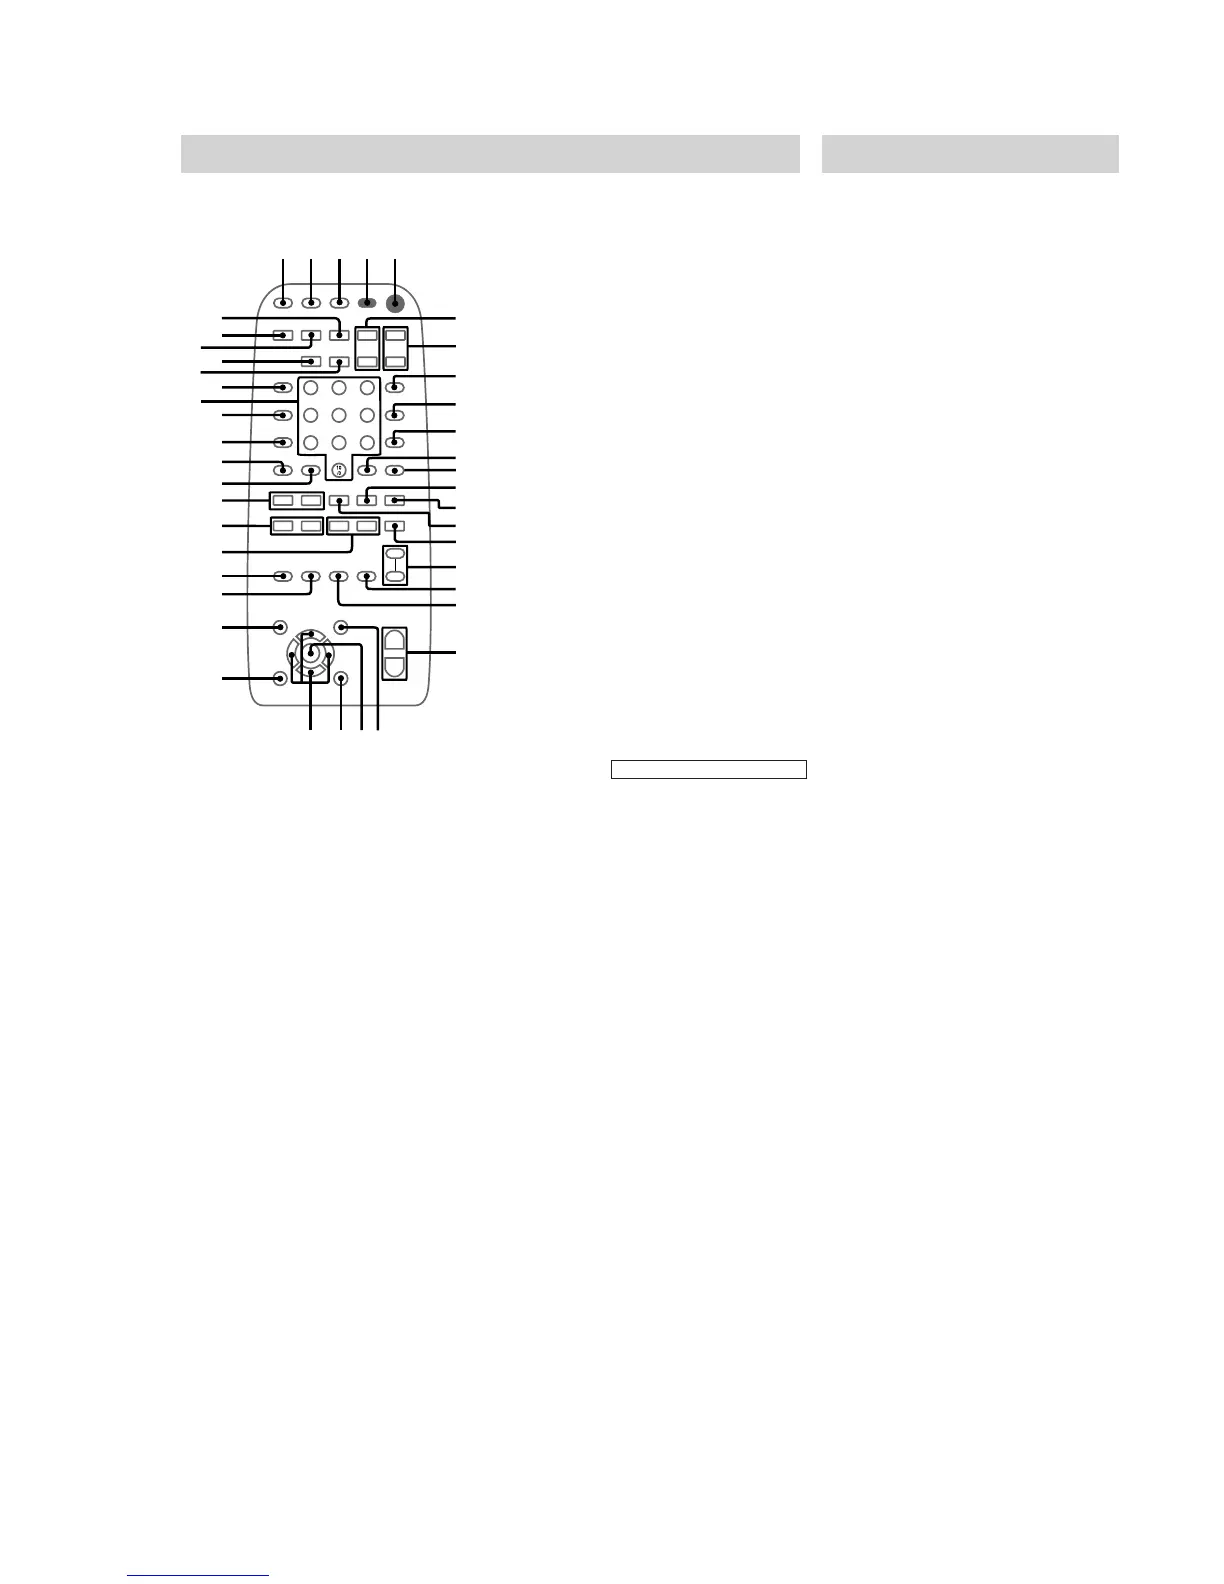
Remote Control
The items are arranged in alphabetical order. Refer to the pages indicated in parentheses ( ) for
details.
4
5
6
1
2
3
7
8
9
A
B
C
D
E
K
7
8
9
0
L
P
M
N
Q
T
O
R
S
U
V
W
X
Y
Z
6
wj
wk
wl
e;
ea
es
ed
ef
eg
eh
ra
r
s
r;
el
ej
ek
CD ra (10~12, 20, 21)
CINEMA SPACE ql (24)
CLEAR ed (13, 15)
CLOCK/TIMER SELECT 2
(22, 27)
CLOCK/TIMER SET 3 (8, 21,
27)
D.SKIP qs (10~13, 16)
DISPLAY ej (9, 14, 31)
EFFECT ON/OFF qk (23, 25)
ENTER ws (9, 11~13, 16, 17, 22,
24, 32)
GAME el (28)
GAME EQ wg (7, 23, 28)
KARAOKE PON ef (25)
KEY CONTROL qj (25)
MD (VIDEO) ek (28, 31)
MOVIE EQ wa (7, 23, 28)
MUSIC EQ wh (7, 23, 28)
NEXT ea (11, 12, 15, 16)
Numeric buttons eh (12, 15)
ON SCREEN qa (14)
PREV ea (12, 15, 16)
PICTURE EFFECT wj (16)
P FILE wd (24)
REPEAT 9 (11, 12)
RETURN O qg (11, 12)
SLEEP 1 (26)
SURROUND SPEAKER MODE
(MHC-VX777 only) wk (23)
SPECIAL MENU 0 (14~16)
SPECTRUM eg (25)
SELECT qd (11)
TAPE A/B rs (19, 20, 26)
TUNER/BAND r; (17, 18)
TV @/1 4 (8)
TV VIDEO 8 (8)
TV VOL +/– 6 (8)
TV CH +/– 7 (8)
VOL +/– w; (25, 27)
: Adjusts the volume.
BUTTON DESCRIPTIONS
@/1 (power) 5 (7, 8, 9, 17, 28,
31, 32)
nN (play) qd (10~13, 15, 16,
20, 26)
X (pause) qf (7, 10, 12, 19, 20)
x (stop) qh (10~12, 15, 16, 19,
20, 32)
. (go back)/PRESET – e; (7,
10~13, 17~20)
> (go forward)/PRESET + e;
(7, 10~13, 17~20)
m (rewind)/TUNING – wl (11,
12, 17~20, 32)
M (fast forward)/TUNING + wl
(11, 12, 17~20)
v/V/b/B (cursor) wf (8, 9, 21,
24, 27)
Setting the time
1 Turn on the system.
2 Press CLOCK/TIMER SET on the
remote.
When you set the time for the first time,
proceed to step 5.
3 Press cursor V/v repeatedly to select
CLOCK SET.
4 Press ENTER.
5 Press cursor V/v repeatedly to set the
hour.
6 Press ENTER.
7 Press cursor V/v repeatedly to set the
minute.
8 Press ENTER.
The clock starts working.
Tip
If you have made a mistake or want to change the
time, start over from step 2.
Note
The clock settings are canceled when you disconnect
the power cord or if a power failure occurs.