HT-S500RF/S700RF
15
Sony CONFIDENTIAL
For Authorized Servicer
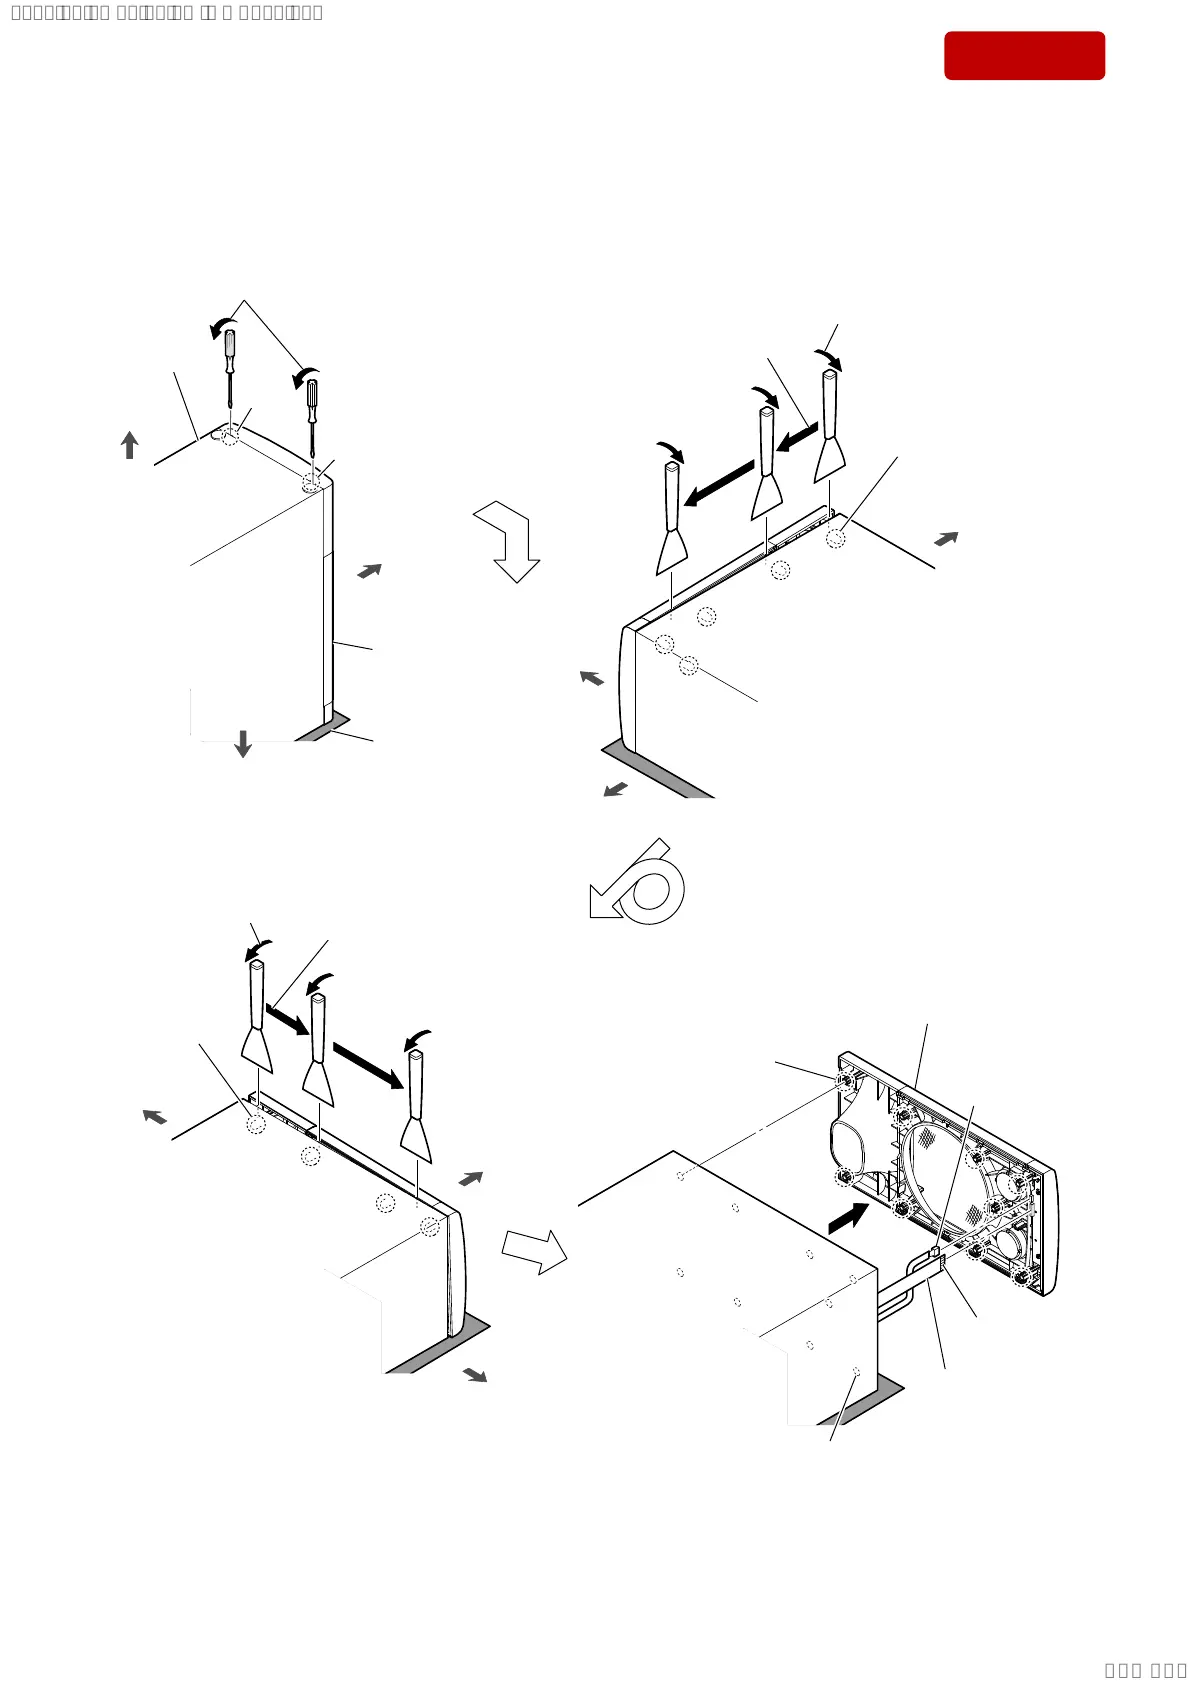
2-9. FRONT PANEL BLOCK
front side
front side
top side
top side
bottom side
bottom side
front side
bottom side
3 While moving the jig in the direction
of the arrow, remove five bosses.
2 Insert the jig into the space and slowly
remove the front panel block.
Note 1: When using a jig, please work
carefully so as not to damage
the front panel block and
speaker cabinet.
speaker cabinet
front panel block
Direction of the opposite
side upwards.
8 While moving the jig in the
direction of the arrow,
remove five bosses.
7 Insert the jig into the space and slowly
remove the front panel block.
Note 1: When using a jig, please work
carefully so as not to damage
the front panel block and
speaker cabinet.
qg front panel block
Note 2:
When installing the front
panel block, align the nine
bosses and nine holes.
total nine holes
Note 3: When installing the front panel block,
remove the used bond and use a new
bond to fix the front panel block.
total five bosses
total four bosses
soft cloth, etc.
1 Insert a flat-head screwdriver into
the two slits on the bottom of the unit,
and open a gap between the front
panel block and speaker cabinet.
slit
slit
Facing the side up.
top side
4
5
6
9
0
qa
total nine bosses
Note 3: When installing the front
panel block, remove the
used bond and use a new
bond to fix the front panel
block.
terminal side
qs
qf FFC (FL~MAIN)
(14 core)
qd cable (FL~MAIN)
(4 pin) connector
SYSSET
2018/11/2806:27:54(GMT+09:00)