HT-S500RF/S700RF
17
Sony CONFIDENTIAL
For Authorized Servicer
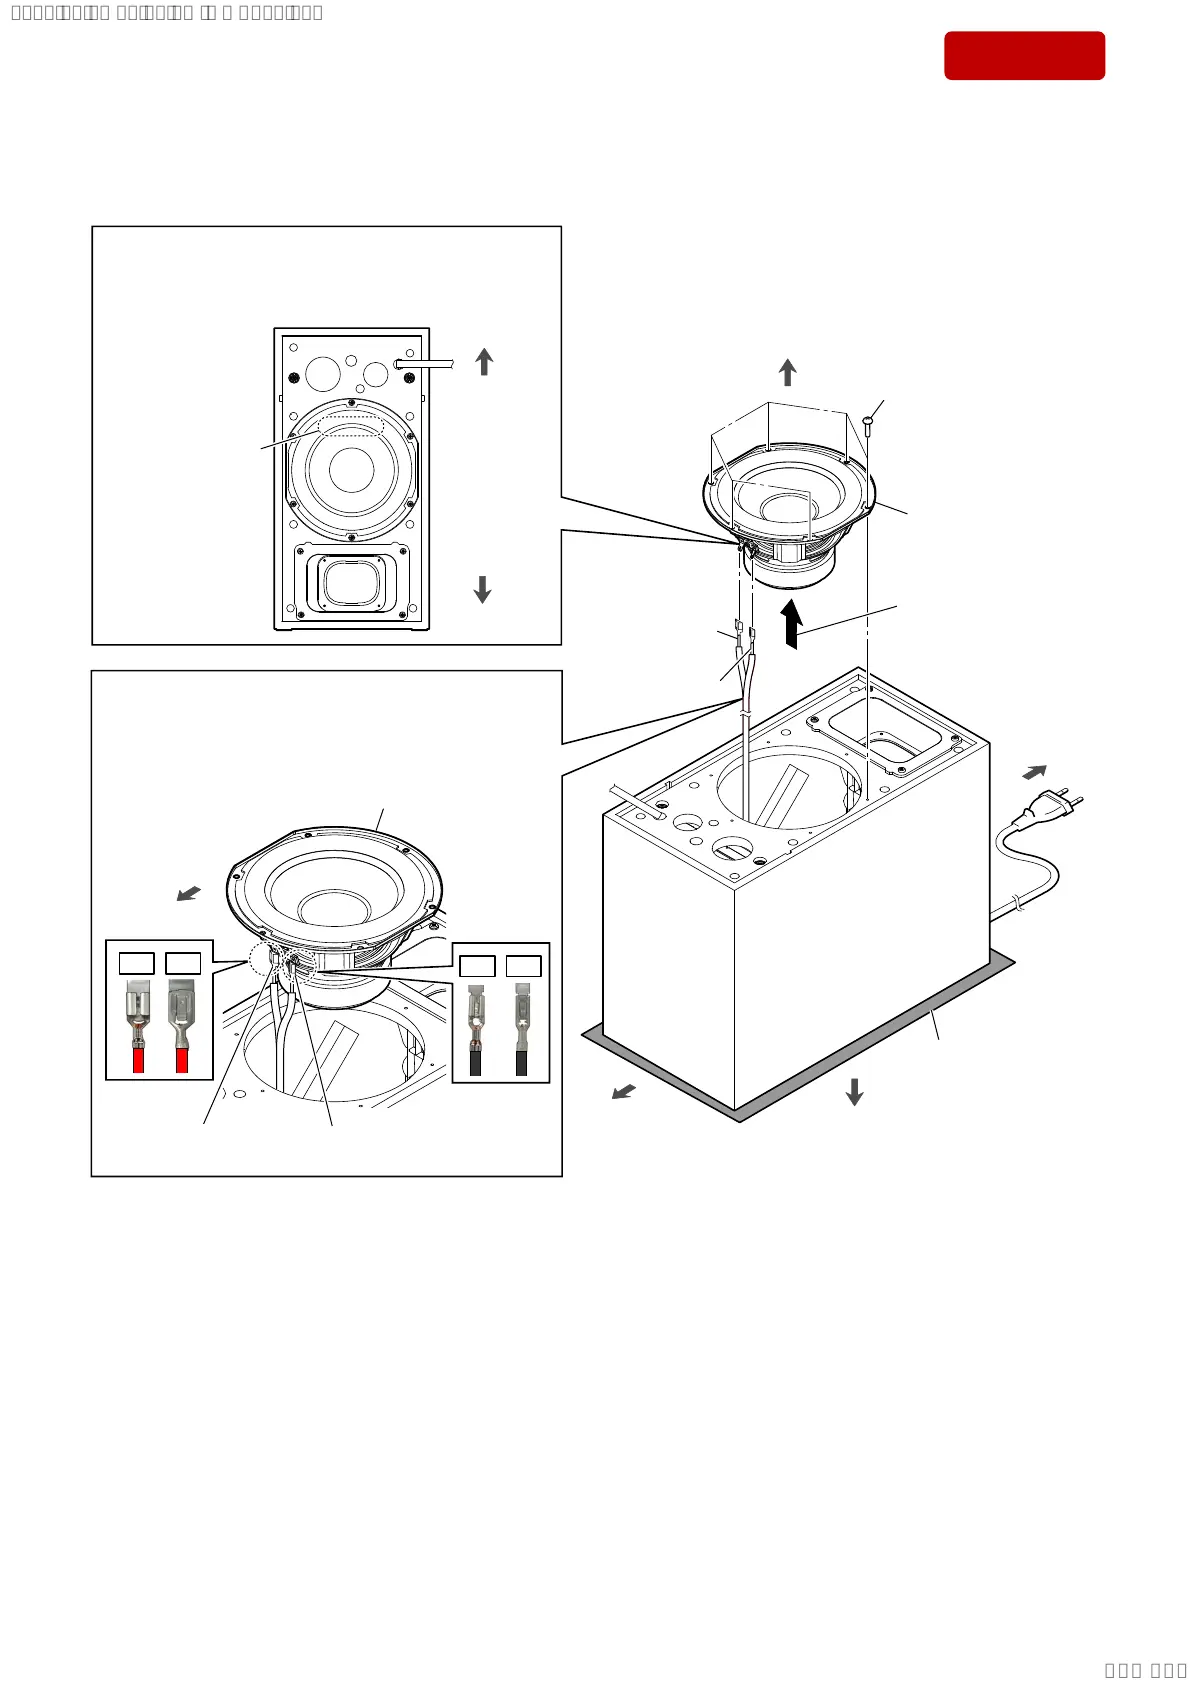
2-11. SW UNIT (SUBWOOFER)
2 Lift up the SW block
in the direction of
the arrow.
,QVWDOODWLRQGLUHFWLRQIRUWKH6:XQLWVXEZRRIHU
terminals position
Note 1:
When installing the SW unit (subwoofer), make the
position of terminals as shown in the figure below.
top side
bottom side
rear side
bottom side
1 six wood screws
(R4.1 u 20)
4 SW unit (subwoofer)
3 terminal (wide)
[red]
3 terminal (narrow)
[black]
,QVWDOODWLRQGLUHFWLRQIRUWKHVSHDNHUFRQQHFWLRQ
FDEOHWHUPLQDO
Note 2:
When connecting the speaker connection cable terminal
to the SW unit (subwoofer), take care for the direction of
the terminal and connect it.
terminal (wide)
[red]
terminal (narrow)
[black]
top side
SW unit (subwoofer)
OK
NG
OK
NG
soft cloth, etc.
top side
–)URQWYLHZ–
front side
SYSSET
2018/11/2806:27:54(GMT+09:00)