18
(GB)
Projecting
4
Press the INPUT key to select the input source.
INPUT-A: Selects video signal input from the INPUT
A connector, such as component
equipment.
INPUT-B: Selects video signal input from the INPUT
B connector, such as component
equipment.
VIDEO: Selects video signal input from the VIDEO
(VIDEO IN) jack.
S-VIDEO: Selects video signal input from the S
VIDEO (VIDEO IN) jack.
5
Press the PATTERN key on the control panel to
display the test pattern, and turn the focus ring to
adjust the focus.
Press the PATTERN key again to clear the test
pattern.
6
Turn the zoom ring to adjust the size of the
picture.
Note
Looking into the lens when projecting may cause
injury to your eyes.
To Press
Cut off the picture
the MUTING PIC key on the remote
commander. To restore the picture,
press the MUTING PIC key again.
1
After all equipment is completely connected, plug
the AC power cord into the wall outlet.
The ON/STANDBY indicator lights in red and the
projector goes into the standby mode.
2
Press the I /
1
key on the control panel or
the I key on the Remote Commander.
The ON/STANDBY indicator lights in green.
3
Turn on equipment connected to the projector.
Projecting
19
(GB)
Projecting
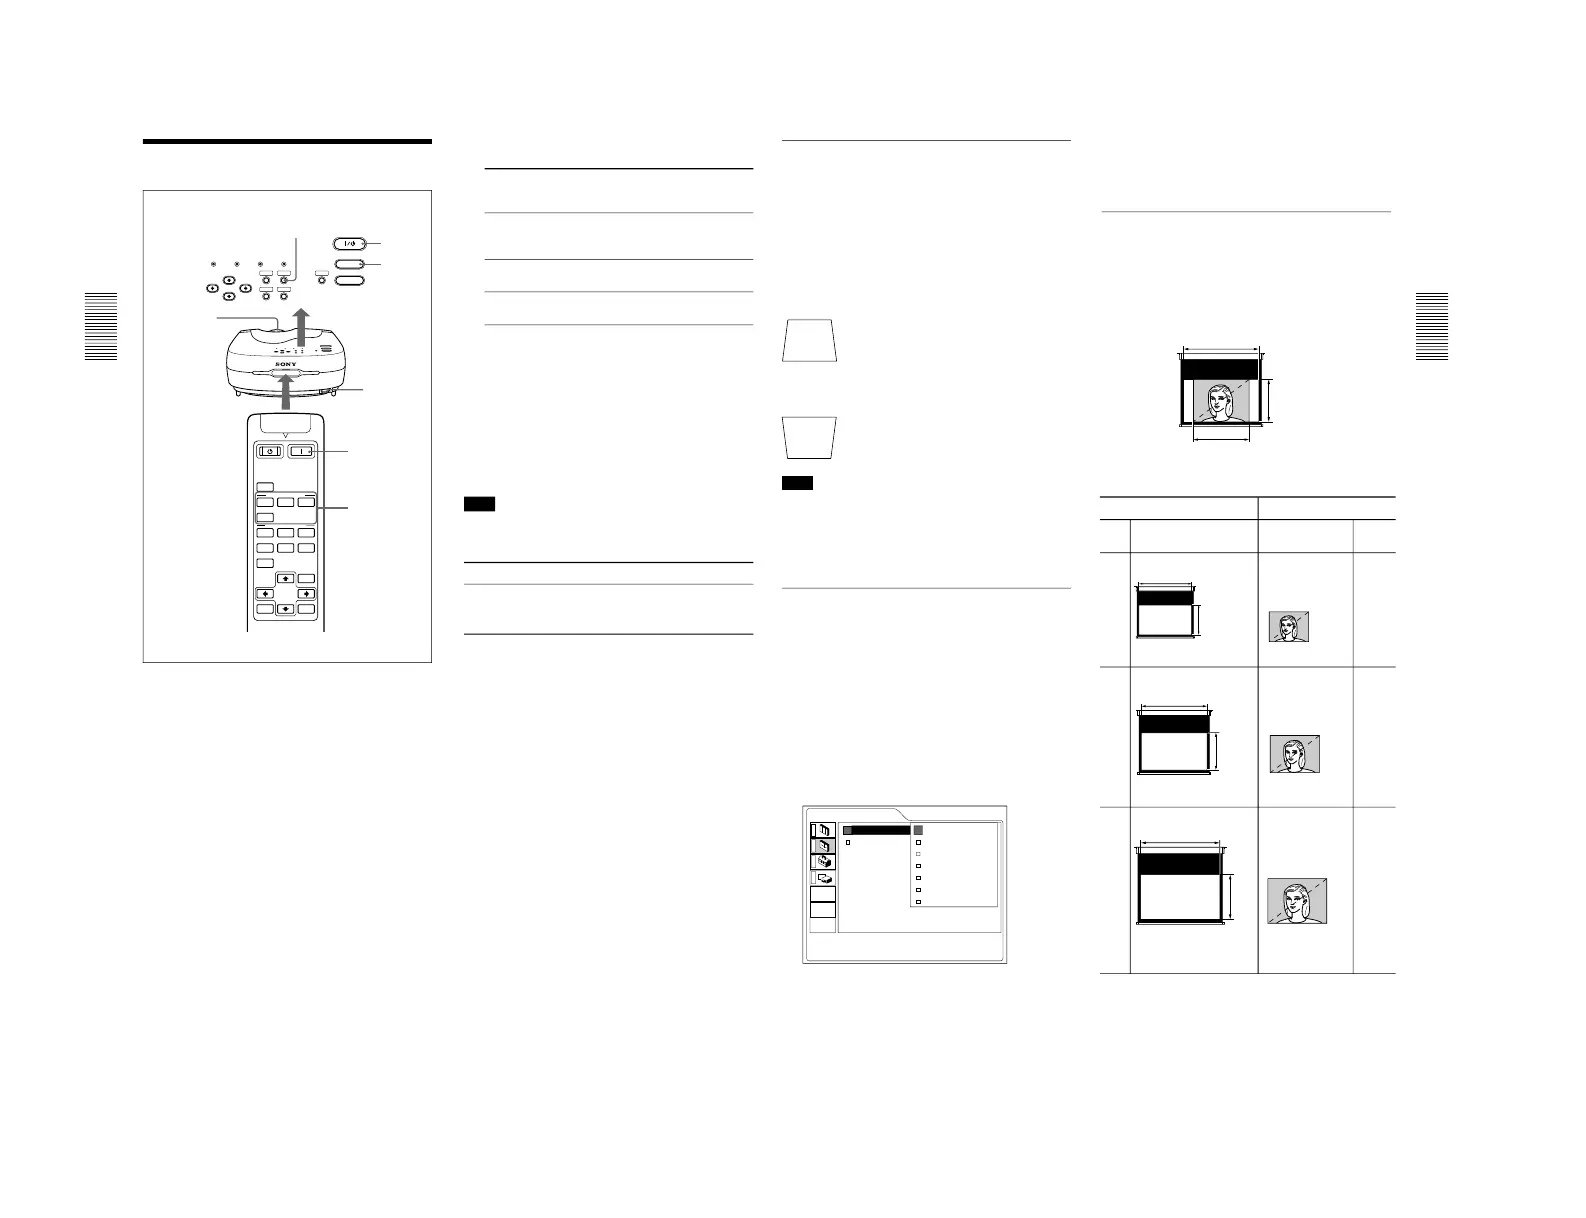
To correct the trapezoid
When the projecting image is a trapezoid, change the
projector’s position/height by moving the adjuster.
For details on “How to use the adjuster”, see page 10 (GB).
If the image is still a trapezoid, correct it in DIGIT
KEYSTONE in the INSTALL SETTING menu.
When the base edge is longer than the upper
edge as shown in the figure below:
When the upper edge is longer than the base
edge as shown in the figure below:
Note
If “ZOOM”, “FULL” or “NORMAL” have been
selected in the ASPECT of the INPUT SETTING
menu, you can change the trapezoid.
For details on “DIGIT KEYSTONE”, see page 28 (GB).
Changing the aspect
You can change the aspect according to the video
signal. For details on the menu screen operation, see
“Using the Menu” on page 21 (GB).
1
Press the MENU key to display the menu.
2
Press the M or m key to select INPUT SETTING
menu, then press the , or ENTER key.
3
Press the M or m key to select ASPECT, then
press the , or ENTER key.
Set the value to negative.
Set the value to positive.
4
Make setting or adjustment on an item.
For details on setting individual items, see page 24 (GB).
The picture size for the screen size
Refer to the following for selecting the aspect.
When the 4:3 picture is displayed on the 16:9
screen
Example: The 120 inch screen is used.
The 98 inch picture is displayed
1,992
2,656
1,494
16:9 screen 4:3 picture
Unit (mm) Unit (mm)
90 73
110 90
120 98
Size
(Inch)
2,656
1,494
1,494
1,992
2,435
1,370
1,370
1,826
1,121
1,992
1,121
1,494
Size
(Inch)
 Loading...