Supported SuperSlot receivers for use in the SL-2 are:
● Sound Devices A20-RX
● Audio Ltd. A10-RX
● Lectrosonics SRb, SRc, SRc-941, SRb5P (Slot A only), SRc5P (Slot A only)
● Sennheiser EK6042 (does not support scan)
● Shure ADX5D
● Sony DWR-S03D
● Wisycom MCR42
● Wisycom MCR54
Powering the SL-2
The SL-2 is powered by the 833 via the Expansion Port. No additional power source is needed to power the SL-2.
To activate the SL-2, set the System>Expansion Port menu to On.
Save power when the SL-2 is not in use by setting the Expansion Port menu to Off. When the Expansion Port is set to Off, the
SuperSlot menu is grayed out.
Routing SL-2 Sources to Channels
The SL-2 has 12 selectable sources and can send up to 8 channels of audio to the mixer/recorder. 8 channels are available if all
sources are AES digital. If a slot receiver output is analog, 6 channels are available and AES 3 and 4 cannot be selected.
To route an SL-2 Source to a channel, access a channel’s source screen and select from A1-A4, B1-B4, AES 1-4. When A1-A4,
B1-B4 are selected as source, use the */** toggle as a shortcut to the selected receiver’s setup screen.
For SL-2 A1-A4, B1-B4, and AES 1-4 sources, channel trim gain range is -20 to 50 dB.
When the A10-RX is receiving signal from the A20-Mini, the trim gain of the associated 8-Series channel is 0 to 60 dB. See
GainForward.
RF Overload LEDS
Each antenna input on the front panel of the SL-2 has an associated LED that displays incoming RF level status.
Red = approaching RF overload threshold of the SL-2
Orange = approaching overload threshold of digital wireless systems
Off = no overload
To disable the LEDs go to SL-2 Options>Antenna LEDs and set to Off.
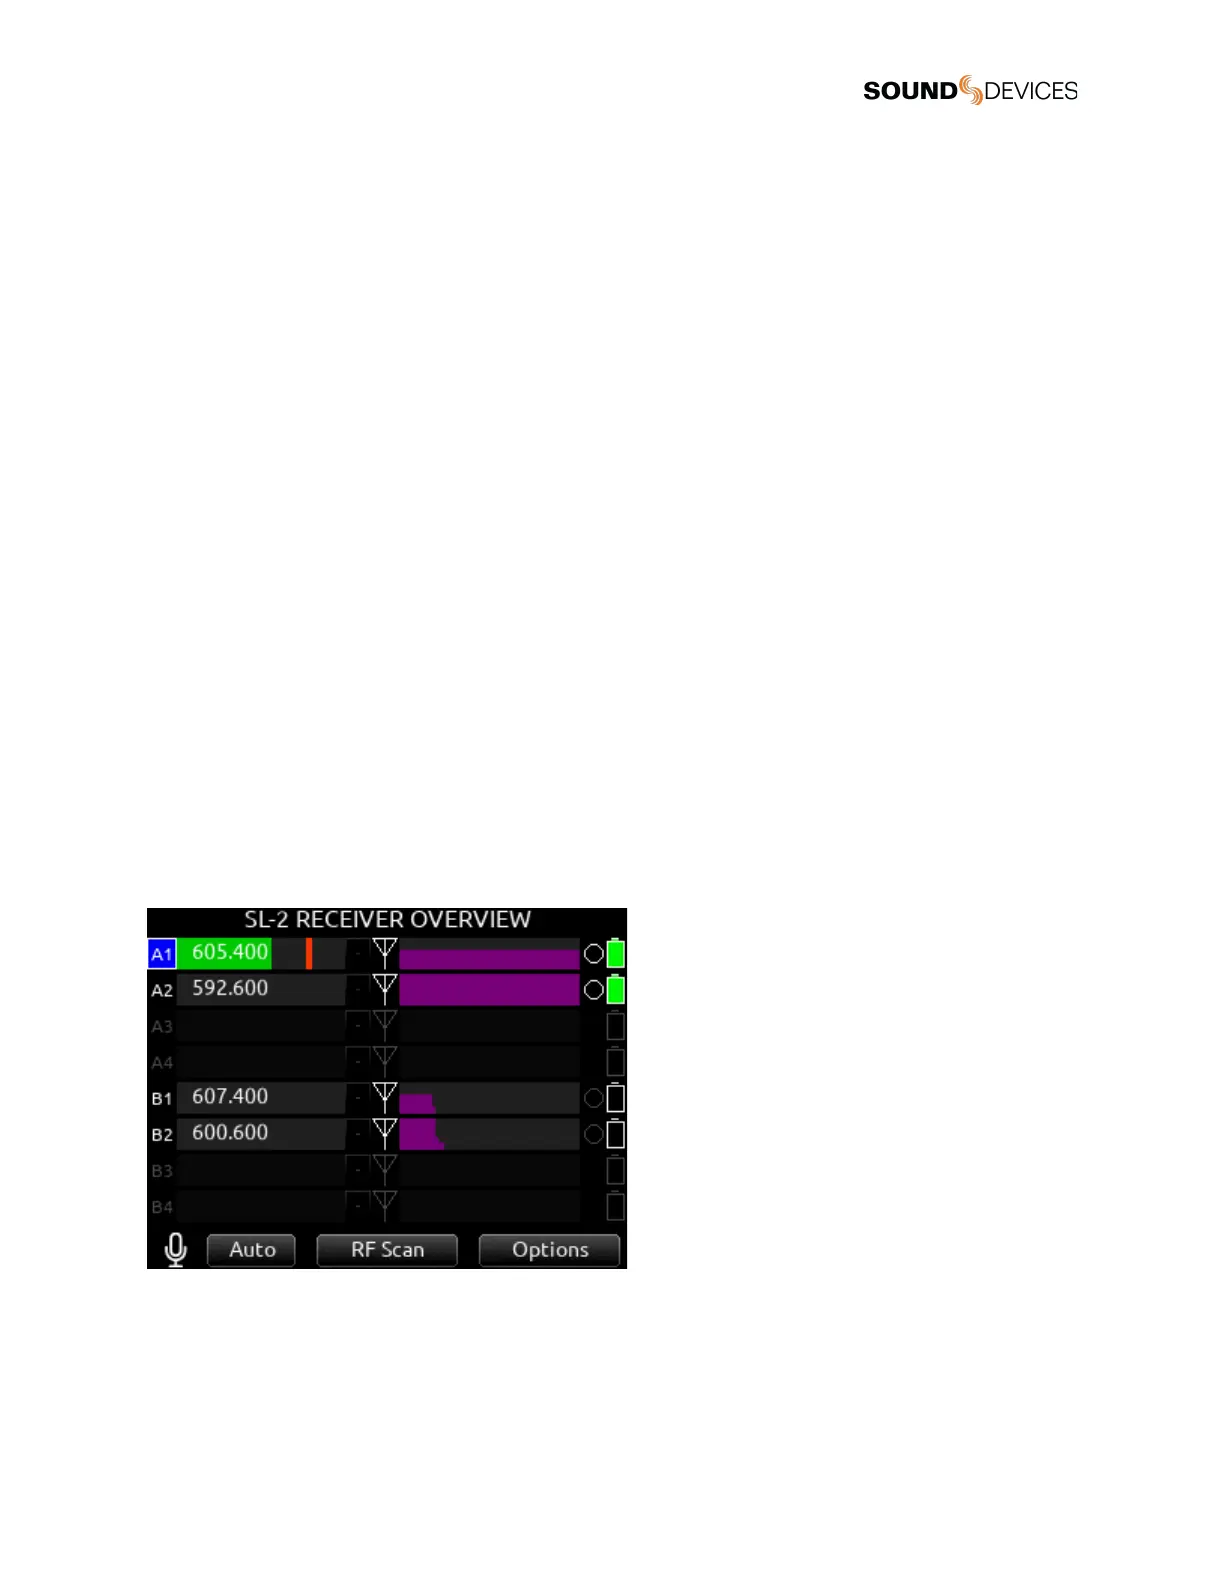
SL-2 Receiver Overview
Select the SuperSlot menu to enter the SL-2 Receiver Overview screen which displays information for all receivers connected to the
SL-2. Hold Meter then press the HP knob to quickly access the Receiver Overview screen.
A1-A4, B1-B4
Use the Select knob to scroll and select an SL-2 channel to access the individual Receiver Setup screen. See Receiver Setup
Screen for more details.
 Loading...