3. Use with Meter Button to scroll through meter views then push to Select.
4. Push with Channel Select switches 1-6 for shortcut to Bus 1-4, L,R routing.
5. Menu navigation and push to Select.
6. Hold then press >>, <<, to add, delete Q-marks during recording and playback.
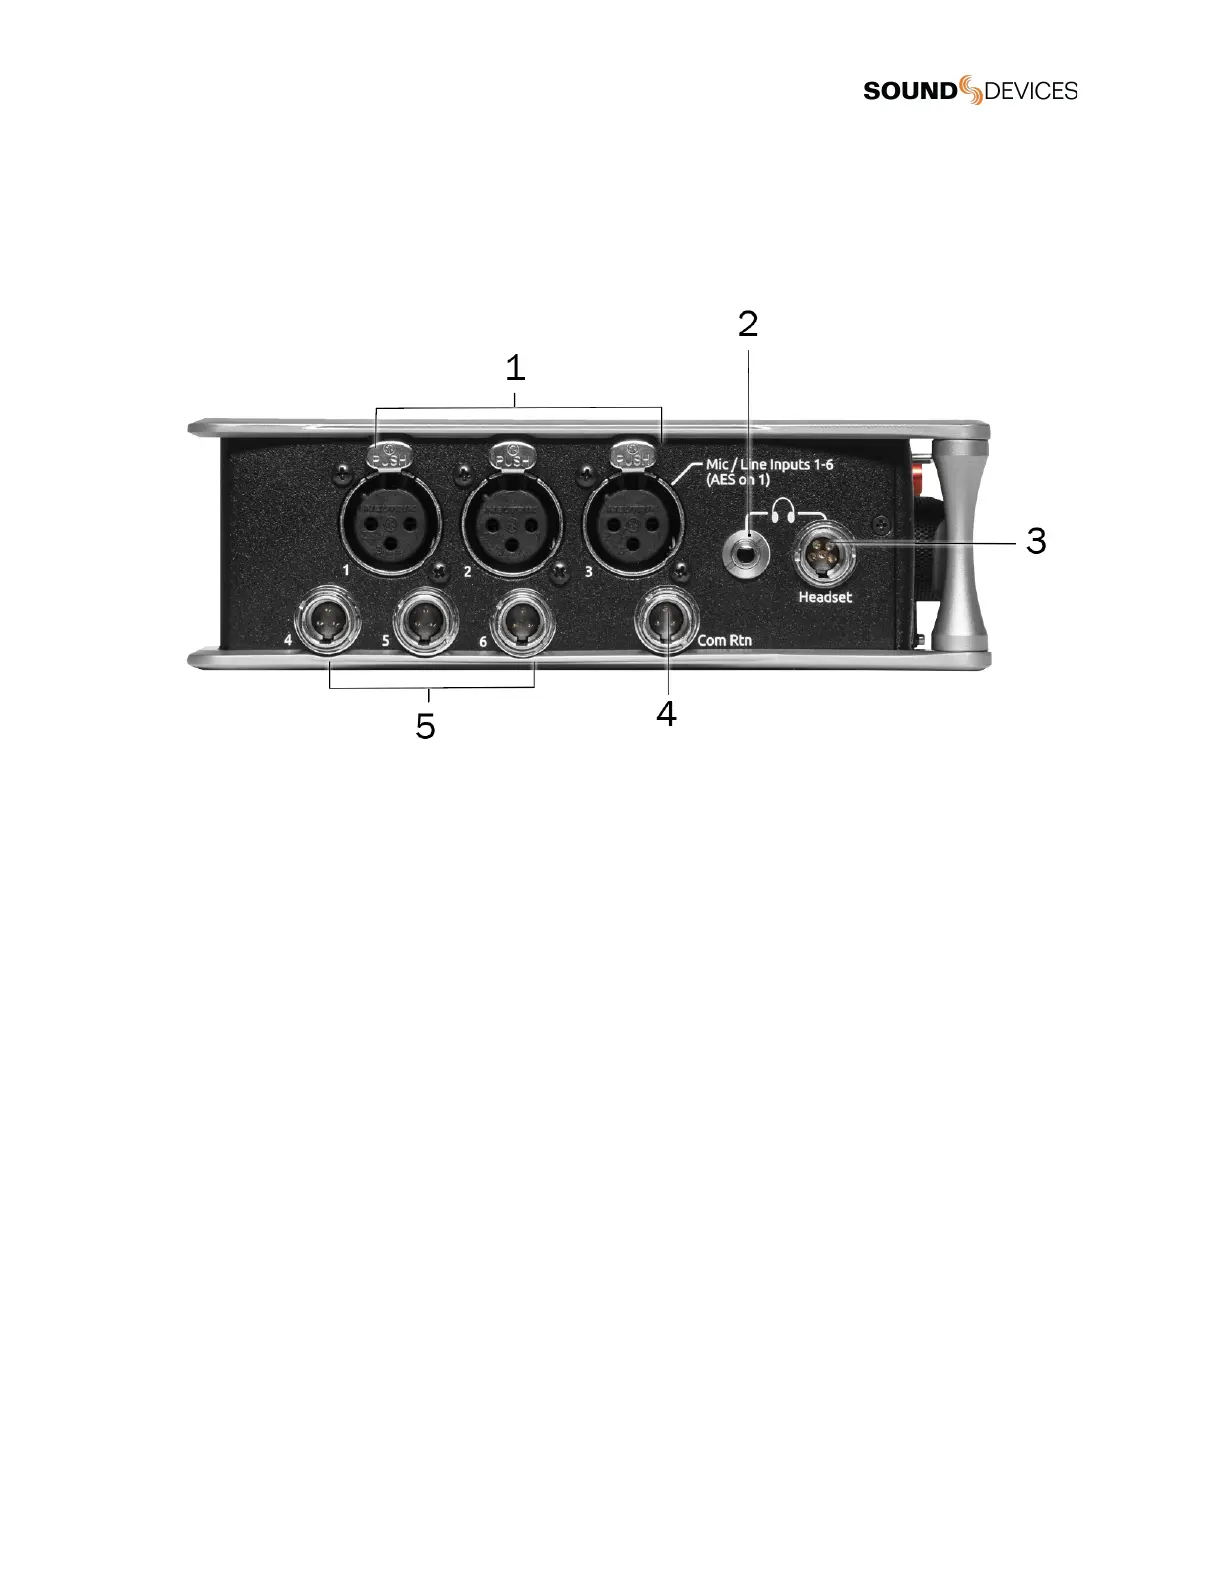
Left Side Panel
1: Inputs 1-3 Female XLR Jacks
Active-balanced analog microphone or line-level inputs. Input 1 can also accept AES3 or AES42 signal. [pin-1 = ground, pin-2 = hot
(+), and pin-3 = cold (-)]. 110 ohm cables should be used for AES3 or AES42 inputs.
2: Headphone 3.5 mm Jack
Unbalanced output and TRS headphone output. Warning! This output can drive headphones to potentially dangerous levels.
Routing determined in the Outputs menu. [Sleeve = ground, tip = left, ring = right].
3: Headphone/Headset TA5 Jack
Headphone and slate microphone connections [pin-1 = HP right, pin-2 = HP left, pin-3 = ground, pin-4 = mic -, pin-5 = mic+].
4: Com Rtn TA3 Jack
Balanced connection for Com Return audio input. [pin-1 = Ground, pin-2 = hot (+), pin-3 = cold (-)].
5: Mic/Line Inputs 4-6 TA3 Jacks
Active-balanced analog microphone or line-level inputs. [pin-1 = ground, pin-2 = hot (+), pin 3 = cold (-)].
 Loading...