To Access the Trim Step
Function
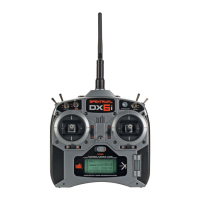
Press and hold the roller while turning on the transmitter. When System Setup
appears on the screen, release the roller. The DX8 is now in System Setup Mode.
Rotate the roller to highlight Model Reset then press to
Rotate the roller to highlight Trim Setup then press to access the function.
The ______following screen appears:______________
Trim Setup US
access the function. The following screen appears:
Confirm
Reset
Model-1
HdJOI-
Heli
DATA WILL
BE RESET
CANCEL
[RESET!
Verify that the model displayed on this screen is the model you wish to reset. if not then see page 14 Model Select to access the desired model. Rotate the
roller to highlight Reset and then press to access the Confirm Reset screen.
Trim Type: Common
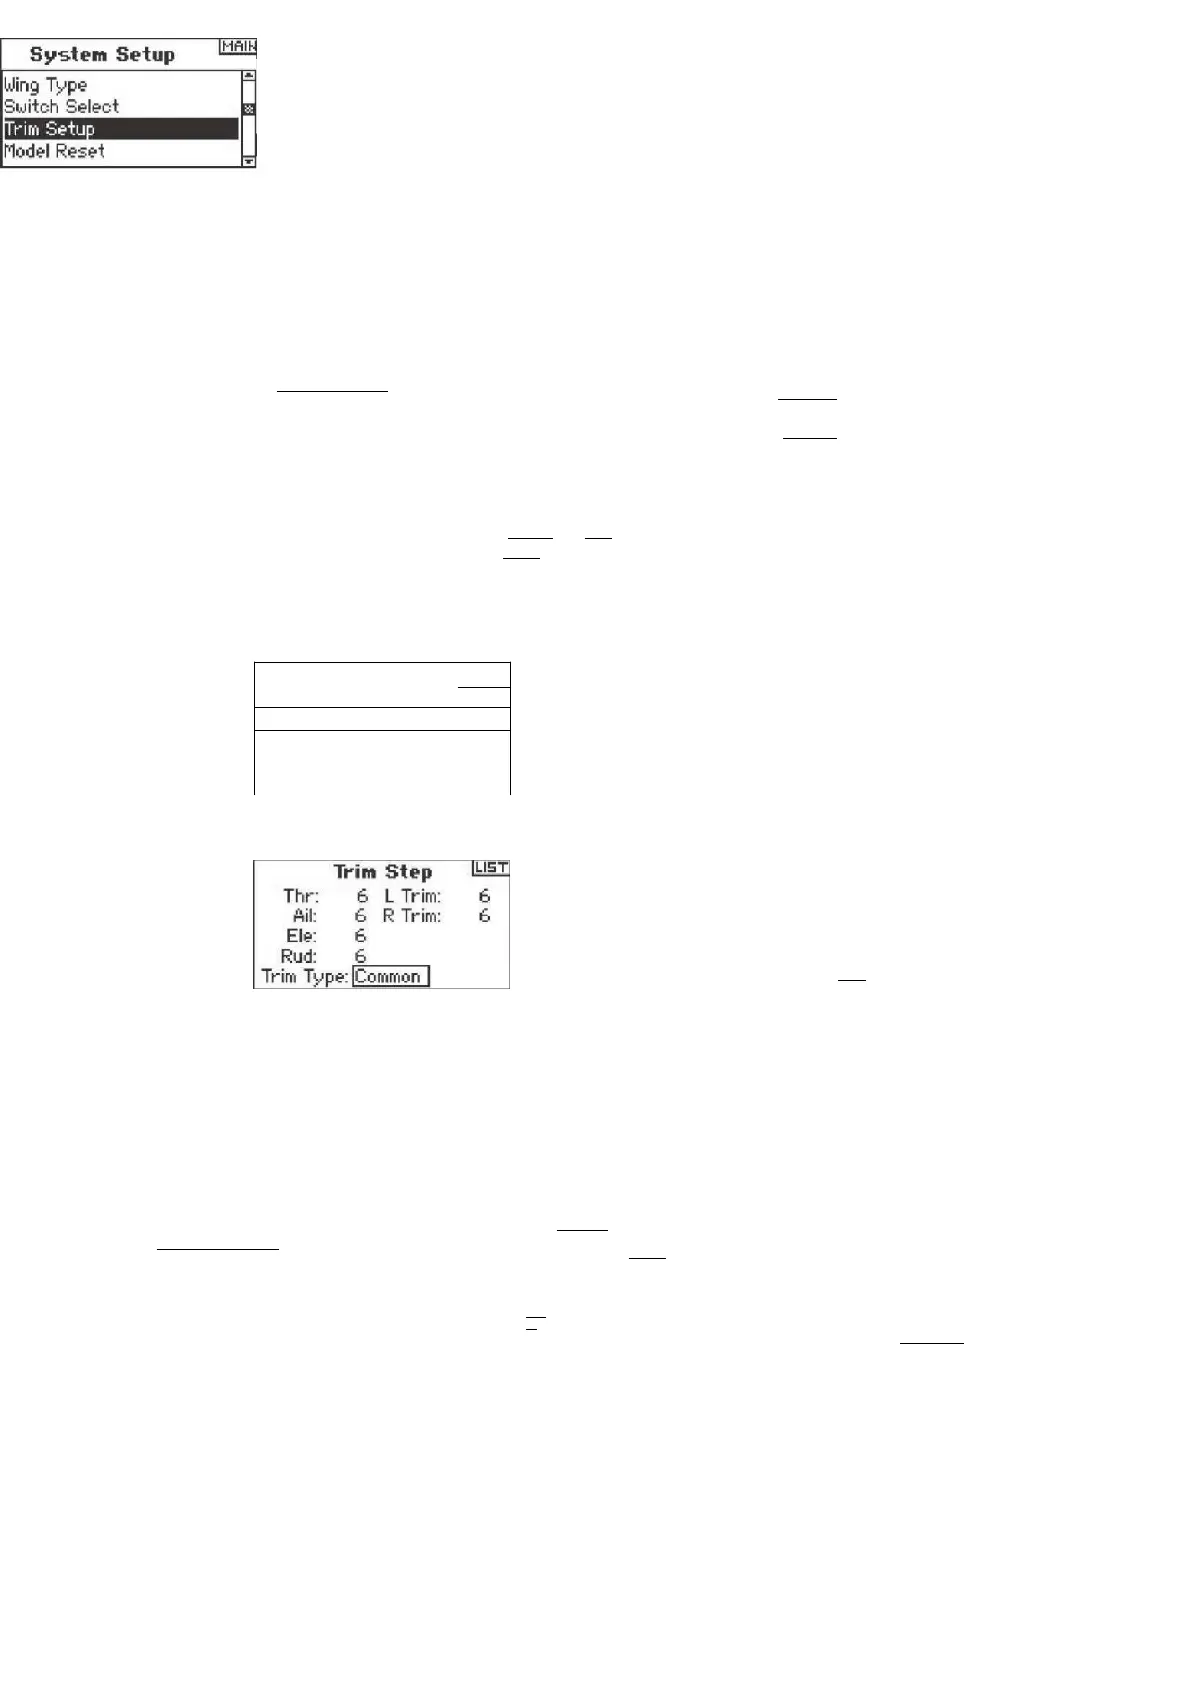
Highlight the desired Trim value then press the roller to
access. Rotate the roller to change to the desired trim value. Press to accept. Repeat to adjust
all trim steps.
Rotate the roller to highlight Trim Type and press to access.
Select F-Mode (each flight mode has its own trims) or Common (trim are always
common regardless of flight mode).
Common Trim - When common trim is selected, trim values are common in all flight modes.
F-Mode Trim - When F-Mode is selected, each flight mode including hold has its own trims that
are automatically active when that flight mode is selected.
MODEL RESET
Highlight YES if you're sure you want to reset this model to factory default settings,
Model Reset is typically used to clear the programming for a model you will no longer be flying Model
Reset resets the programming for the selected model to factory defaults. No other model memories will
be affected. When a model's memory is reset all programming for that model is permanently deleted
and cannot be recovered. To Access the Model Reset Function Press and hold the roller while
turning on the transmitter. When System Setup appears on the screen, release the roller. The DX8 is
now in System Setup Mode.
System Setup
F-Mode Setup
Trim Setup i
Model Copy
press the roller. The screen will return to the main screen.
MODEL COPY
The Model Copy function copies the currently selected model's programming of another model
memory. Thirty model memories are available. Some of the more common uses of the Model Copy
function include:
•Moving the order of models around in model memory so they can be organized by category, type, etc.
Note: You will need to re-bind after moving models. •Experimenting with the programming for an
aircraft while preserving a copy of the original setup. Note: if you want to use the model copy
function to try two slightly different setups with the same model you will need to rebind the
receiver each time you switch between model memories.
•Copying the programming for an existing model over to a new model that is similar. Many pilots
find this to be a good way to provide more accurate baseline programming for the new model.
For example Vibe 50 w/120CCPM mixing, gyro and governor programming provides a good
base programming for any other nitro powered 120CCPM mixing helicopter. An Extra 300 with
dual aileron and elevator servos that is properly programmed with dual flap and dual elevator
mixing in Wing Type provides good foundational programming for another aerobatic airplane
with the same basic control system.
Important: The model memory you are copying to will be over-written by the copied
programming, permanently deleting any programming that may already exist. To Access the
Model Copy Function
Press and hold the roller while turning on the transmitter. When System Setup appears on the
screen, release the roller. The DX8 is now in System Setup Mode.
IMAIH
System Setup
Model
Copy EMU
Model-1 Mdl01-Holi
To
Rotate the roller to highlight Model Copy then press. The following screen appears:
Thr: e. L Trim:

 Loading...