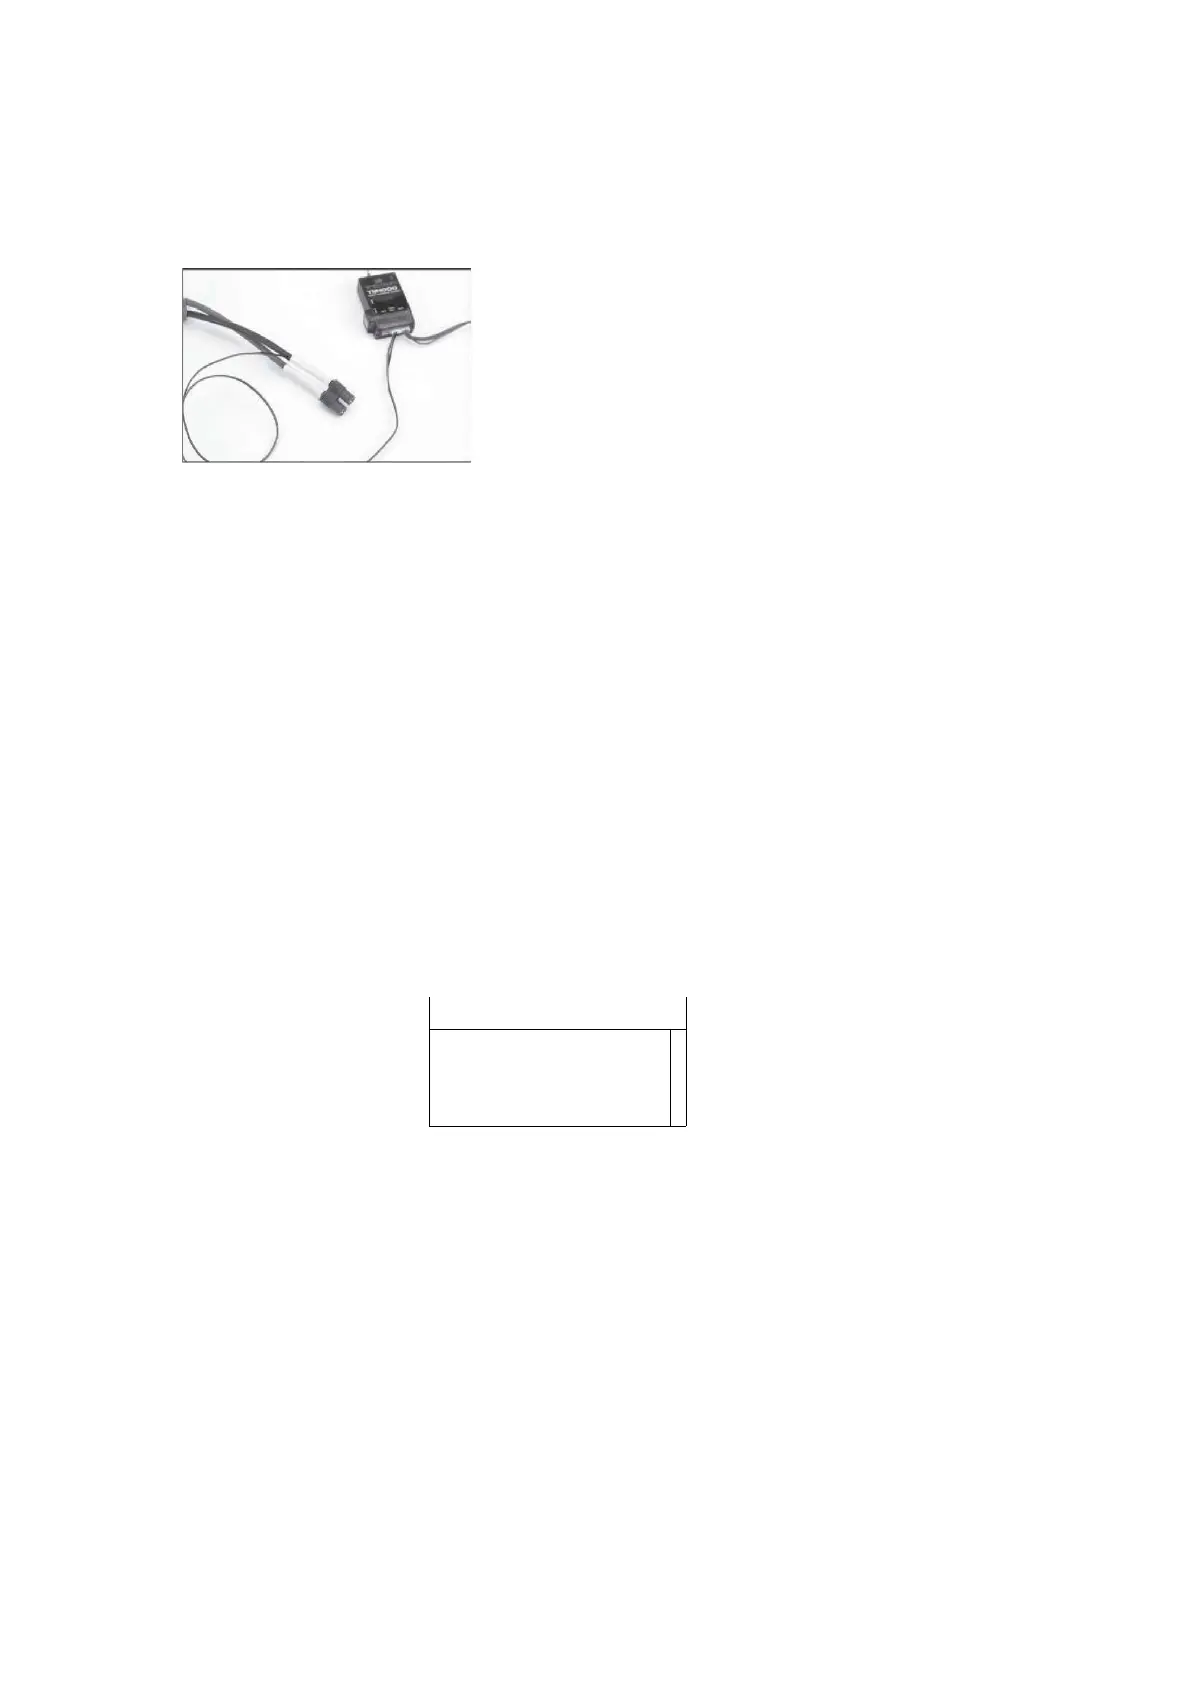
Electric RpM Sensor
The optional electric RPM sensor is designed to be used with any brushless motor. The sensor
has two leads to attach to any two of the three motor wires. This is typically done by soldering.
Installation
To install the electric RPM sensor using servo tape, attach the sensor in a convenient
place that allows the leads to reach the motor wires and the TM1000 telemetry unit.
Solder the two sensor wires to any two motor leads.
Plug the sensor lead into the RPM port on the TM1000 telemetry module.
Testing
Turn the transmitter and receiver on and scroll to the RPM telemetry screen.
Run the motor and the RPM should register on the screen.
The RED LED on the TM1000 indicates the sensor is picking up properly.
NOTICE: It is necessary to program a matching pole count in the telemetry RPM
screen to have accurate reading on screen. The motor's pole count is normally in the
motor manufacturer's instructions or on the manufacturer's website.
FRAME RATE
The Frame Rate function allows the selection of 11ms or 22ms frame rate. When a 11ms frame
rate receiver is used, the transmitter defaults to 11ms frame rate. This fast frame rate is not
compatable with some types of analog servos and the Frame Rate screen allows the selection
of a 22ms frame rate when a high frame rate receiver is being used with analog servos.
To access the Frame rate Function
Press and hold the roller while turning on the the transmitter. When system setup appears on
screen relese the roller. The DX8 is now in System Setup mode.
TRAINER
programmable trainer function with three trainer modes. The transmitter assigns the trainer
function to the trainer button. The function activates when the switch is depressed and one of
the three trainer modes is selected. The three trainer Modes include: Inhibit
In Inhibit you can use the transmitter as a slave only. However, the slave transmitter
must have the same programming as the master (e.g., servo reversing, travel adjust,
sub-trim, trims).
Programmable Master
With Programmable Master you can program the transmitter to transfer any or all channels
when you activate the trainer switch. This is ideal for beginners so the student learns control of
individual channels (aileron only for example) while the trainer maintains control of all other
channels.
Note: When Programmable Master is selected for the master transmitter, all settings for
the slave transmitter (i.e. Servo reversing, wing type, Sub trim, Travel Adjust, Mixing, etc.)
must match the master's transmitter programming. If two DX8's are being used simply
copy and transfer the model memory using the SD card from the master's model to the
slave. The slave transmitter is then programmed to inhibit in the trainer screen.
Pilot Link Master
When Pilot Link Master is selected the slave transmitter has control of the stick function only
(aileron, elevator rudder and throttle) while the master maintains control of all other channels
and functions including D/R and switch positions. This is ideal for complex models as the
master maintains control of all secondary functions and controls all other channels.
Slave
Use Slave mode when flying with the DX8 as a slave when the master radio has
activated its Pilot Link. In this case, there is no need to match programming between the
slave and master transmitter.
SYSTEM SETTINGS
Use the System Setting screen to establish the overall transmitter setting that will apply to ALL
model memories. These settings include: User Name, Contrast, Mode, Region and Language.
If you select Mode One, then Mode One will be selected for all 30 model memories. Note:
Even when models are imported from an SD card the system settings in the transmitter will
remain.
To Access the System Settings Function
Press and hold the roller while turning on the transmitter. When System Setup appears on the
screen, release the roller. The DX8 is now in System Setup Mode. Highlight System Settings
then press. The following screen appears:
Frame Rate HSi
11 ms
When 11ms is selected, digital servos must be used.