EN
• Turn the scroll wheel to move through the screen content or
change programming values. Press the scroll wheel to make
a selection.
• Use the Back button to go to the previous screen
(forexample,togofromtheMixingScreentotheFunction
List).
• UsetheClearbuttontoreturnaselectedvalueonascreento
the default setting.
• Direct Model Access enables you to access the Model Select
screen without powering off the transmitter. Anytime the
transmitterpowerison,presstheClearandBackbuttonsto
access the Model Select screen.
• Press and hold the roller while powering on the transmitter
to show the System Setup list. No radio transmission occurs
when a System Setup screen is displayed, preventing
accidental damage to linkages and servos during changes to
programming.
• At the main screen you can roll the roller to view the servo
monitor.
• The Main Screen appears when you power on the transmitter.
Press the scroll wheel once to display the Function List.
• When you want to change a value in a screen for a particular
control position, move the control to the desired position to
highlight the value you want to change, such as 0/1/2, up/
down or left/right.
Enter, Choose
or Exit
Move between
options or change
value in an option
Hold for 3
seconds and
release to move to
the Main Screen
Turn HoldPress
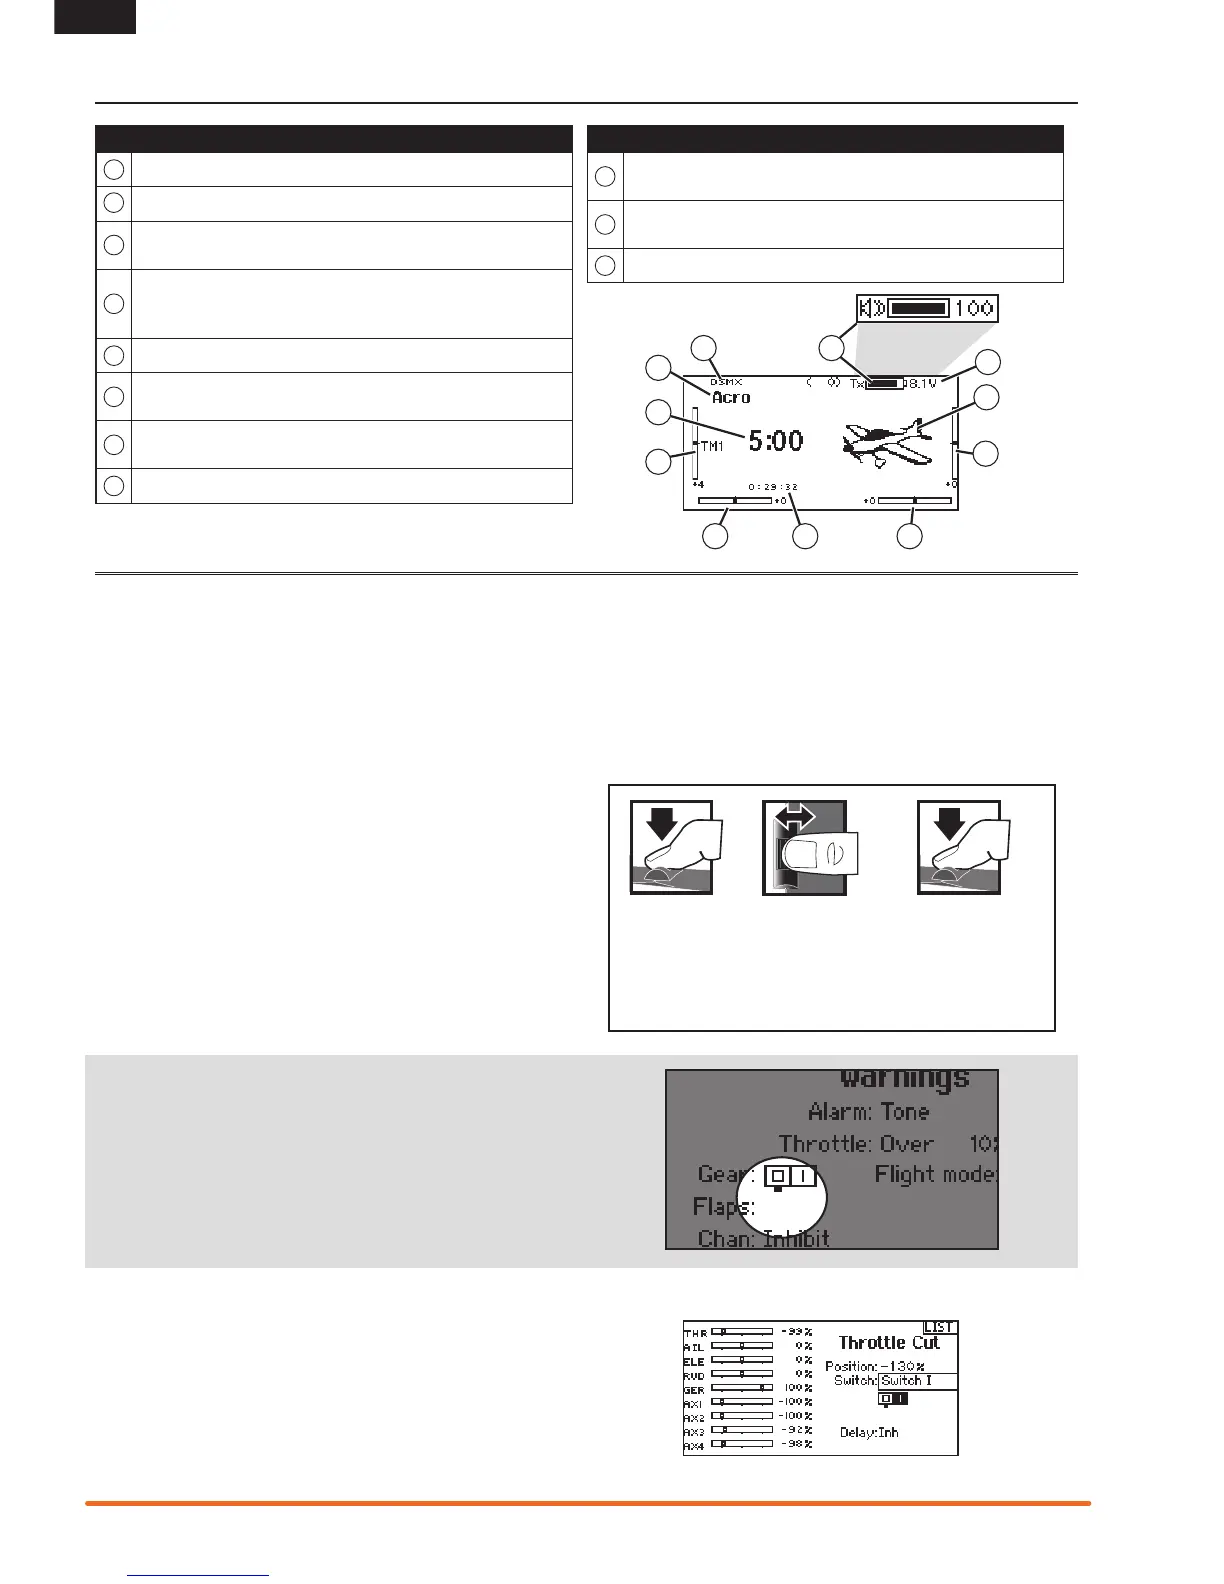
Tip: The tick mark below shows the current switch position.
Rollingandclickingtherollerturnstheselectedboxblack,
indicating that the value or condition will act on that position.
Function
A
Model Name
DSMX/DSM2 If not shown, this indicates “not bound”.
C
Transmitter Battery
ChargeLevel
D
Digital Battery Voltage (an alarm sounds and the screen flashes
when battery charge gets down to 4.3V when using an NiMH
battery or 6.4V for a LiPo/Li Ion battery.)
E
Model Type
F
Elevator Trim (Modes 2 and 4)
Throttle Trim (Modes 1 and 3)
G
Aileron Trim (Modes 1 and 2)
Rudder Trim (Modes 3 and 4)
H
Model Memory Timer
Function
I
Rudder Trim (Modes 1 and 2)
Aileron Trim (Modes 3 and 4)
J
Throttle Trim (Mode 2 and 4)
Elevator Trim (Mode 1 and 3)
K
Timer
Also displays R Trim values when
the Right Trim button is pressed
Also displays L Trim values when
the Left Trim button is pressed
Navigation
Main Screen
Auto Switch Select
Toeasilyselectaswitchinafunction,suchasaprogrammix,
rollwiththerollertohighlighttheswitchselectionbox,andpress
theroller.Theboxaroundtheswitchshouldnowash.Toselect
a switch, toggle the switch you wish to select. Verify the switch
selection is now displayed as desired. When correct, press the
roller to select this switch and complete the switch selection.
E
D
CB
J
K
A
F
GI H
Also displays the Volume Level
when the BACK button is pressed
B

 Loading...