179
OMAHA STANDARD
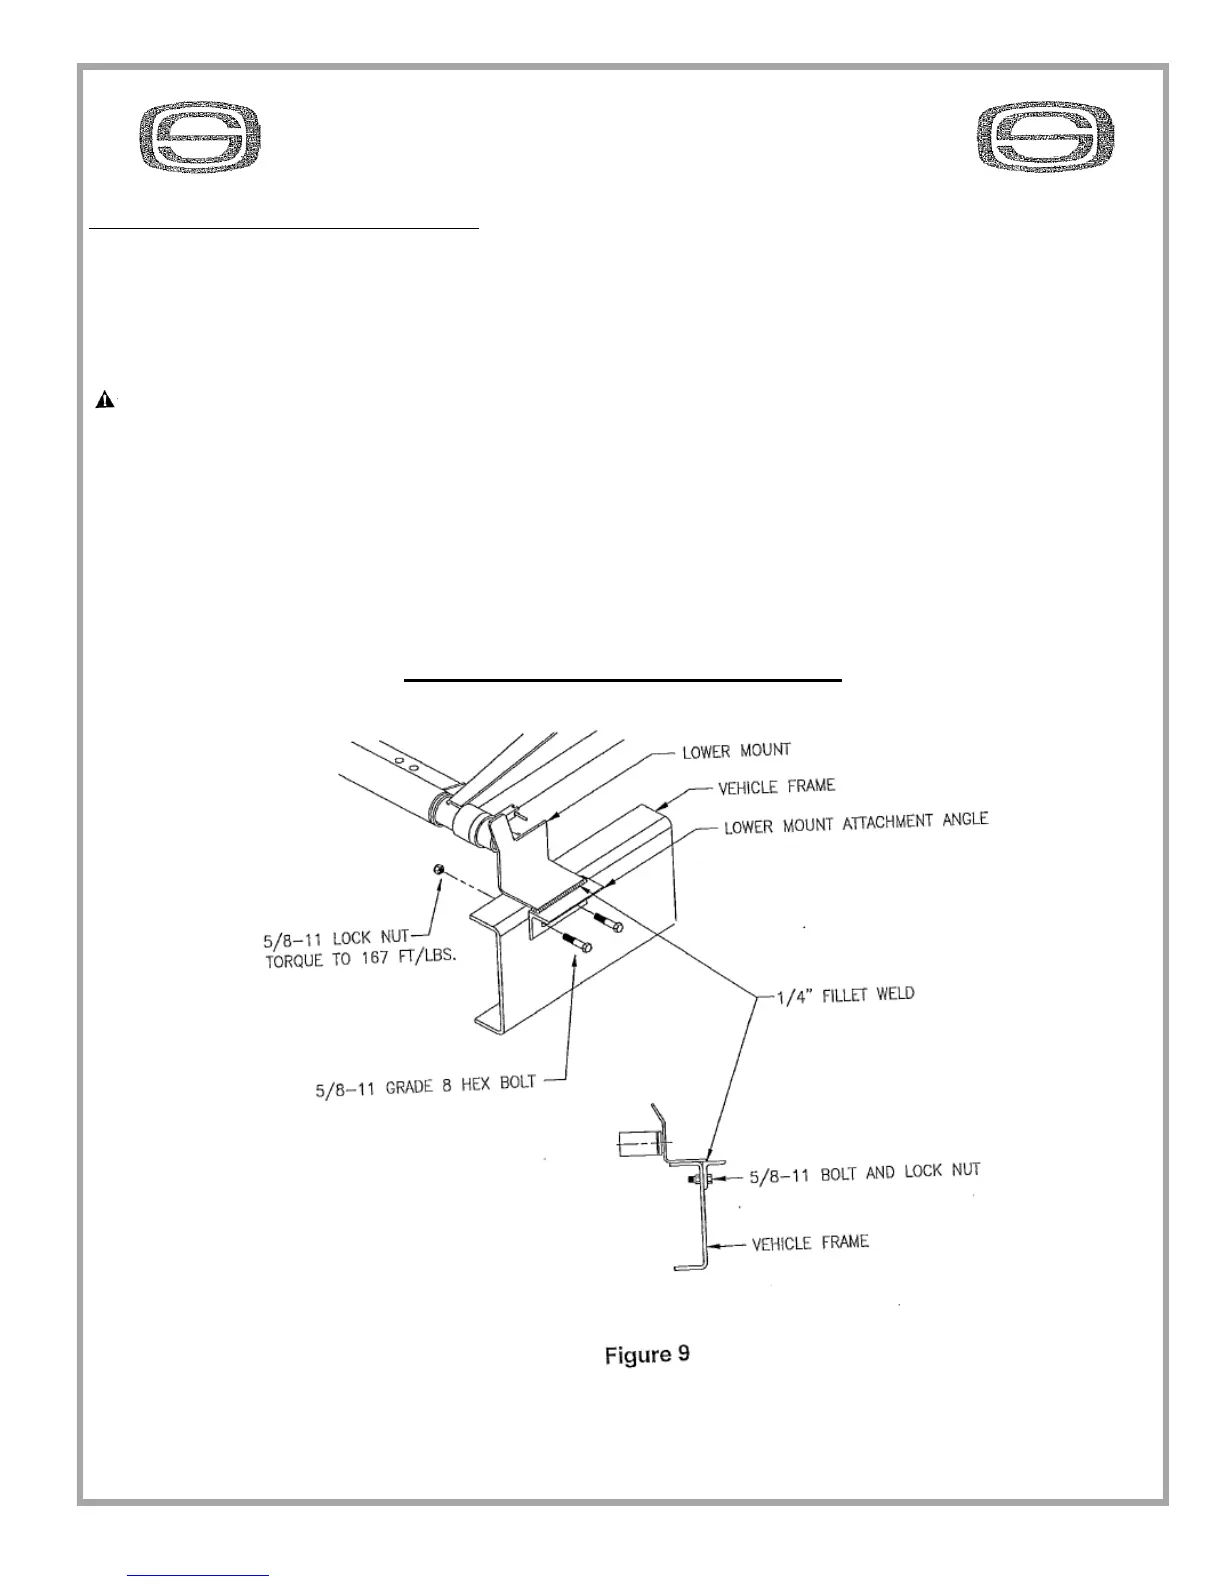
F. MOUNT HOIST TO CHASSIS FRAME (See Figure 9)
1. Clamp LOWER MOUNT ATTACHMENT ANGLES to outside of each frame
member, with top of mounting angle leg even with frame (see figure 9). Drill three
11/16” holes through frame member using mounting angle as a template. Secure angles
with 5/8-11 X 1 3/4” lg. hex bolts and lock nuts.
CAUTION: BEFORE DRILLIN, CHECK THAT FRAME CHANNEL IS CLEAR OF
ALL LINES, WIRES, ETC. BEHIND THE LOWER MOUNT ATTACHMENT PLATES
2. Center and square HOIST ASSMBLEY to rear hinge assembly, re-check all areas of
possible interference and securely
3. The hoist frame, expect for drop hinge, must set level with the frame. Rear of hoist,
just before drop hinge, must rest on a cross member (shim to make level if necessary) If there
is no cross member, attach a 2” X 2 “ angle between frame rails to support hoist.
LOWER MOUNT INSTALLATION