S - 26 | English English | S - 27
Adjusting the STEVENS Bicycle to the Rider
Your body height and proportions are decisive for the frame size of your
STEVENS bicycle. Make particularly sure there is enough space between your
crotch and the top tube so that you do not hurt yourself, if you have to get off your
bike quickly.
By choosing a specific type of bicycle you roughly determine the posture you
will be riding in. However, some components of your STEVENS bicycle are espe-
cially designed so that you can adjust them to your body proportions up to a
certain degree. This includes the seat post, the handlebar and stem as well as the
brake levers or brake levers/shifters.
As these adjustments require know-how, experience, appropriate tools and
a certain amount of skill, you should restrict yourself to the adjustment of the
seating position. Ask your STEVENS dealer for the correct seating position or if you
want something changed. They will see to your wishes the next time you leave the
STEVENS bicycle at the workshop, e.g. for the first inspection.
After any adjustment/assembly work, be sure to make a short functional check
as described in the chapter “Before Every Ride” and do a test ride on your
STEVENS bicycle in an area free of traffic.
Danger:
If you have a very small frame, there may be the danger of your foot
colliding with the front wheel. Therefore, make sure that your cleats are
properly adjusted.
Danger:
All tasks described in the following require the know-how of a mechanic
and appropriate tools. Make it a rule to tighten the bolted connections
always with greatest attention. Increase the torque values bit by bit and
check the fit of the component in between. Use a torque wrench and do
not exceed the maximum torque values! You find them on the components
themselves and/or in the chapter “Recommended Torque Settings”.
Note:
If sitting on the saddle causes you trouble, e.g. because it numbs your
crotch, this may be due to the saddle. Your STEVENS dealer has a very
wide range of saddles available and can offer advice on position.
Danger:
When replacing the
saddle, make sure the
saddle rail is compatible
with the seat post. If
you are in doubt or if
you have any questions,
contact your STEVENS
dealer.
Note:
The seating position
depends highly on how
you want to use the
STEVENS bicycle. Ask
your STEVENS dealer
or your trainer for help.
The advices given below
are suitable for typical
cross-country/ mara-
thon bikes suitable.
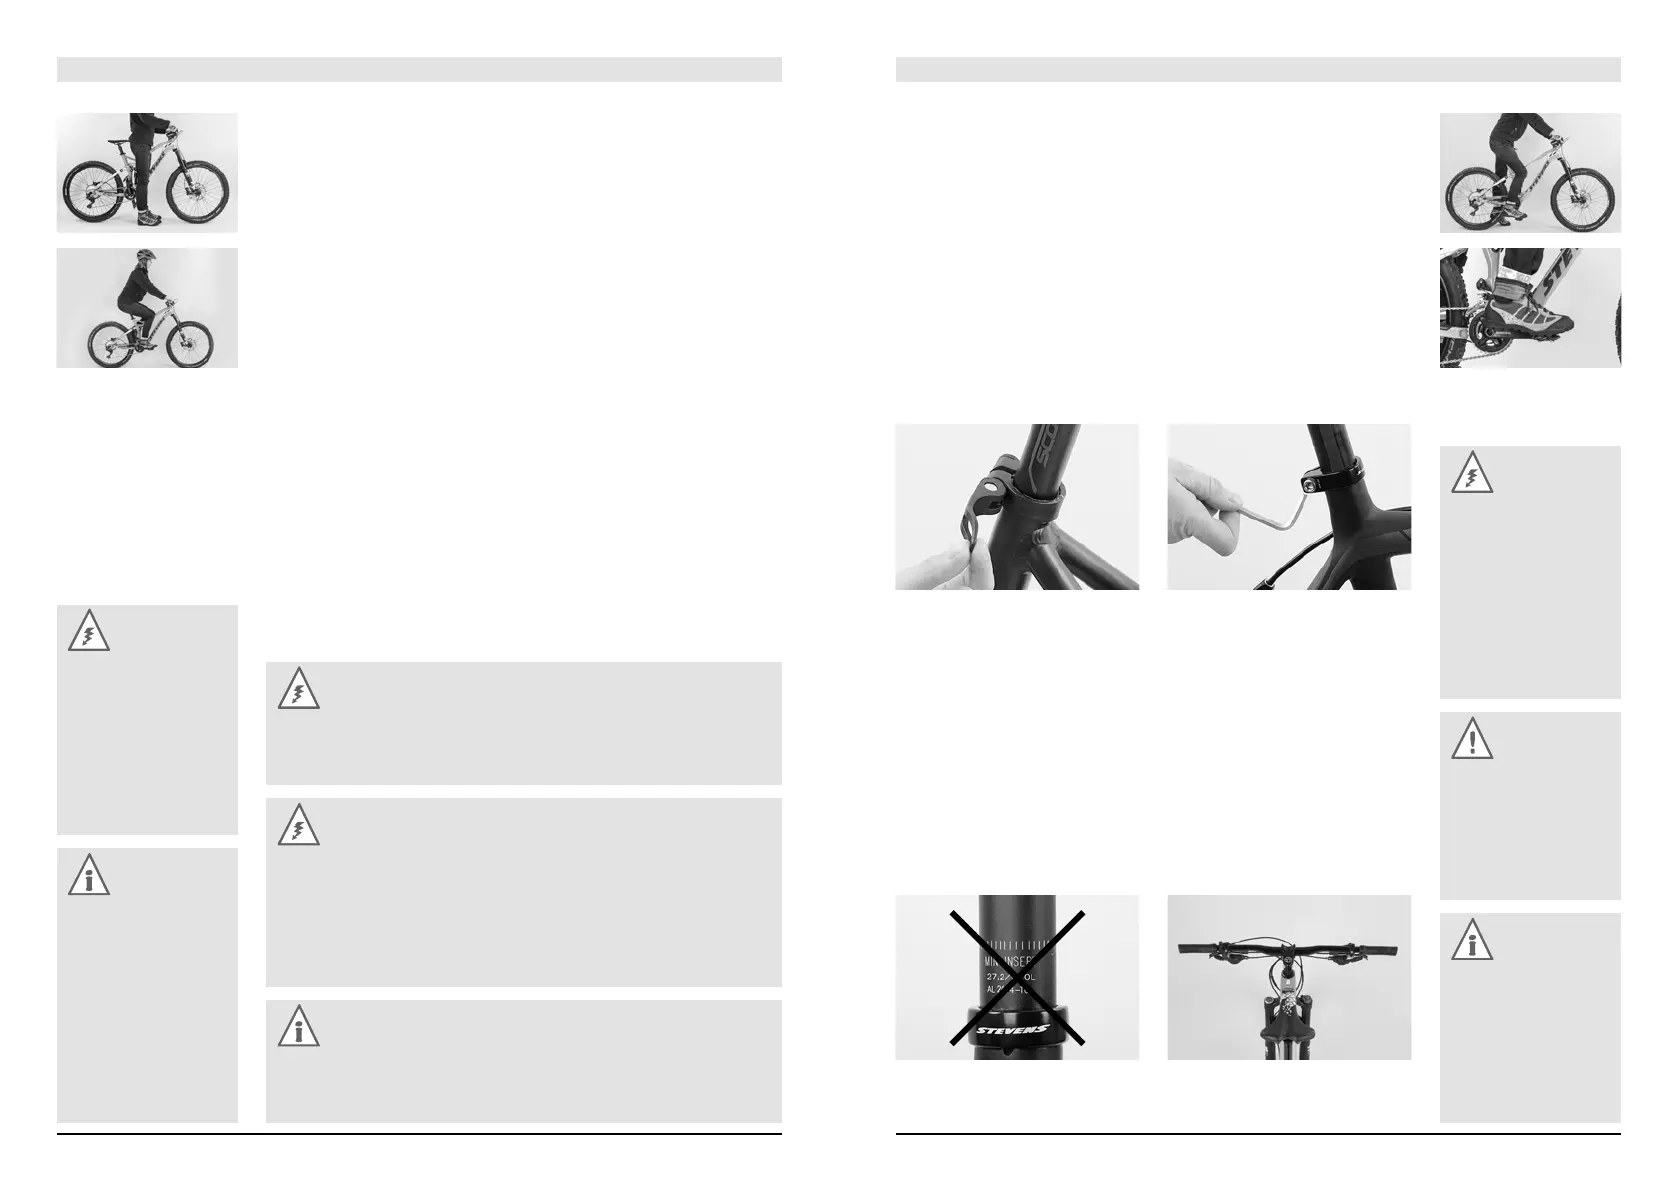
Adjusting the Saddle to the Correct Height
The correct saddle height depends on the length of your legs. When pedalling,
the ball of your foot should be positioned above the centre of the pedal axle. With
your feet in this position you should not be able to stretch your legs completely
straight at the lowest point, otherwise your pedalling will become awkward. Check
the height of your saddle with flat-soled shoes. This is best done with suitable
cycling shoes. Sit on the saddle and put your heel on the pedal at its lowest point.
Your leg should be fully extended and your hips should remain horizontal.
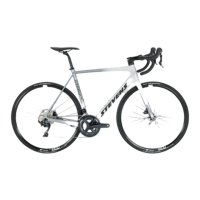
To adjust the saddle height loosen the quick-release lever (see chapter “How
to Use Quick-Releases and Thru Axles”) or the binder bolt of the seat post
clamp at the top of the seat tube. The latter requires suitable tools, e.g. an Allen
key, with which you turn the bolt two to three turns anticlockwise.
Rule of thumb to determine the suitable saddle height:
Inside leg (barefoot) x 0.885
Now you can perform the vertical adjustment of the seat post. Be sure not to
pull out the seat post too far – the mark on the seat post (max., min., stop or the
like) should always remain within the seat tube – and to grease the surface of an
aluminium or titanium seat post that is inserted into a seat tube made of alumin-
ium, titanium or steel. Do not grease carbon seat posts and/or carbon seat tubes
in the clamping area! Use special carbon assembly paste instead.
Align the saddle with the frame by using the saddle nose and the bottom
bracket or top tube as a reference point.
Danger:
When riding steep
downhill courses on
your mountain bike, a
lower saddle height is
often better for some
riding manoeuvres.
This allows a better
control of your STEVENS
bicycle.
Caution:
If the seat post wobbles
in the seat tube or does
not slide easily, ask your
STEVENS dealer for
advice. Do not use brute
force!
Note:
Children and adoles-
cents need to have the
saddle height and the
position of saddle and
handlebars checked
at least every three
months!