S - 62 | English English | S - 63
If you have derailleur gears, you should shift the chain to the medium or small
chainring or to the smallest sprocket before removing the wheel. This shifts the
rear derailleur right to the outside where it does not interfere with the removal of
the wheel and the chain tension is not too high.
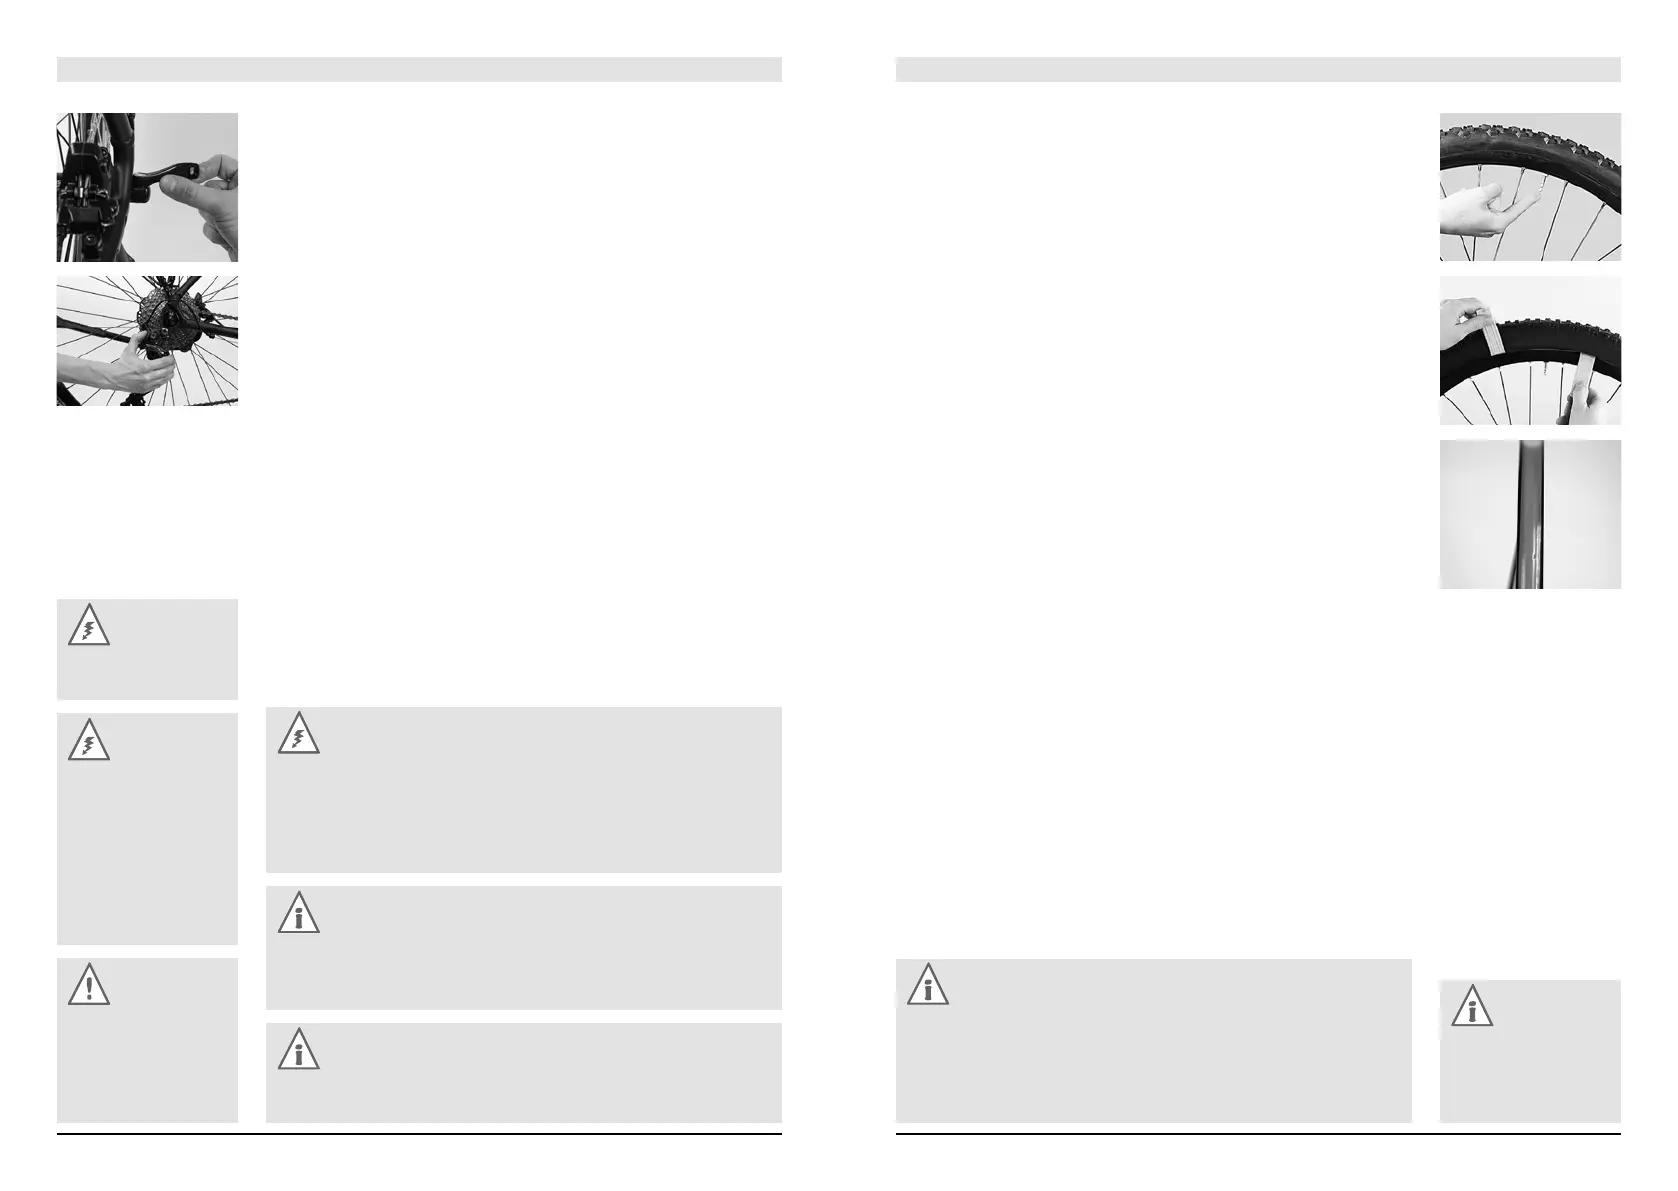
• Open the hex nut or the quick-release, as described in the chapter “Wheel
Fastening with Quick-Releases”. If you cannot remove the wheel after
releasing the lever or nut, it is probably still being held in place by drop-out
catches. These are either tabs at the drop-outs or metal securing devices
reaching into a recess of the drop-out. In these cases, just release the
quick-release adjusting nut by a few turns and slip the wheel past the catch.
• You will find it easier to remove the rear wheel, if you pull the rear derailleur
a little rearwards.
• Lift the STEVENS bicycle off the ground and give the wheel a gentle tap with
your hand so that it drops out.
Danger:
Do not file off the drop-
out catches!
Danger:
Never ride a STEVENS
bicycle without having
checked first whether
the wheels are securely
fastened! A wheel that
comes loose during the
ride will throw you off
your bicycle!
Caution:
Do not activate the
brake lever after remov-
ing a wheel when your
STEVENS bicycle has
hydraulic brakes.
Danger:
Make sure the levers of both quick-releases are always on the side
opposite the chain drive. This will help you to avoid mounting the front
wheel the wrong way round. In the case of disc brakes we recommend for
a reliable clamping that you position the quick-release on the side of the
chain drive.
Note:
Before removing a wheel read the chapters “Mounting Wheels” and “How
to Use Quick-Releases and Thru Axles”. If you are in doubt or if you have
any questions, contact your STEVENS dealer.
Note:
Be sure to lock the wheels fastened with quick-releases together with the
frame to an immovable object when parking the STEVENS bicycle.
Note:
If you have a puncture while riding, do not pull out the inner tube com-
pletely. Leave the valve sticking in the rim and first look for the hole where
the air escapes. Pump up the inner tube. When you have found the hole,
look for the corresponding place on the tyre and examine it. Often the
foreign body sticks in the tyre.
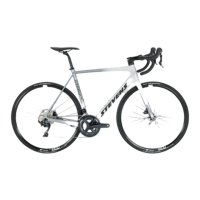
Tyre Removal
• Screw the valve cap and the fastening nut off the valve and deflate the tyre
completely.
• Press the tyre over its entire circumference from the sides towards the centre
of the rim. This will ease the removal.
• Apply the tyre lever to one bead of the tyre opposite the valve and lever the tyre
out of the rim in this area. Hold the tyre lever tight in its position.
• Slip the second tyre lever between rim and tyre at a point about 10 centimetres
beyond the first one and lever the next portion of the bead over the edge of
the rim.
• After levering a part of the tyre bead over the edge of the rim you should
normally be able to slip off the whole tyre on one side by moving the tyre lever
around the whole circumference.
• Now you can pull out the inner tube. Make sure that the valve does not get
caught in the rim, as this can damage the inner tube.
• Inspect the inflated tube and look for the puncture. A bucket of water may
help you.
• Repair the puncture according to the operating instructions of the repair kit
manufacturer.
• After having removed the tyre, you should check the rim tape. The tape should
lie squarely in the base of the rim covering all spoke ends and should neither
be torn nor brittle.
In the case of double wall rims the tape must cover the entire rim base, but it
should not be so broad as to stand up along the inside edges of the rim trough.
For this type of rim only use rim tapes made of fabric or durable plastic. In case
you are in doubt about the rim tape, contact your STEVENS dealer.
Note:
If your bicycle has thru
axles, observe the oper-
ating instructions of the
fork manufacturer.