S - 28 | English English | S - 29
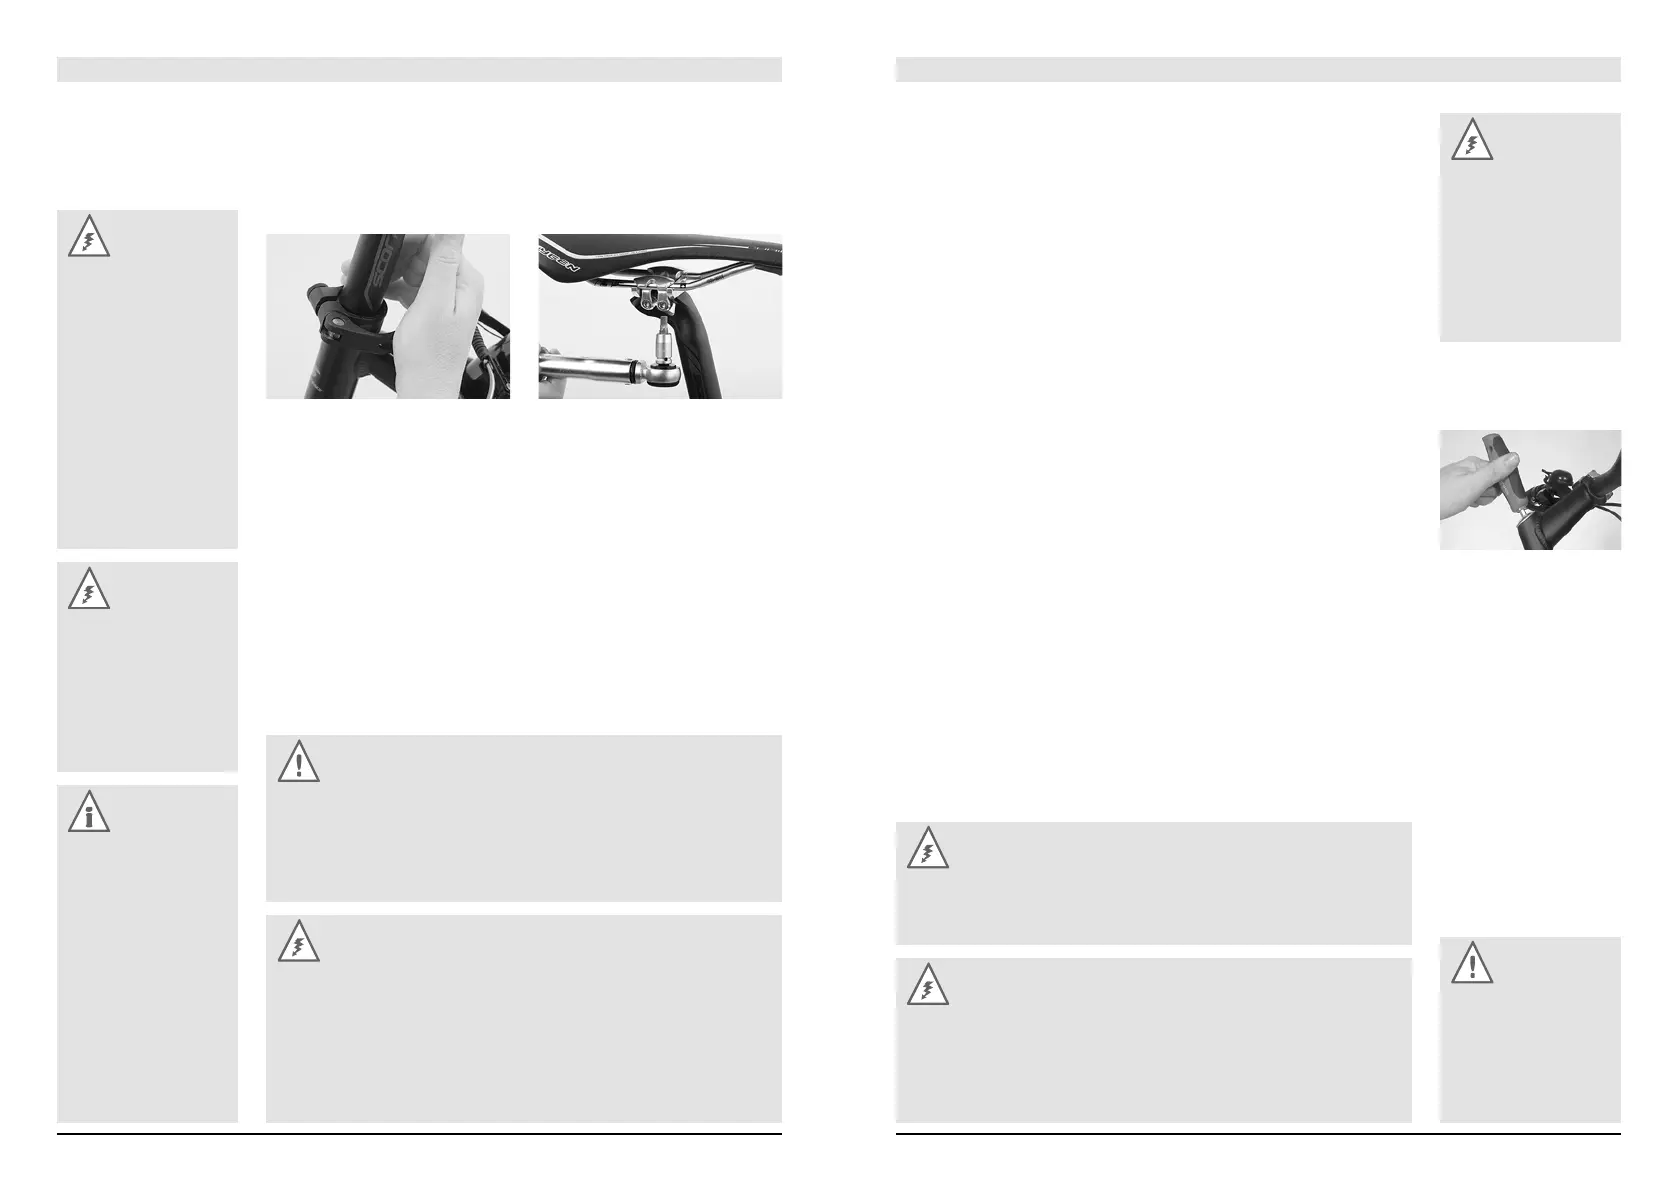
Clamp the seat post until it is tight by closing the quick-release, as described
in the chapter “How to Use Quick-Releases and Thru Axles” or by turning the
seat post binder bolts clockwise in half turns. You should not need using great
manual forces to achieve a sufficient clamping effect. Otherwise the seat post
does not match the frame.
Always check between the steps that the seat post is sufficiently tight by hold-
ing the saddle at both ends with your hands and by trying to twist it. If it does,
gently retighten the binder bolt by half a turn and check again.
Is the leg extension correct when you check again? Check by moving your foot
and pedal to the lowest point. When the ball of your foot is exactly above the pedal
centre in the ideal pedalling position, your knee should be slightly bent. If it is,
you have adjusted the saddle height correctly. Check whether you can still reach
the ground safely while sitting on the saddle. If you cannot, you should lower the
saddle a little, at least to begin with.
Danger:
Under no circumstances
grease the seat tube of
a carbon frame. If you
mount a carbon seat
post, do not put any
grease on it, even if the
frame is made of metal.
Once greased, carbon
components may never
again ensure reliable
clamping! Use special
carbon assembly paste
instead.
Danger:
Make sure not to
overtighten the binder
bolt of the seat post
clamp. Otherwise you
may damage the seat
post or the frame. Risk
of accident!
Note:
In the case of height-ad-
justable seat posts, such
as those from RockShox
and Kind Shock, the
height can be adjusted
by pressing a button
on the handlebar. For
more information see
the chapter “Height-Ad-
justable Seat Post/
Dropper Post”. Also read
the instructions of the
manufacturer.
Caution:
Tighten carefully by approaching the prescribed maximum torque value
in small steps (0.5 Nm increments) and check in between the proper fit of
the component. You find them on the components themselves and/or in the
chapter “Recommended Torque Settings”. Do not exceed the maximum
torque value indicated by the manufacturer!
Danger:
Never ride your bike with the seat post drawn out beyond the limit, maxi-
mum, or stop mark! The seat post might break or cause severe damage to
the frame. In the case of frames with seat tubes that extend beyond the top
of the frame’s top tube the seat post should be inserted into the seat tube at
least below the bottom of the top tube and below the top of the seat stays! If
seat post and frame require different minimum insertion depths, you should
opt for the deeper insertion depth.
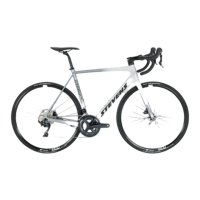
Adjusting the Height of the Handlebars
The height of the handlebar compared to the saddle and the distance between
saddle and handlebar determine how much your upper body will be inclined for-
ward. Lowering the handlebar gives you a streamlined position and brings more
weight to bear on the front wheel. However, it also entails an extremely forward
leaning posture which is tiring and less comfortable, because it increases the
strain on your wrists, arms, back, upper body and neck.
There are three different stem systems that allow vertical adjustment of the
handlebar, i.e. the conventional, the adjustable and the Aheadset
®
-stem.
These systems require special knowledge. In this regard, the descriptions here-
after may be incomplete. If you are in doubt or if you have any questions, contact
your STEVENS dealer.
Conventional Stems
Handlebars with conventional stems allow limited vertical adjustment. This is
done by moving the stem up or down inside the fork steerer tube.
For more information see the chapter “Adjusting the Height of the Handle-
bars” as well as the instructions of the component manufacturers.
Danger:
Never ride a STEVENS bicycle with a stem that has been drawn out beyond
the mark for the maximum permissible height! Check all bolted connec-
tions and test your brakes before you set off!
Danger:
The bolted connections of stem and handlebar have to be tightened to
the prescribed torque values. If you disregard the prescribed values, the
handlebar or stem may come loose or break. Use a torque wrench and do
not exceed the maximum torque values! You find them on the components
themselves and/or in the chapter “Recommended Torque Settings”.
Caution:
Never try to unscrew the
top race of the headset
when you only want to
adjust the stem, as you
will otherwise alter the
bearing play!
Danger:
The stem is one of the
load bearing parts of
your STEVENS bicycle.
Changes to it can impair
your safety. If you are in
doubt or if you have any
questions, contact your
STEVENS dealer!