S - 34 | English English | S - 35
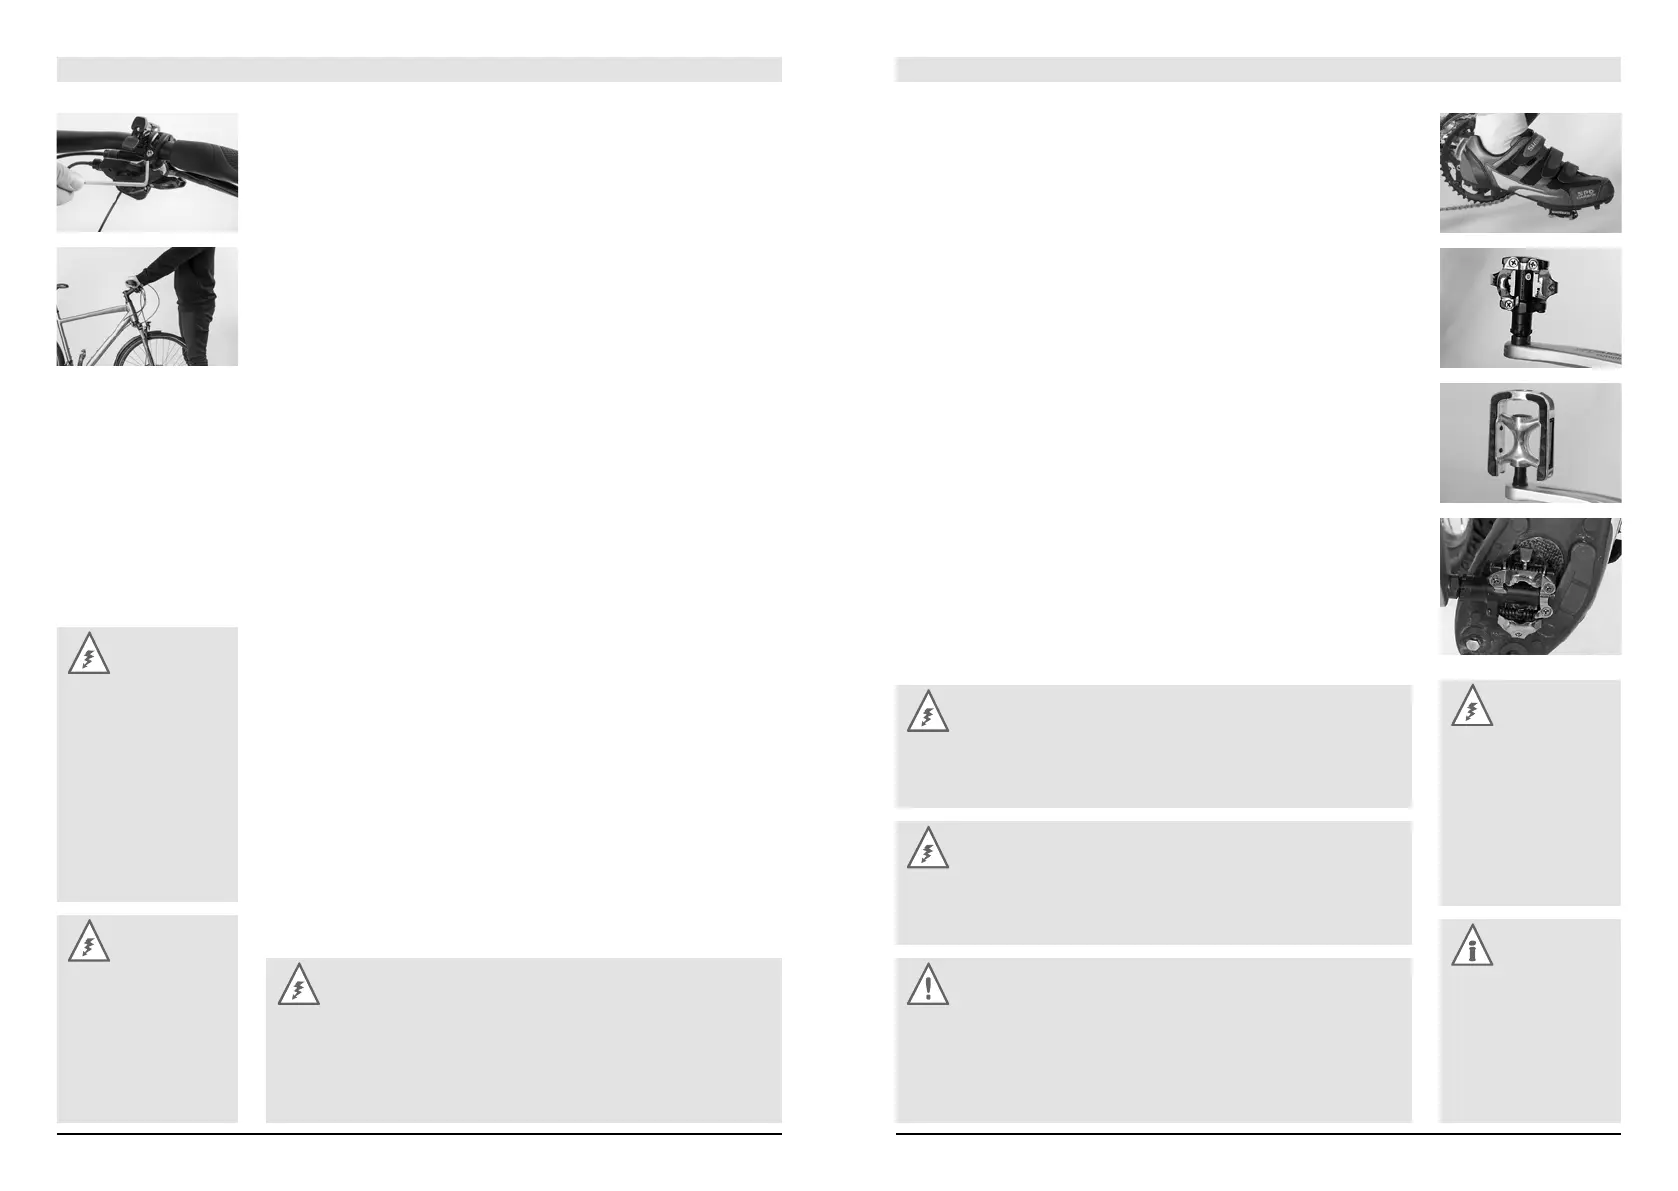
Try rotating the handlebar once clamped in the stem and tighten the bolt a
little more, if necessary. Use a torque wrench and do not exceed the maximum
torque values! You find them on the components themselves and/or in the chapter
“Recommended Torque Settings”.
After adjusting the handlebars you need to adjust the brake levers and shifters.
Release the Allen bolt at either mount. Turn the levers relative to the handlebars.
Sit in the saddle and place your fingers on the brake levers.
Check whether the back of your hand forms a straight line with the line of your
forearm. Retighten the mounts with a torque wrench and do a twist test!
Bar ends and multi position handlebars give you additional ways of gripping
the handlebars. Bar ends are usually fixed in a position that gives the rider a com-
fortable grip when pedalling out of the saddle, i.e. almost parallel to the ground or
tilted slightly upwards (by about 25°).
Release the bolts, which are usually located on the underside of the bar ends,
by one to two complete turns. Turn the bar ends to the desired position making
sure the angle is the same on both sides. Retighten the bolts to the required torque
value. Check whether the bar ends are firmly fixed by trying to twist them out of
position.
Danger:
Be aware that the dis-
tance you need to stop
your bicycle increases,
when you are riding
with your hands on bar
ends or on multi position
handlebars. The brake
levers are not in all grip
positions within easy
reach.
Danger:
Never fix bar ends in
vertical position or with
their ends pointing
rearwards as this would
increase the risk of
injury in the event of an
accident.
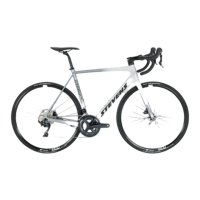
Danger:
Make sure that the
fastening bolts of the
cleats are properly
tightened. If they are
loose, disengaging your
shoe from the pedal is
nearly impossible. Risk
of accident!
Note:
Read the operating
instructions of the pedal
and shoe manufactur-
ers carefully. In case
of inquiries, ask your
STEVENS dealer for
advice.
Danger:
Tighten the bolts at the stem until the clamping slots between the stem
body and the faceplate are parallel and identical in width in the top and in
the bottom. Tighten the bolts evenly and in a cross pattern, i.e. alternately
and gradually, by using a torque wrench to the lower value of the recom-
mended torque settings.
The Pedal Systems
Not all shoes are suited for cycling. Shoes used for cycling should have a stiff
sole and provide a firm support for your feet. If the soles are too soft, the pedals
can press through and cause foot pain. The force transmission is less efficient. The
sole should be not too broad near the heels, as the rear stays will otherwise get
in the way of your pedalling. This will prevent your feet from assuming a natural
position and may cause knee pain in the long run.
Different Systems at a Glance – How They Work
We recommend pedals that provide a lock and release mechanism for your
shoe, known as step-in pedals. The firm connection between shoe and pedal pre-
vents your feet from slipping off when pedalling fast or when riding over rough
ground. Besides this, it enables you not only to push but also to pull the pedals,
which makes your pedalling more fluent. A further advantage is that the ball of
your big toe comes to rest biomechanically just at the right place on the pedal axle
and that you do not block unintentionally the front wheel with the tips of your feet
during steering.
With step-in pedals a special cycling shoe forms a lock-in connection with the
pedal, similar to a ski binding.
Danger:
Taking up the pedals, engaging the shoes and disengaging them by turning
the heel outward should first be practised while stationary. Later you can
refine your technique in a place clear of traffic.
Danger:
Only use clipless pedals allowing you to engage and disengage smoothly.
A defective pedal or a badly worn cleat can make the shoe disengage from
the pedal. Risk of accident!
Caution:
Some mountain bike pedals, also referred to as platform pedals, are
designed for maximum grip of the shoes, e.g. for dirtbiking and freeriding.
For this reason they have sharp edges and/or bolted pins. As they enhance
the risk of injuries during riding, you should wear protective clothing, e.g.
knee and shin guards.