S - 36 | English English | S - 37
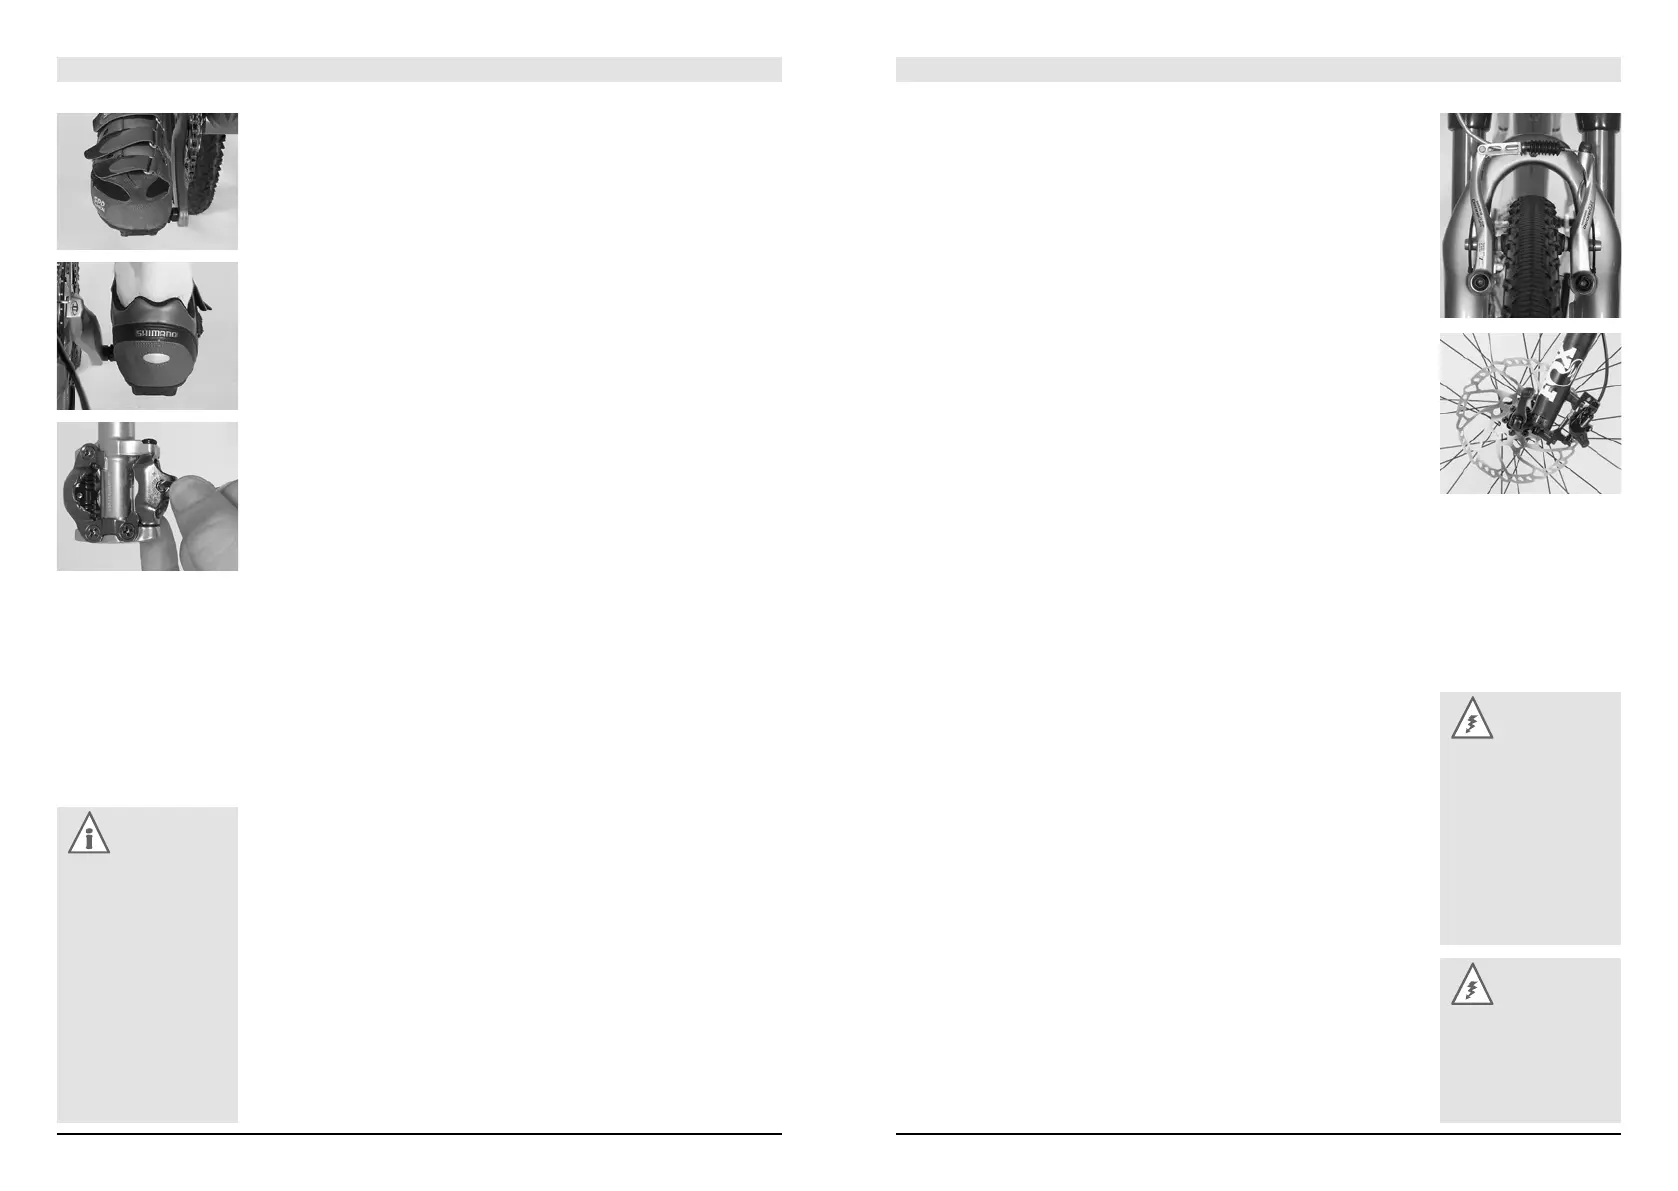
To engage with the pedal is to turn it to the horizontal using the tip of the cleat
(the plate on the sole of the shoe) and then rest your foot on it. Most step-in pedals
are equipped with a double-sided lock-in mechanism, so that you can step on the
pedal with either face up. The shoe engages with the pedal with a click which
you will hear and feel clearly. With all commercially available systems the shoe is
disengaged from the pedal by twisting the heel outward.
Lean against a wall or ask someone to hold you when you try to engage and
disengage the shoe from the pedal.
Functional differences between the pedal systems concern the shape of the
cleat, the release angle and the rigidity of the connection. Cyclists predisposed
to knee trouble should choose a pedal system that has some “float”, so that the
heel can move sideways a little while the shoe is engaged with the pedal. Some
step-in pedals have cleats embedded into the sole which is a great advantage, as
it ensures stable walking.
Adjustment and Maintenance
The various pedal systems differ sometimes significantly in their technical
design. Nevertheless, there are some general rules for adjustment which apply
to all of them.
• The cleat has to be fastened to the shoe in such a position that the ball of the
foot comes to rest on the pedal axle.
• Your feet should assume a natural position when pedalling. For most people
this means that the heels will point inward a little. Make sure that the fastening
bolts are properly tightened, as you will find it almost impossible to disengage
your shoe from a loose plate!
• Adjust the release force according to your needs. It is advisable to start with an
inferior preload. Turn the small Allen bolt and check the preload by engaging
and disengaging the shoe from the pedal.
• Exposed springs and other components that attract dirt have to be cleaned and
regreased regularly.
• Squeaking or creaking cleats can often be silenced by applying a little grease
to the point of contact between cleat and pedal. These noises may also be
signs of wear.
• Check the cleats regularly for wear, especially in case of plastic cleats.
• If your shoe wobbles on the pedal, the cleat or the sole of your shoes might
be worn.
Note:
Before mounting the
pedals, check the
marking on the pedal
axles first. “R” stands
for right pedal and “L”
for left pedal. Note that
the left pedal has a
left-handed thread that
has to be tightened
contrary to the direction
you are accustomed to,
i.e. anticlockwise.
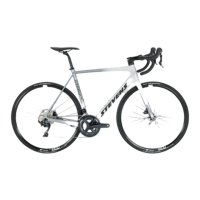
The Brake System
Brakes are used for adjusting one’s speed to the surrounding terrain and traf-
fic. In an emergency situation, the brakes must bring the STEVENS bicycle to a
halt as quickly as possible. In the event of such emergency braking, the rider’s
weight shifts forward abruptly, thus reducing the load on the rear wheel. On a
grippy surface it is therefore more likely that the rear wheel will come up and
that the STEVENS bicycle will overturn than that the tyres will lose grip. Such a
problem becomes particularly acute when riding downhill. Therefore, in case of an
emergency braking situation you must try to shift your weight back and down as
far as possible.
Actuate both brakes simultaneously and bear in mind that due to the weight
shift the front brakes can achieve a higher braking force.
With rim brakes long lasting braking or permanent dragging of the brake
pads can overheat the rim. This can affect the inner tube negatively or cause the
tyre to slip on the inner rim. Sudden loss of pressure while cycling can result in a
serious accident.
With disc brakes prolonged braking or permanent dragging of brake pads can
overheat the brake system. This can result in a loss of braking force, even to the
point of total brake failure, provoking serious accidents.
Therefore, check your riding manners and make it a habit to brake hard and
then to open the brake again, whenever the road surface and the situation allows
it. It is better to stop for a moment and let the rim cool down with the brake lever
released rather than to risk anything.
Functioning and Wear
Actuating the hand lever on the handlebar causes a stationary brake pad to
be pressed against a rotating braking surface generating friction. The resulting
friction slows down the wheel. The rate of deceleration is not only determined by
the force with which the brake pad is pressed against the braking surface, but
also to a decisive degree by the coefficient of friction, which depends on the two
materials that are rubbed against each other.
When water, dirt or oil gets in contact with one of the engaging surfaces, this
changes the coefficient of friction. This is why brakes respond at a slight delay and
less powerfully in wet weather. This applies in particular to rim brakes.
In order to maintain their effectiveness brakes need to be checked and read-
justed from time to time.
Danger:
Be careful while getting
used to the brakes.
Practise emergency
stops in a place clear
of traffic until you are
comfortable controlling
your STEVENS bicycle.
This can save you from
having accidents.
Danger:
Ensure that braking
surfaces and brake
pads are absolutely free
of wax, grease and oil.
Risk of accident!