S - 58 | English English | S - 59
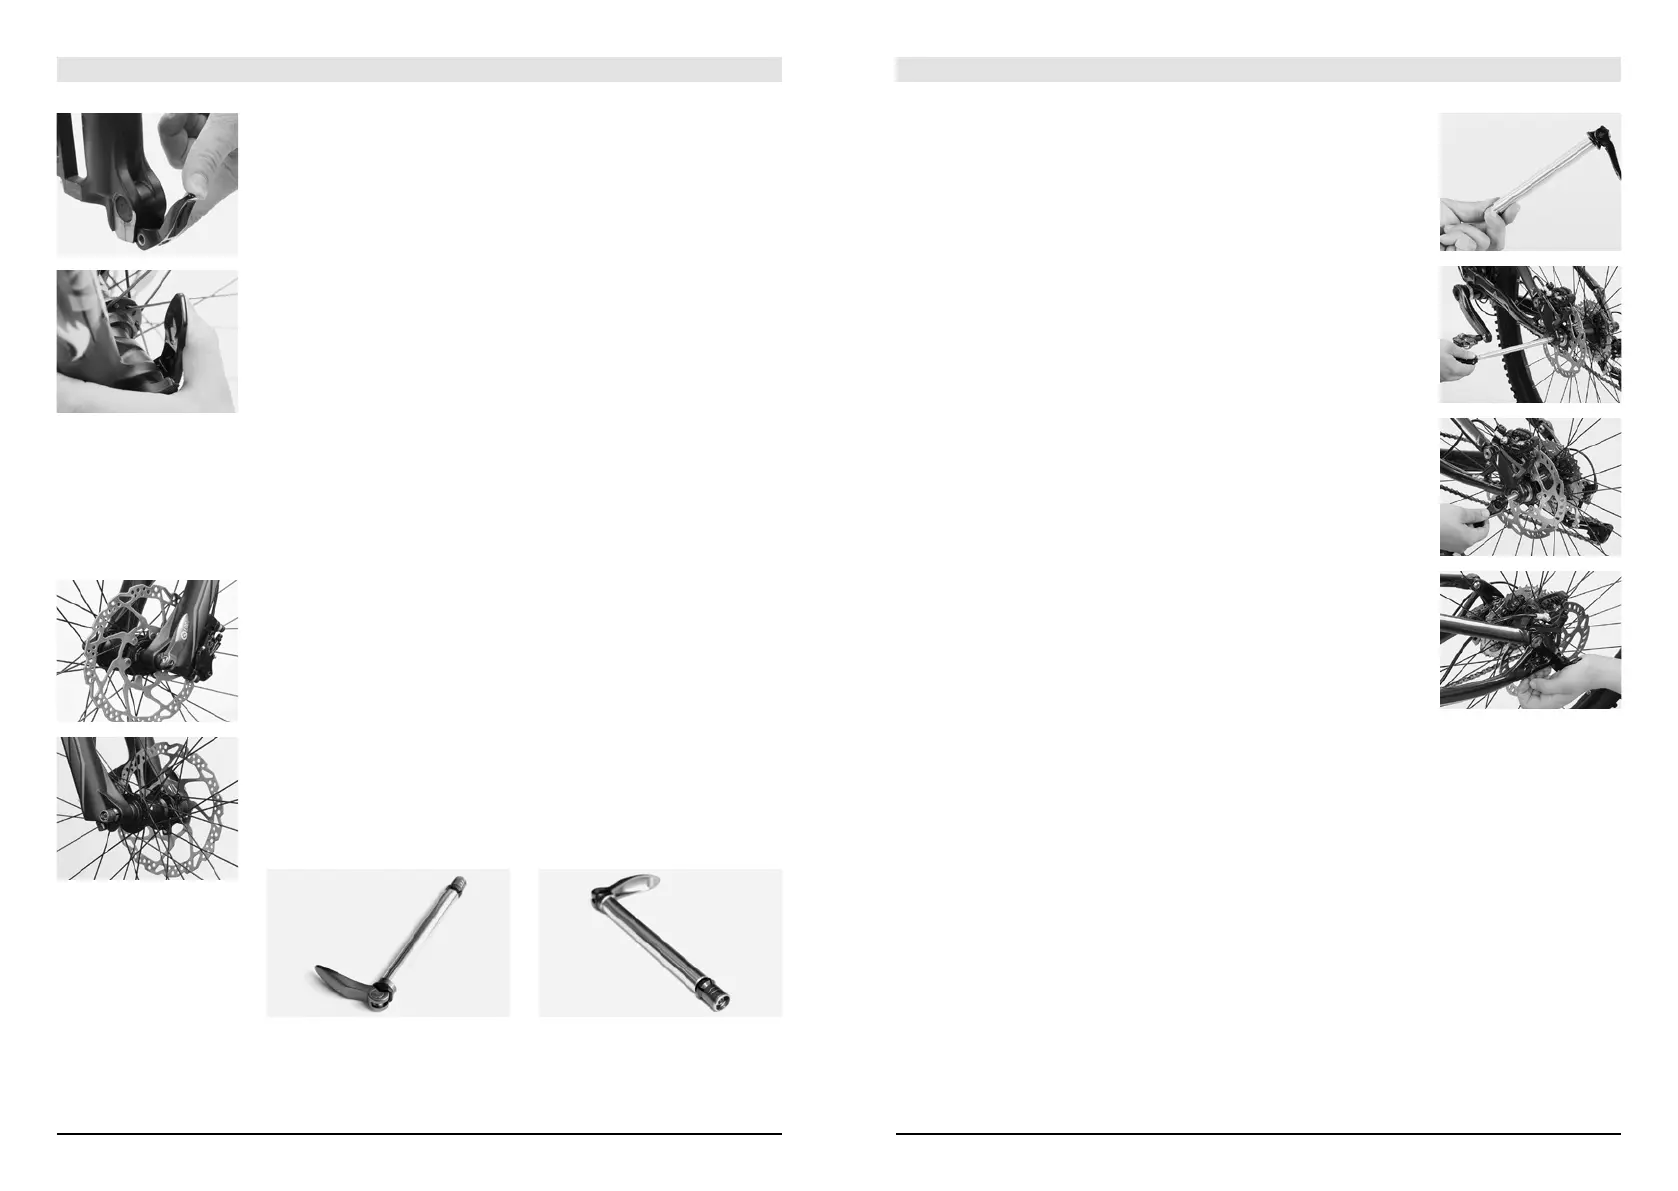
Fox 20 mm
If you have a Fox 20mm system, open both quick-release levers in the bottom
area of both fork legs to mount the front wheel. Put the front wheel into the fork
and mount the rotor at the same time in the brake calliper.
Bring the front wheel into the right position between the drop-outs and slide
the axle from the right side through the drop-out and the hub. Unfold the lever
from the axle. As soon as the axle thread engages with the thread of the right fork
leg, close it by turning it clockwise.
During the first rotations you should be able to rotate the thru axle easily.
Tighten the axle until it is hand-tight. Re-fold the lever of the thru axle. Close
both quick-release levers. From the start of the closing movement up to about
the first half of its travel the levers should move very easily without clamping the
wheel, whereas over the second half of its travel the force you need to move it
should increase considerably. Towards the end of its travel you should clearly feel
resistance.
Use, if necessary, the palm of your hand while your fingers pull on an immov-
able part, such as the fork leg, but not on a spoke or the rotor.
SR SUNTOUR QLOCK System 15 mm
If your bike is equipped with an SR SUNTOUR QLOCK system 15 mm, put the
wheel into the fork and mount the rotor, if available, in the brake calliper. Bring the
wheel into the right position between the drop-outs.
Open the quick-release lever of the SR SUNTOUR thru axle fully. Turn the coun-
ter nut on the thru axle anticlockwise until the expander releases. Slide the axle
with open QLOCK quick-release lever and released expander from the right side
through the drop-out and the hub until the thru axle engages with a clear “click”.
Now turn the quick-release lever forcefully clockwise until the axle is hand-tight.
Finish by closing the quick-release lever like a usual quick-release lever. Make
sure the quick-release lever does not stand out to the front or to the side.
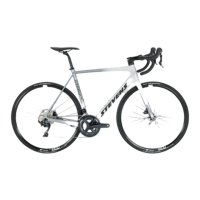
Thru Axles on the Rear Frame
Some mountain bikes are equipped with a threaded thru-axle.
The system typically consists of two operative elements:
1. There is a nut on the right side which is often integrated into the frame.
2. On the left side there is either a clamping lever which can be folded, a rigid
lever for tightening or a tool mount hole, e.g. for an Allen key, 5mm.
Mounting Wheels
Slide the rear wheel into the rear frame, mount the rotor at the same time into
the brake calliper and guide the chain over the outmost sprocket of the cassette.
Make sure that in the area of the rear wheel the chain runs over the sprockets and
over both pulleys of the rear derailleur.
Bring the rear wheel into the right position between the drop-outs and slide
the thru axle with the quick-release lever open from the left side through the
drop-out and the hub. When the axle thread engages with the nut thread, turn the
axle clockwise. During the first rotations you should be able to rotate the thru axle
easily. Tighten the axle slightly.
Close the possibly available quick-release lever like a usual quick-release lever.
When you start closing the lever you should feel virtually no resistance with your
hand, during the second half of the way the resistance you feel should increase
significantly and towards the end even more strength is required to close the lever.
In case you do not succeed in closing the lever fully, re-open it and turn the
axle a little anticlockwise. Try closing the quick-release lever once again. Use the
palm of your hand while your fingers pull on the rear frame, but never on a spoke
or the rotor.
In its end position the quick-release lever should be tight so that it can no
longer be turned. Make sure the quick-release lever does not stand out to the rear
or to the side. It is recommended that it is closed in parallel to a frame tube. If
necessary, modify the nut to change the position.
In the case of rigid levers or thru axles with a tool mount hold the axle tight.
Observe the torque values, if specified.