6.1.3 Requirements for Installation Details
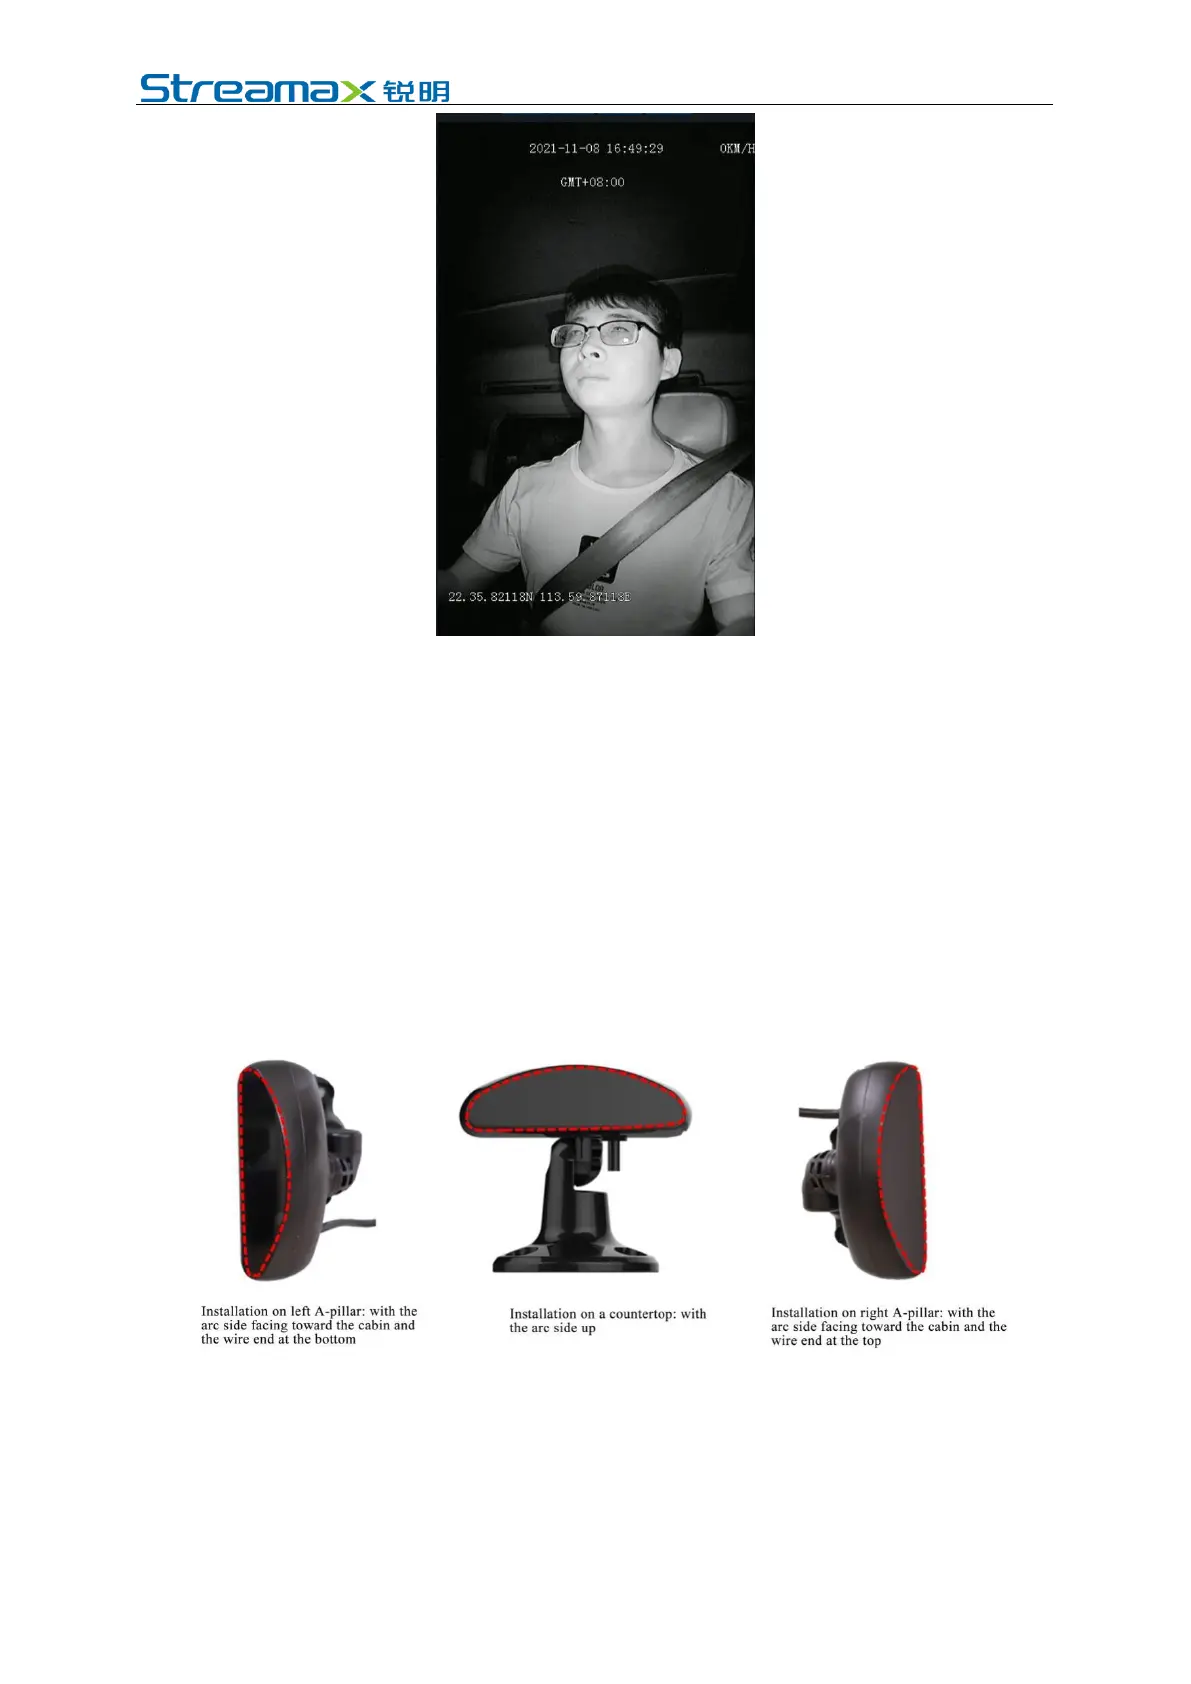
1. If A-pillar installation (3mm lens, crescent CA29M, with side mounting
bracket) or A-pillar side glass mounting bracket installation (3mm lens,
crescent CA29M, with glass mounting bracket) is adopted, the labeling surface
of DMS camera must face toward the A-pillar (with the arc side facing toward
the driver).
2. In the event of installation on countertop (4mm lens, crescent CA29M, with
vertical mounting bracket), the labeling surface of the DMS camera must face
downward (with the arc side facing upward).
3. After angle adjustment and calibration, the protective film on the DMS camera
must be removed, and the DMS camera must be locked with a socket head
wrench to avoid shaking.
6.1.4 Installation Steps
6.1.4.1 Installation steps of A-pillar CA29M camera
1. Energize the device, connect the device through the APP, and enter the real-
time preview screen. After that, check whether the driver is upright in the
screen when the device is installed at the target position and the camera label
faces the direction of the A-pillar (with the arc surface facing the driver).