12 www.stryker.com
EN 0702-002-700 Rev-J
Instructions
To Dock Rover for Waste Disposal (see figure 6)
1. Place the rover in front of the docking station.
2. Ensure the power switch on the docking station is in the ON position and
illuminated.
NOTE: Before docking the rover, always allow the docker to warm up for at
least 60 seconds after applying power to the docker.
3. Ensure the Stryker-approved detergent bottle is connected, has enough
detergent to perform a wash cycle, and the end of the inlet tube is located
at the bottom of the bottle.
Cleaning
CAUTION: DO NOT use glutaraldehyde or similar chemical cleaners on the
rover or docker.
1. Wipe the external surfaces of the rover and/or docker with a soft cloth
dampened with a non-abrasive, hospital disinfectant.
2. Thoroughly wipe the infrared communication windows to ensure the rover
and docker can communicate and function properly.
3. Inspect the rover. See Periodic Maintenance.
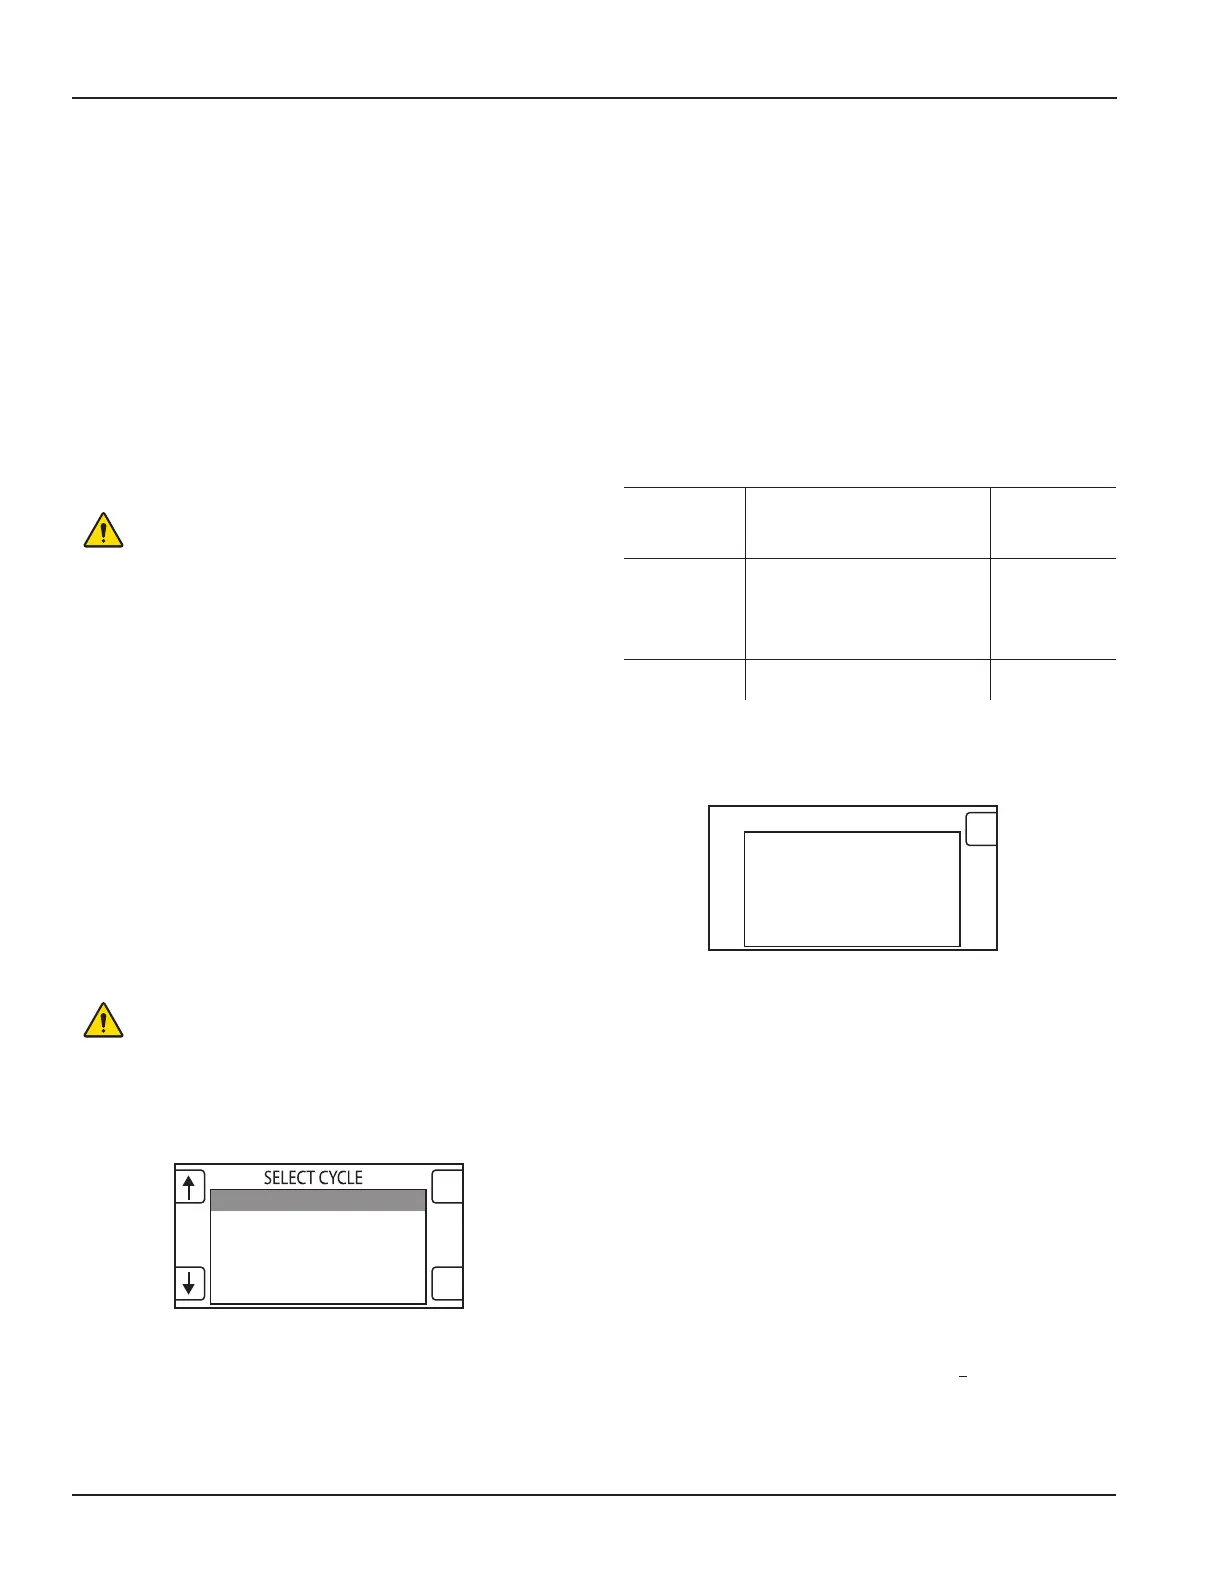
6. From the Select Cycle screen, push the buttons next to the arrow icons to
scroll and highlight the appropriate wash cycle. Push the button next to the
OK icon to select the highlighted cycle.
Wash Cycle Options
CYCLES DESCRIPTION TIME (approx.)
Wash Cycle drains the contents, applies
detergent to the interior walls of both
canisters, and rinses the detergent
with water.
5 minutes
Extended Wash Cycle drains the contents, applies
detergent to the interior walls of both
canisters, and rinses the detergent
with water. Three wash cycles occur
and five minutes of soak time occurs
between each cycle.
50 minutes
Quick Drain Cycle drains the contents of both
canisters.
2 minutes
7. After the cycle is complete, the Docking Complete screen will appear on
the control panel display (see figure 8). Push the button next to the OK icon
to detach the rover from the docking station. Pull the rover away from the
docking station.
EXTENDED WASH
WASH
QUICK DRAIN
ESC
OK
Figure 7 Select Cycle Screen
8. Clean the docker. See Cleaning section.
9. If the rover will be used again, use the rover handle to push and relocate
the rover. See To Prepare Rover for Collection. If the rover will no longer
be used, use the rover handle to push and relocate the rover to a storage
area.
NOTE: If this is the rover’s first docking procedure, ensure the rover is tested
and setup prior to use. See the Appendix section for instructions.
DOCKING COMPLETE
PRESS OK TO RELEASE
OK
Figure 8 Docking Complete Screen
To Prepare Rover for Relocation After Collection
1. Remove all disposable accessories, including suction nozzles, suction
tubing, manifolds, and smoke evacuator tubing with any attachments
from the rover. See the instructions for use supplied with the disposable
accessories for proper handling and disposal procedures.
NOTE: If raised, the IV pole will decrease its height automatically when power
is removed from the rover to ensure proper clearance during relocation.
2. Push the power switch to the OFF position.
3. Disconnect the rover from facility electrical power and remove the power
cord. Wrap the power cord around the cord bracket.
4. Using the knobs, close the canister access doors to conceal the contents.
5. Clean the rover. See Cleaning section.
6. Unlock the two rear casters of the rover.
7. If the canisters are full or the rover contains fluid waste and will not be used
within two hours, use the rover handle to push and relocate the rover to the
docking station. See To Dock Rover for Waste Disposal.
8. If the canisters are not full and the rover will be used within two hours, use
the rover handle to push and relocate the rover to the desired location. See
To Prepare Rover for Collection.
NOTE: The rover does not have to be connected to facility power when not
in use.
WARNING: ALWAYSremovethedisposableaccessoriesbefore
relocatingtherover.ALWAYSusethehandletoretaincontrolof
the rover during relocation.
NOTE: Liquid or prefill will remain inside each canister after a cycle is
complete. Prefill contains a specified amount of detergent for initiating the
break down of fluid waste collected during the rover’s next use.
NOTES:
• FromtheSelectCyclescreen,therovermaybedetachedbypushingthe
button next to the ESC icon. The “Wash” or “Extended Wash” cycles may
be stopped by pushing the button next to the ESC icon.
• Duringthefirstroverdockingprocedure,theinformationonthecontrolpanel
display may appear inconsistent. The procedure may also take a few more
minutes than specified in the Wash Cycle Options table. Both conditions are
normal and temporary.
• Ifaspecificwashcycleisnotselectedwithintenseconds,the“Wash”
cycle (see Wash Cycle Options) will be performed automatically.
WARNING: Keep hands out and away from the front of the
docking station when attaching the rover.
4. Push the rover toward the docking station and between the guides until the
rover and docking station attach automatically.
5. Verify the Select Cycle screen appears on the control panel display (see
figure 7).

 Loading...


