17
S
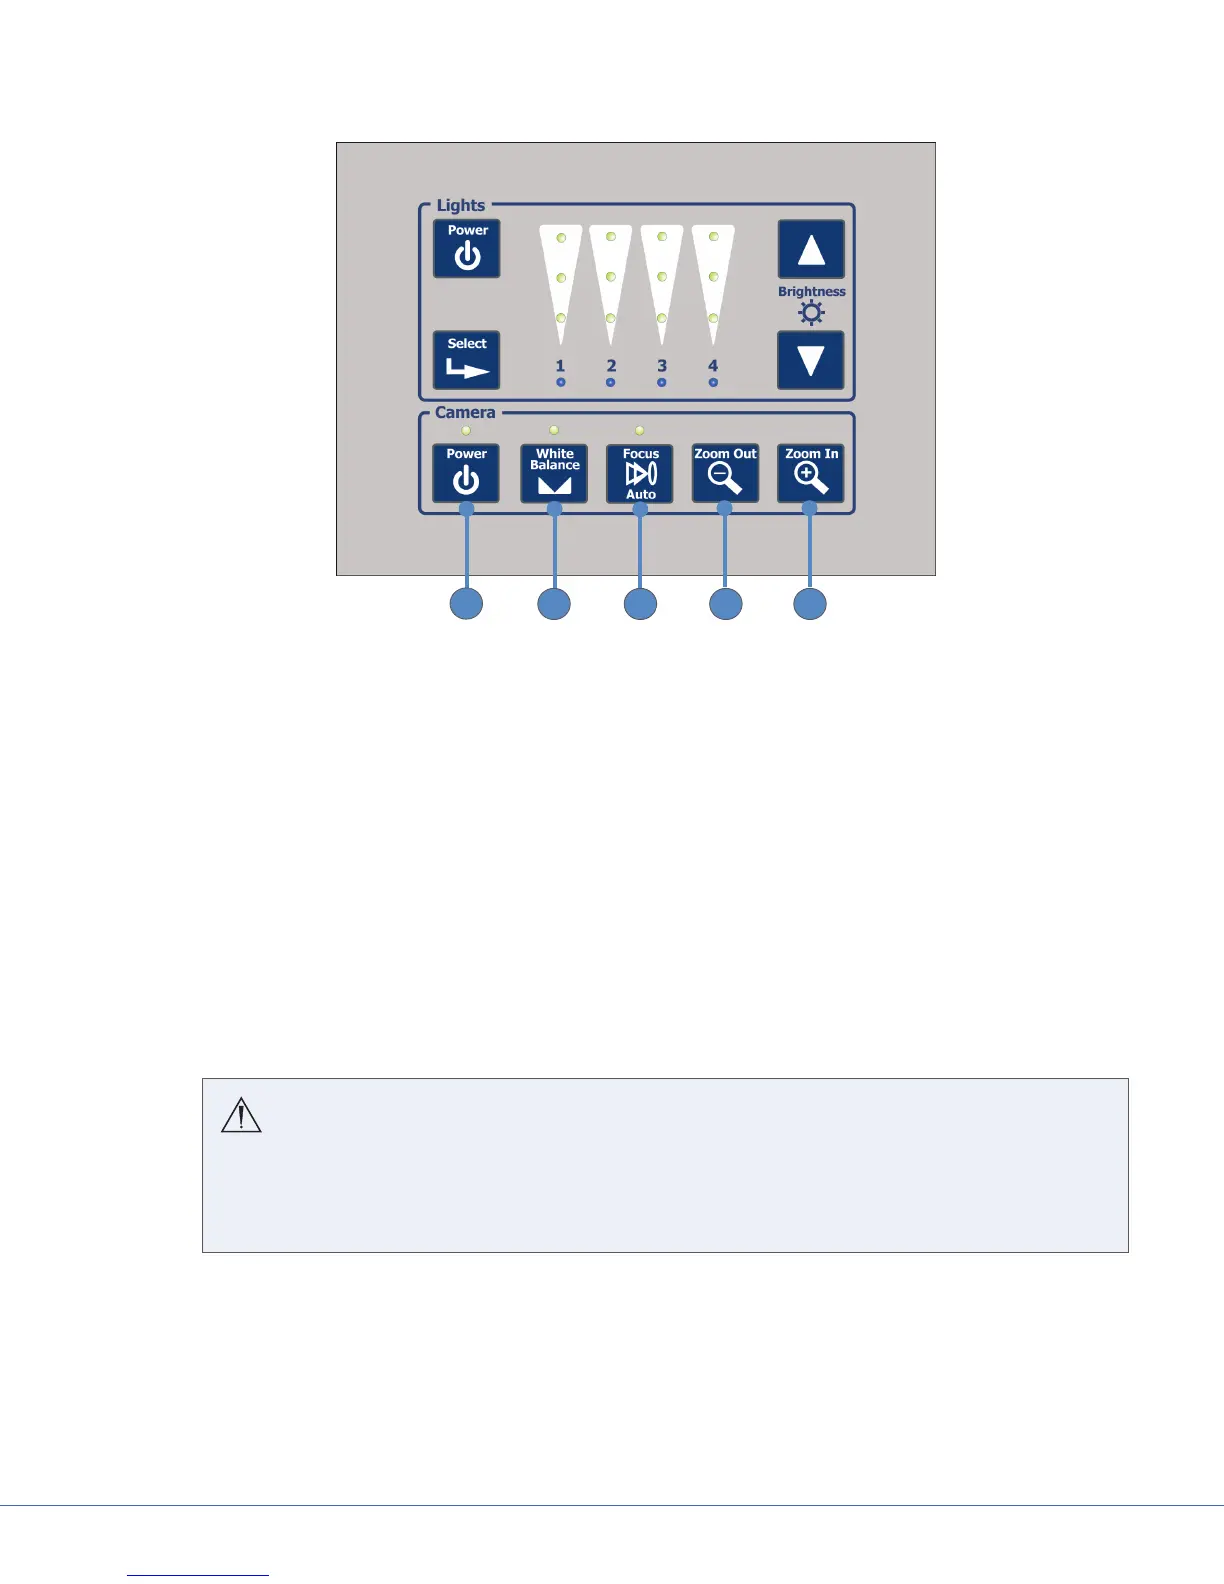
In-Light Camera Controls
1
2 43
5
1. Powers the camera on/o
2. Corrects color dierences caused by
varying light conditions
3. Turns auto focus on/o
4. Zooms out on the camera image
5. Zooms in on the camera image
Press the Power button to power the camera on or o.
The White Balance Button feature ensures the most accurate colors are captured by the camera and
displayed on a monitor. To adjust the White Balance of the In-Light Camera:
• Set the lights to the intensity you will be using.
• Power on the In-Light Camera and point it at a white surface, such as a piece of white paper.
Warning
Do not look directly at the white surface or the lights. Looking directly at the lights or at the
reection of the lights o the white surface can stimulate the retina and produce after-images.
Look only at the monitor image of the white surface.
• Look at the monitor that displays the camera image to make sure that the white surface lls the
entire monitor and that there is no visible glare from the white surface.
• Press the White Balance button. The LED above it turns on.
• Keep the camera pointed at the white surface until the LED turns o, which indicates that the
white balance adjustment is complete.
• You do not need to white balance again unless you want to use the camera in dierent light
settings.
 Loading...