Assembly & Installation
II. Assembling & Installing Carriages
For part numbers and descriptions of parts
referenced in this section, see parts assembly
manual, page 53.
1 Carry crosstube and hardware into bin.
2 Place outside crosstube end with drive wheel
next to bin sidewall and inside end with shaft in
center of bin.
For Fastir Plus units, begin here and continue
following instructions:
3 Bolt stationary carriage plate onto drive wheel
end of crosstube with hub pointing outward
using 3/8” x 1-3/4” bolts and 3/8” washers and
nuts. Figure 7, Figure 13.
Figure 7 - Placement of Stationary Outside Carriage on
Fastir Plus Unit
4 Slide stationary outside carriage onto crosstube
beside plate with reversing mechanism tab
pointing toward drive wheel. Figure 7, Figure 13.
For multiple-carriage regular Fastir units, begin
here and continue following instructions:
5 Slide satellite carriage(s) onto crosstube from
inside, shaft end with reversing mechanism tab
pointing toward drive wheel, as shown in Figure 7.
For single-carriage Fastir units, begin here:
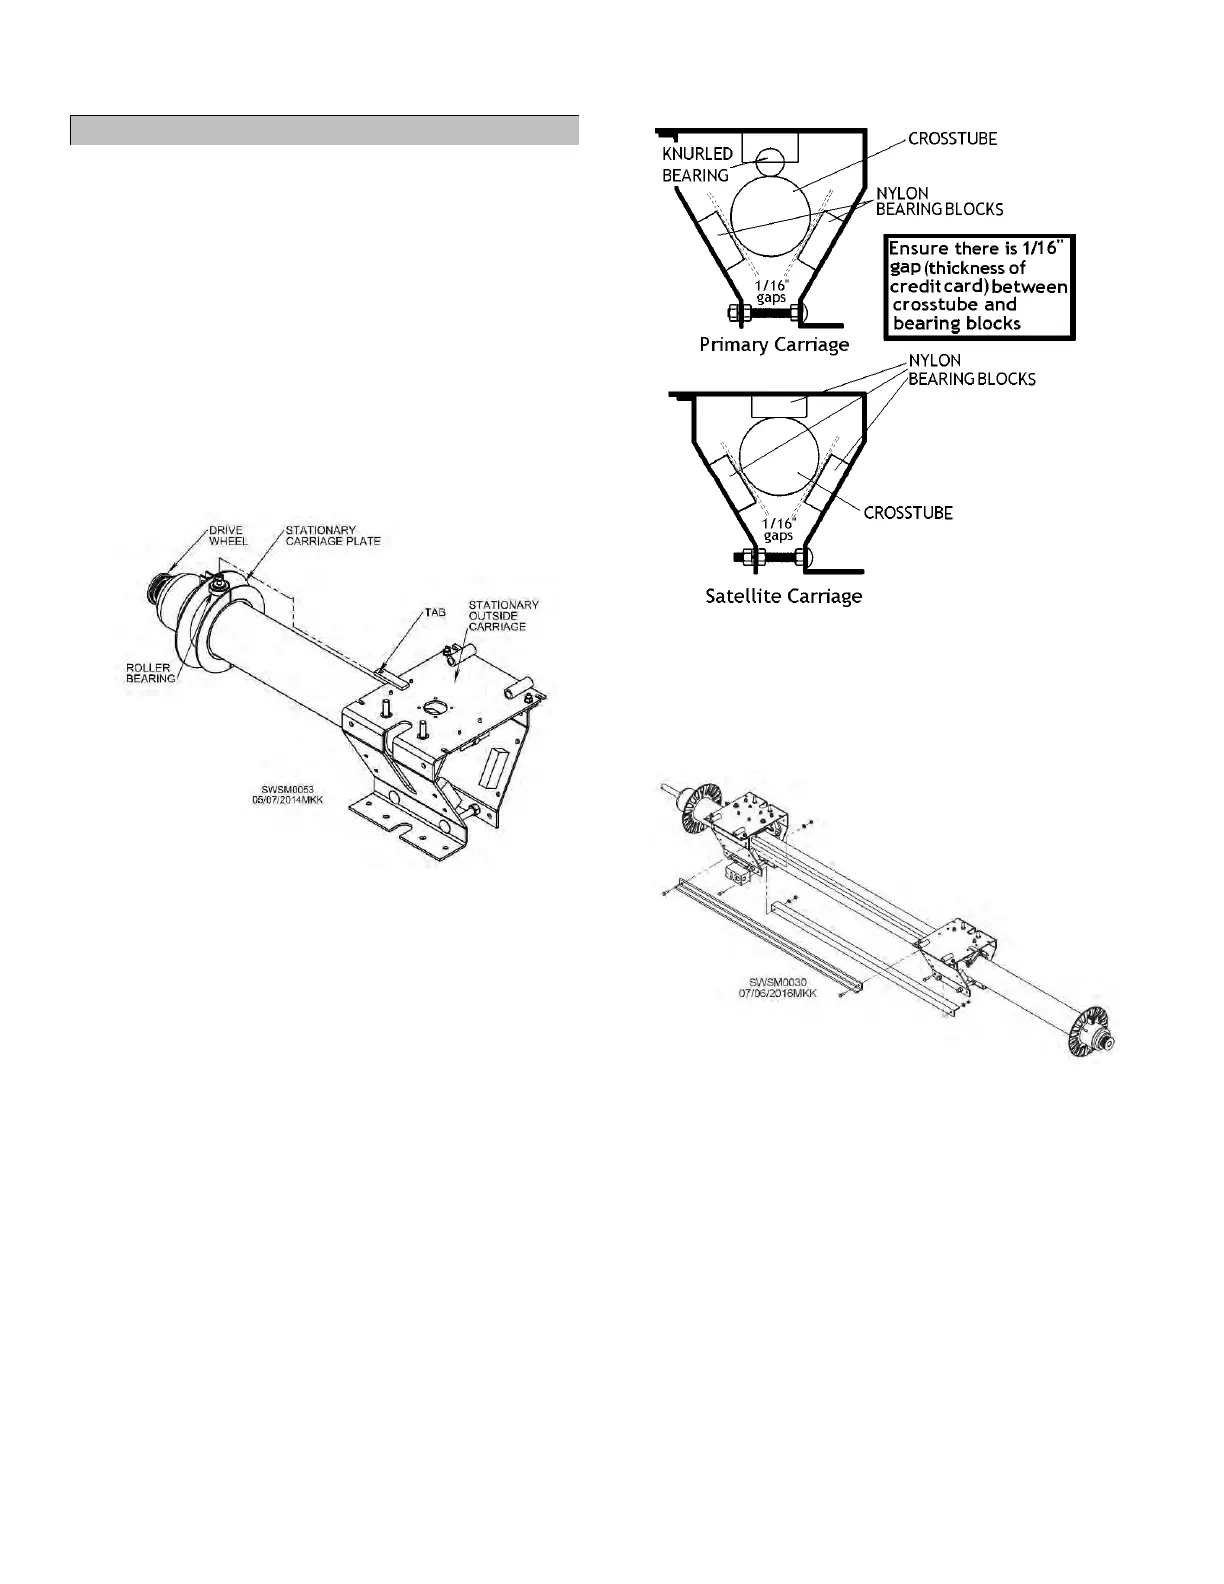
6 Slide primary carriage about 1 foot onto
crosstube from inside, shaft end. Knurled
bearing should be on top and slot for down
auger on front of crosstube as shown in Figure
7, Figure 8.
7 Ensure 1/16” gaps (approximately the thickness
of a credit card) exist between crosstube and
bearing blocks. Figure 8.
Note: If necessary, adjustments may be made
using 3/4” wrench on bottom carriage
bolts. Do not overtighten carriages.
Figure 8 - Side View of Primary and Satellite Carriages
8 Ensure correct spacing between carriages exists
by comparing hole-to-hole length on installed tie
bar with tie bar specifications in drawings and
tables on pages 15-18.
Figure 9 - Back and Top View of Fastir Tie Bar Installation
9 Bolt tie bar(s) between carriages on sides
without down auger slots as shown. Use 5/16” x
1” bolts pointing out and 5/16” lockwashers and
nuts and tighten using 1/2” wrench. Figure 9,
Figure 12, Figure 13.
9.1 Note: Single-carriage units do not require tie
bars.
9A On all Fastir sizes, install additional tie bar on
back inside of carriage near top as shown.
Figure 10. (For 4 ½” crosstube, use lower holes
shown in drawing inset. 5 ½” crosstube has only
one set of holes.) Figure 10.
9B Install additional tie bar(s) between
moving carriages in same manner. Figure 10.