Chapter 5 Replacing Field-Replaceable Units 5-9
5.4.1.2 Installing the Hard Drive in a Single-Drive Assembly
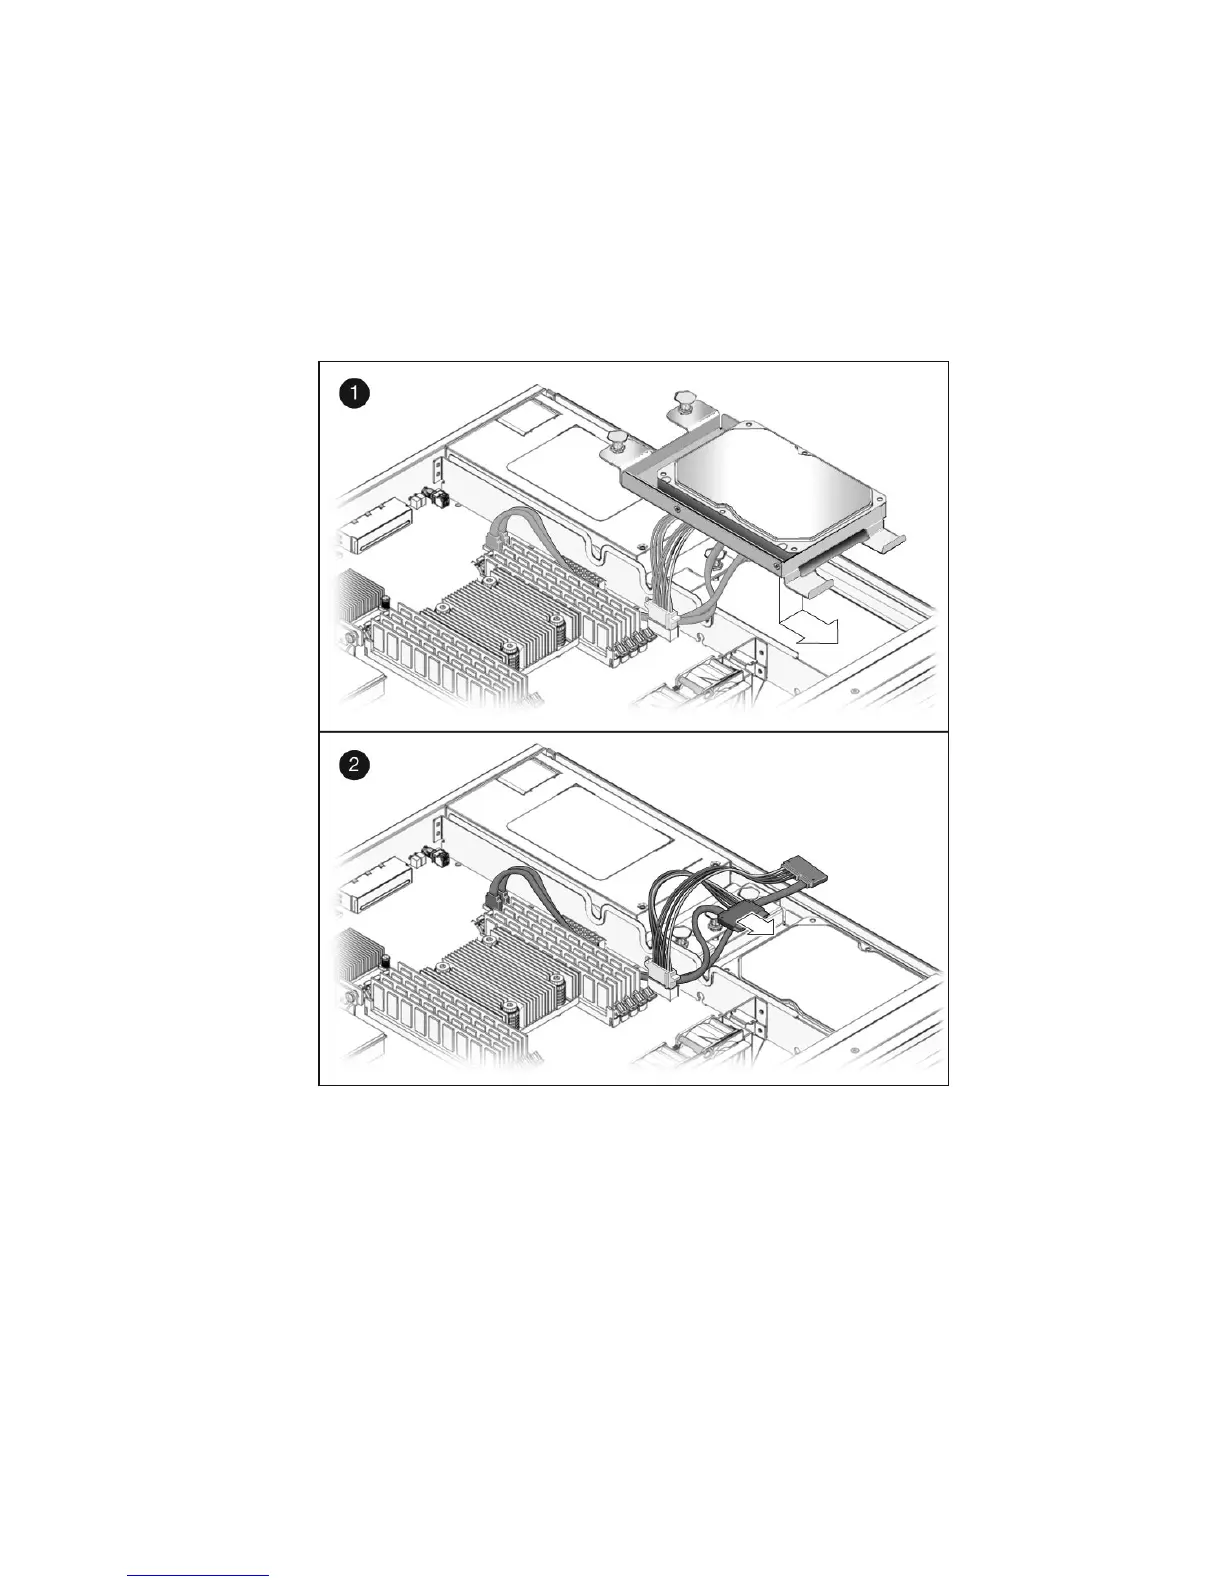
1. Unpack the replacement single-drive assembly.
2. Slide the single-drive assembly into the chassis until it mates with the front of the
chassis (
FIGURE 5-7).
FIGURE 5-7 Installing the Single-Drive Assembly
3. Push the fasteners down to lock the drive assembly into place in the chassis.
4. Redress the cable through the midwall in the chassis.
5. Reconnect the data cable to the data/power connector on the drive (
FIGURE 5-7).
If you have a dual-drive cable installed in your system, connect the DRIVE 0
connector on the cable to the data/power connector at the rear of the drive. Do not
connect the DRIVE 1 connector on the cable to the data/power connector at the rear
of the drive in a single-drive assembly.