Page | 27
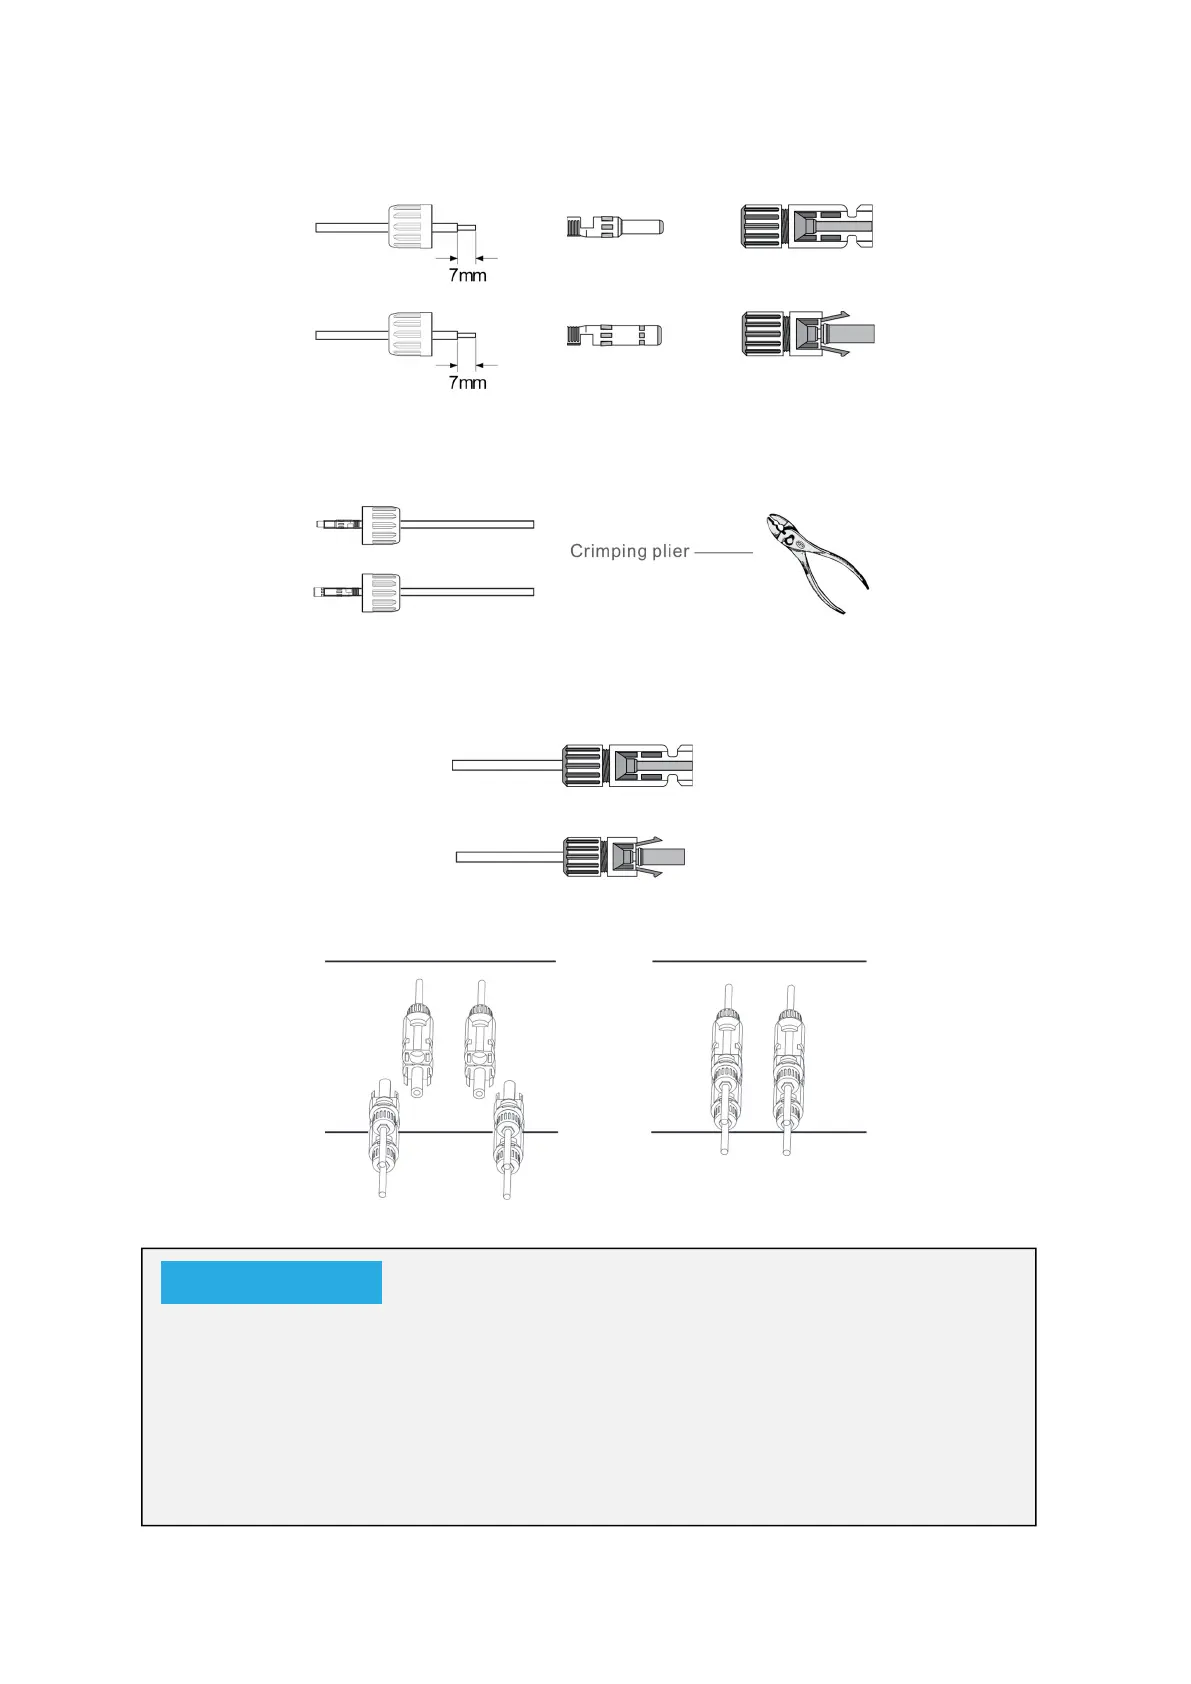
a) Strip 7mm of the plastic coating off the DC wire and disassemble the connector
cap nut.
b) Crimp metal terminals with crimping pliers.
c) Insert the contact pin into the connector housing until it locks into place. Then
screw the cap nut onto the connector housing. Torque to 2.5-3 N.m
d) Finally, insert the DC connector into the positive and negative input of the
inverter.
When sunlight falls on the solar panel, it will generate a voltage. A high voltage
generated by panels in series configuration may cause danger to life. Therefore,
before connecting the DC-Input line, the solar panel’s surface should be shielded
from the sun’s rays by some opaque material and the DC switch should be off.
This will prevent a high voltage flowing to the inverter thereby causing risk to
persons conducting installation or maintenance.
NOTICE