rev. 08.15.2006.
3-20
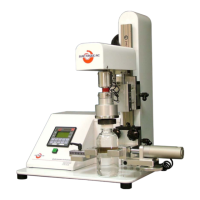
To set-up your Sure Torque Unit, proceed as follows:
1. Install the proper Collet for the “closure” being tested into the Chuck Housing utilizing the Lock Pin
(Press Lock Pin handle button during installation and removal).
2. Push the “POWER” button On (located on rear of the head).
3. Go to Manual Mode/Control
Container Platform Adjustment:
4. Obtain a container to be tested, with its closure on and insert it to the collet. If it is CR collet and it is a
Child-Resistant closure, then make sure that the plunger has a fair spring load on the cap. Activate the “Chuck”
by pushing the “CHUCK” button on the keypad.
5. Press the “HEAD” and then the “CAL” pushbuttons, energizing the vertical actuators to the measurement
position.
6. Set the height of the Head, and the Clamp block with the container/closure to be tested in the chuck.
Manually set the height of the head block so the container will stand firmly on the base and tighten the locking
handle. Adjust the height of the clamp block, so the clamps will have a strong grip on the container and lock
the clamp block securely.
Adjusting the table’s regulator valve - on the back panel - compensates for the additional vertical force created
by the closure’s thread travel and any unnecessary pressure is reduced accordingly. On the “CR” type closure,
while setting up to engage the closure’s ratchets prior to obtaining thread engagement, the proper head height
is first set (static) conforming to the parameters described in your Sure Torque ST-LAB tuning sheet. Next, feel
the upward travel allowed in release mode by pulling up the head when only the low pressure valve is active.
By adjusting the table’s regulator valve to obtain a constant vertical load on the component and closure, this
assures a dynamic engagement of the closure’s ratchet feature.
Clamp Adjustment:
7. Set the Left Hand, Stationary Clamp in a position that will ensure a centralized position of the container on
the Platform.
8. Press the “CLAMP” pushbutton, energizing the Air Clamp.
9. Adjust the Air Clamp in or out until both stationary and moveable Clamp sections perfectly align the
container (and closure) in the Collet.
10. Press the “CLAMP” pushbutton, opening the Clamp.
11. Press “ESC” pushbutton to return to main menu, the tester is setup for your container.
Confirm your settings by running an automatic cycle:
13. Press “ENTER” on any mode screen to configure the desired torque and cycle settings (Password may be
required) then hit “ESC” to go back to the mode screen. Push the “MODE/Navigation Arrows” button(s) until
you reach the desired one, and hit the Start button to start the test.
14. Place the container/closure to be tested, onto the Container Platform snugly against the Stationary Clamp.
15. Press the Start buttons on the two sides of the head.
16. Read the “Applied”, or “Release” Torque finding for this particular test on the PLC screen at the end of the
test cycle.
3.2.2. Electronic Setup
The ST-LAB Setup Mode provides several options to set-up and alter electronic or pre-programmed software
settings. Select the Setup Mode using the arrow buttons on the main navigation screen, then hit ENTER. Depending
on the purchased configuration, the PLC will inquire you for your password on the next screen (the default password
to get in the setup is 1111). After entering the last digit of the password the “Password accepted” screen appears. If
the password is not accepted then the user may reenter the correct password or hit the ESC to cancel the password