7
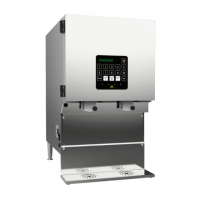
INSTALLATIONANDLOCATIONOFTHEDISPENSER
1. LocationofDispenser:
· Placethedispenserwhereitwillbestserveyouroperation.
· Counters,platforms,orshelvesshouldbestrongenoughtosupportthedispenserandfull
containersofproduct.Refertotheminimumweightofyourdispensermodelonpage2.
Thisistheweightoftheemptydispenser.
· Placethedispenserattheappropriateservingheightsothatpeopledrawingproductfrom
thedispensercanoperatethebuttonsaswellaseasilyplaceandremovecups.
· Leaveclearspacearoundthedispenser,approximately1inchor2.5cmonallsides.
· Donotplacethedispensertooclosetoasourceof heatormoisture.Allowaminimum1
inch(2.5cm)airspacebetweenmachine satalltimes.Theperformanceandefficiencyof
the refrigeration system will be reduced if the dispenser is placed too close to a h eat
generatingmachine,suchasacoffeemaker.
· Donotblocktheventsatthetopre arofthedispenser.Theventsmustbefreeandopen
to ensure pro per operation of the ventilation system and to prevent overheating and
damagetothesystem.
· Thedispensermustbeplacedona levelsurfaceorleveledbyadjustingthelegs.The
dispensermustbeleveltodispenseaccuratequantitiesandtoensureproperfunctioning
oftherefrigerationsystem.
· Do not remove the legs from the dispenser or allow the dispen ser to sit flat on the
counter.Airflowandcirculation underthemachineareessentialfortheproperoperation
oftherefrigerationsystem.Makesurethelegsatthe fourcornersofthebottomofthe
dispenserareinplace.Ifonehasloosenedduringshipping,retightenit.Somedispenser
modelshaveadjustablelegsandtheselegsaresecureeventhoughtheymayappearto
beloose.RemovalofthelegsautomaticallyvoidstheWarranty.
CLEANBEFOREFIRSTUSEOFTHEDISPENSER
· Makesureyoucleanthedispenserthoroughly.SeeCleaningInstructionsfortheExterior
oftheDispenserandtheDispenserComponentsonpages1823.
· Alldairytanksandlidsmustbecleanedbeforeuse.Seepage22.
WARNING: Beforestartingthedispenser,makecertainthatallInstallationinstructionshave
beenfollowedandthatthedispenserhasbeensittinguprightforaminimumof3hours.
STARTINGTHEDISPENSER
Tostartthedispenser:
1. Plugthepowercordintotheproperelectricaloutlet.
2. TurnthePowerSwitch“ON”. Thepowerswitchislocatedatthelowerleftofthe
dispenser.
Makesurethed ispenserdoorisclosed.
Pushoneoftheproductbuttonsonthefrontpanelandlistentohearthevalveopenand
close.Thisconfirmsthatthedispenserisoperating. Thebuttonpanelonthefrontofmost
modelsofdispenserhasapowerLEDwhichglowsgreenwhenthedispenserison.
3. Allowthedispensertorunemptyforonehourtoachieveacoldtemperaturebefore
placingproductcontainersinthedispenser.Thetemperaturecontrolhasbeenpresetat
thefactory. Youcanfeelthecoldtemperaturebyplacingyourhandonthetoporback
walloftherefrigerationcompartment.
4. Ifthedispenserdoesnotappeartobegettingcold,checktomakesurethatitisplugged
inandthatthepowersourceisactive.Ifthedispenserstilldoesnotoperate,immediately
calltheSureShot DispensingSystems®TechnicalAssistanceCenterat18887779990
or19028659602.
 Loading...