70 8: Optional Functionality
8.0.2 Using the DOCSIS Option Locally
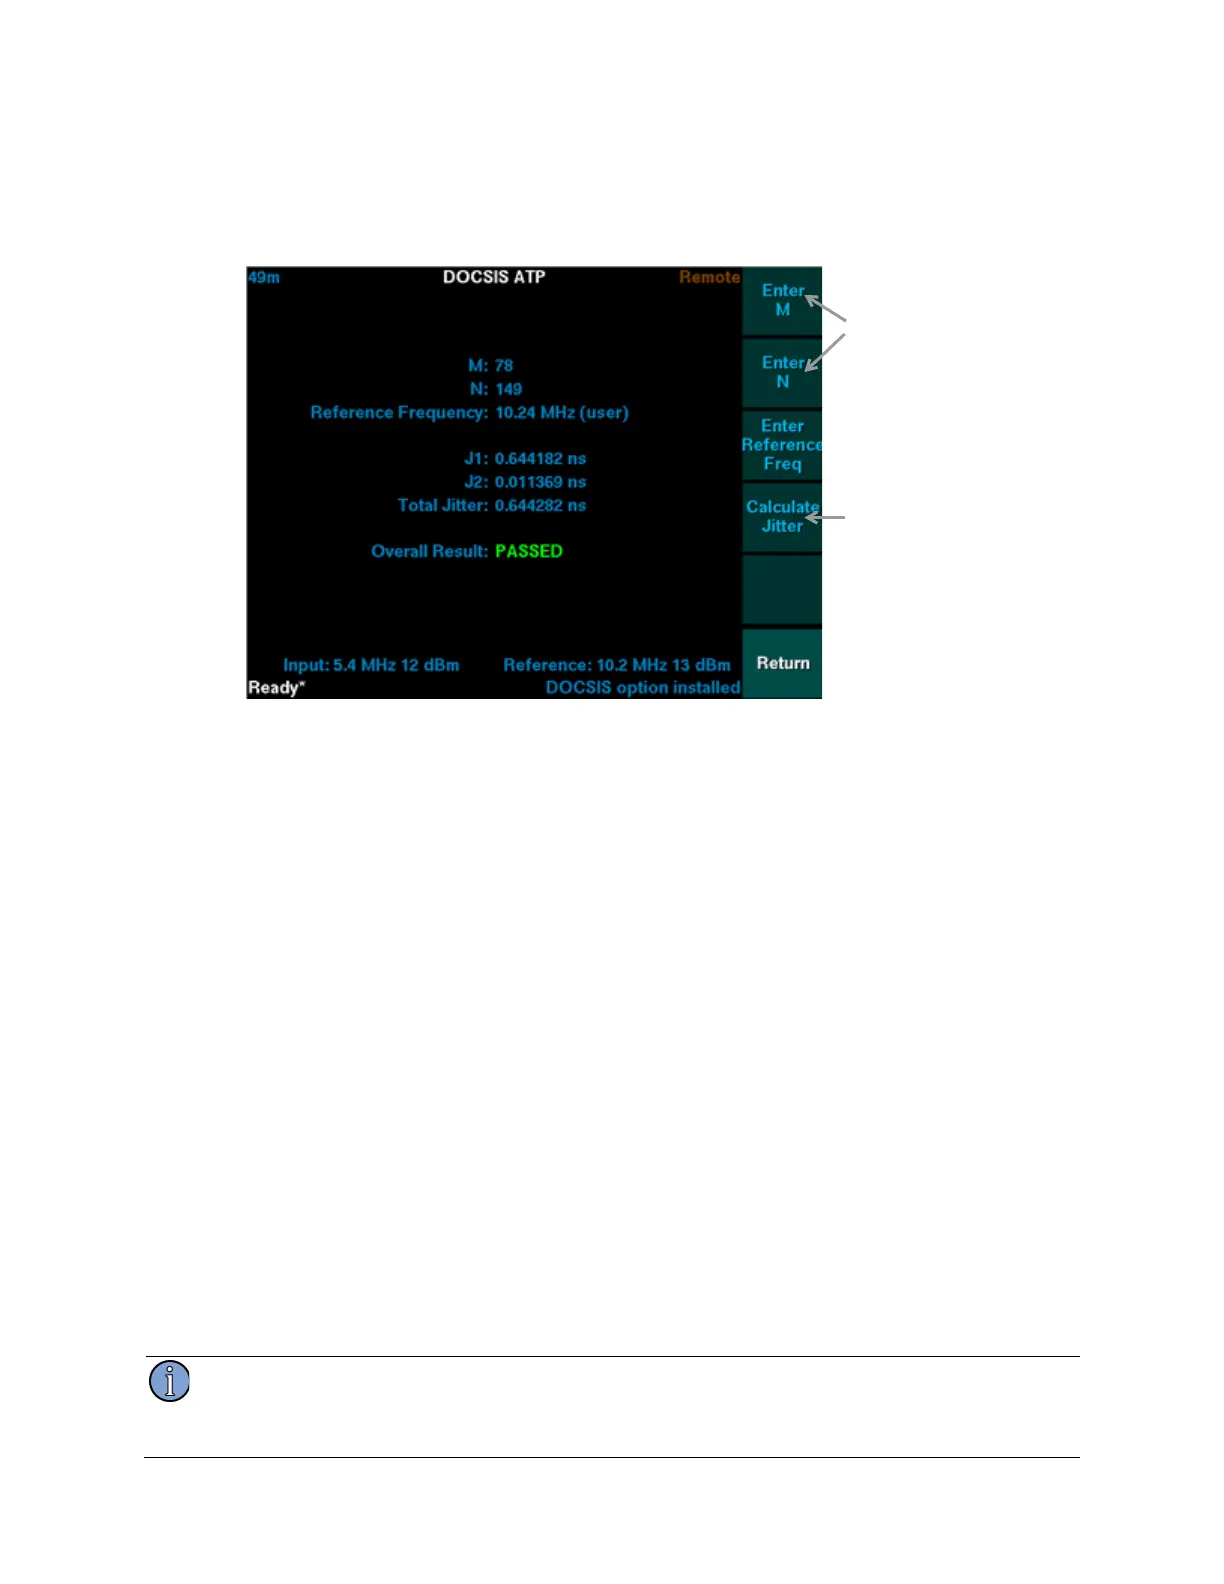
Figure 17 shows the DOCSIS option screen after it has calculated total jitter for a set of input
signals. The signals PA S S E D because total jitter was less than 1.5 ns.
Figure 17: DOCSIS Option Screen
To ru n a DOC SIS tes t:
1. Connect the master clock to the Reference port and the bit clock to the Input port.
Verify that the Reference frequency displays as 10.2 MHz and the Input frequency
displays as 5.x MHz.
2. Press Settings and Options, then Options and finally DOCSIS ATP to navigate to the
DOCSIS option screen.
3. Press Enter M to enter the numerator and Enter N for the denominator.
See “3.4.1.1 The Number Pad Editor” on page 17 for help with entering numbers.
Both M and N must be positive integers representable as an unsigned 16 bit value.
These values persist when the test set is powered off.
4. Press Enter Reference Freq and enter the frequency counter’s reference frequency.
5. Press Start and collect data for at least 45 minutes.
6. Press Calculate Jitter.
If a dialog stating that more data must be collected is displayed, press Dismiss Dialog,
wait a few minutes, then press Calculate Jitter again.
The J1, J2 and Total Jitter values are calculated and displayed, the Overall Result
shows PA S S E D when jitter is less than 1.5 ns or FA I L E D otherwise.
The DOCSIS and frequency counter reference frequency are the same value. Changing the
reference frequency in either screen changes the setting for both screens.
Use these softkeys to
enter the M and N values
for the M/N ratio used
for the test.
Use this softkey to
calculate jitter and pass or
fail the signal.
 Loading...