097-10603-01 Rev. A – November 2004 X72 Desiger’s Reference and User’s Guide 69
Symmetricom Serial Interface Protocol (SSIP)
The X72 unit included in the kit is configured at the factory to operate at 10 to 32
Vdc. If the X72 is used without the adapter board a 50 Ω load is required and a 390
pf filter capacitor is recommended to prevent spurs. Additional information on power
requirements and precautions can be found in Electrical Interface, on page 36.
Symmetricom Serial Interface Protocol (SSIP)
Setting up and interacting with the X72 unit using SSIP is covered in Appendix B,
Symmetricom Serial Interface Protocol.
Turn-on Procedure
Verify that the X72 is mounted to the heat sink supplied or to a customer supplied
heat sink device.
Verify that the power supply is set to the correct voltage (if adjustable) and is
unplugged.
Connect the X72 to a properly terminated, shielded cable that does not have
power applied. Once the unit has been properly terminated, plug in the cable to
the power supply.
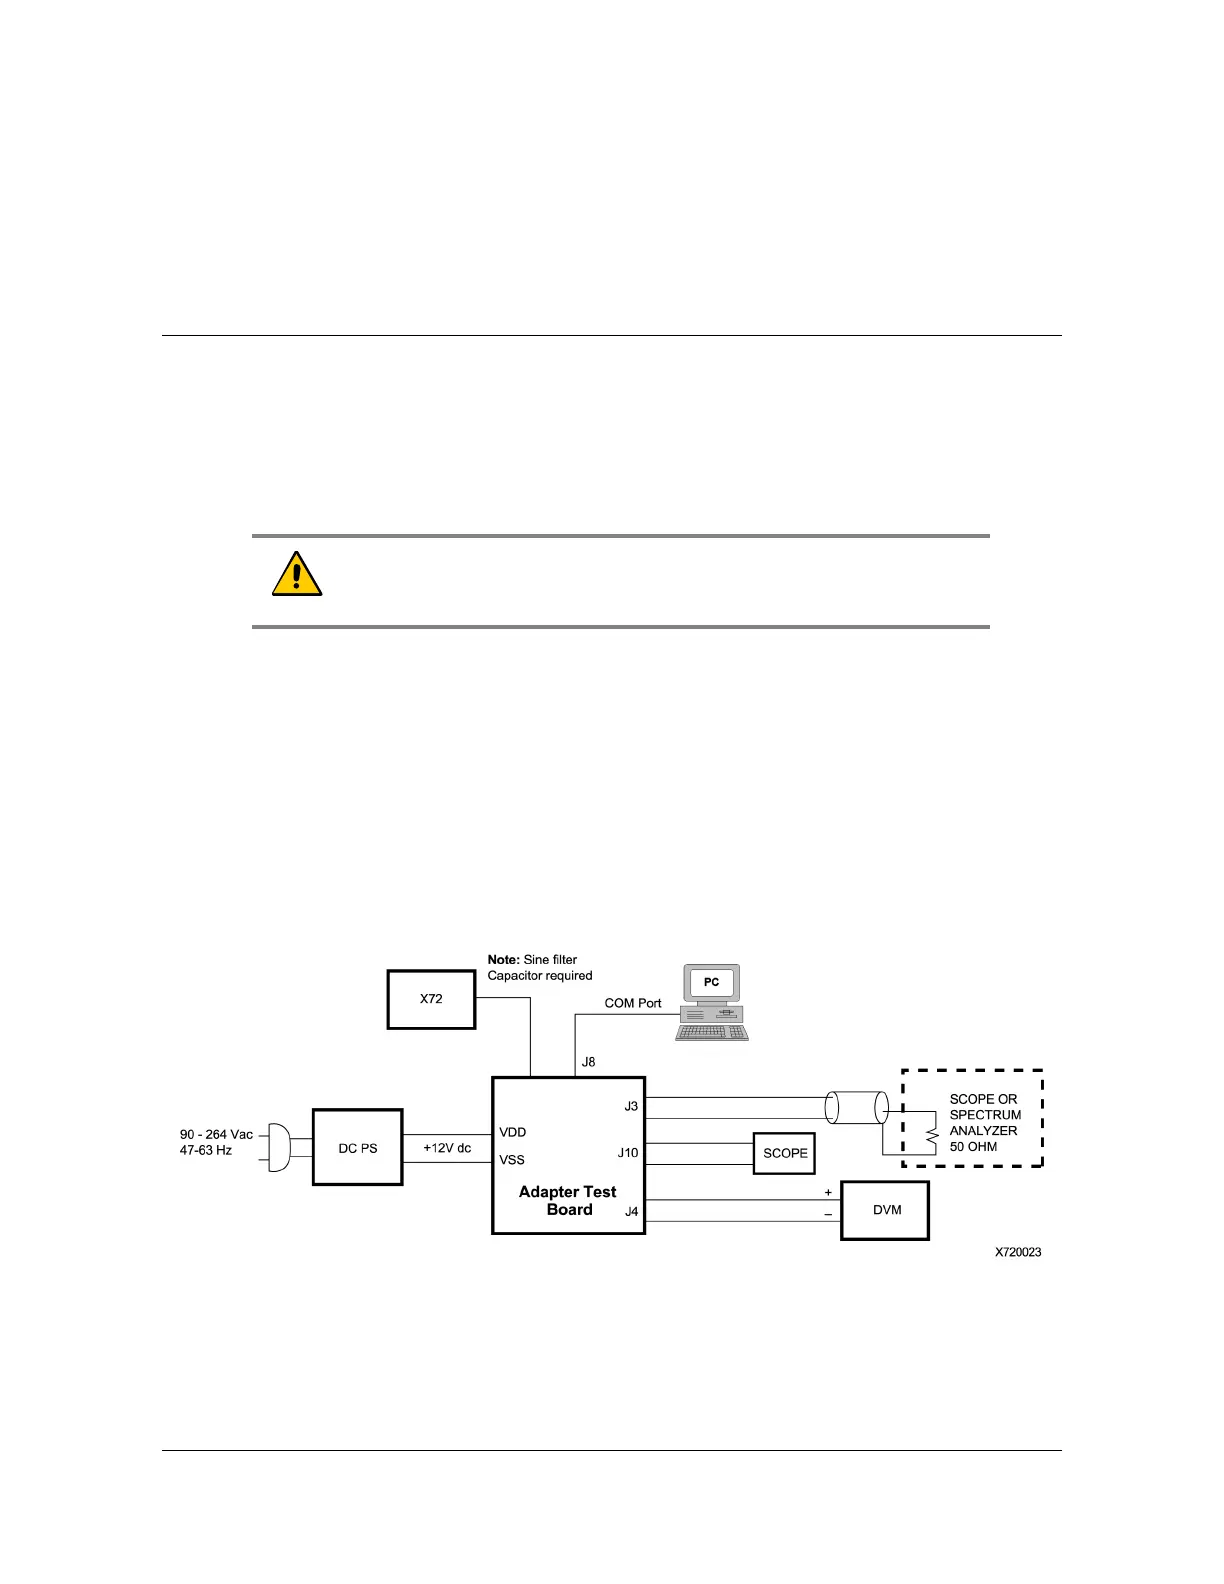
Figure C-1 shows a block diagram of the suggested X72 test setup.
Figure C-1 Suggested X72 Test Setup.
Once The X72 is plugged in and receiving power, wait 3 to 4 minutes while the unit
achieves atomic lock. During this period, the monitored LOCK signal should be
HIGH. Once the unit achieves atomic lock, the LOCK signal goes LOW.
Caution: The X72 has no reverse voltage protection and damage will
occur if power is applied to the unit in reversed direction.
 Loading...