52
Model PH90Operating Procedures
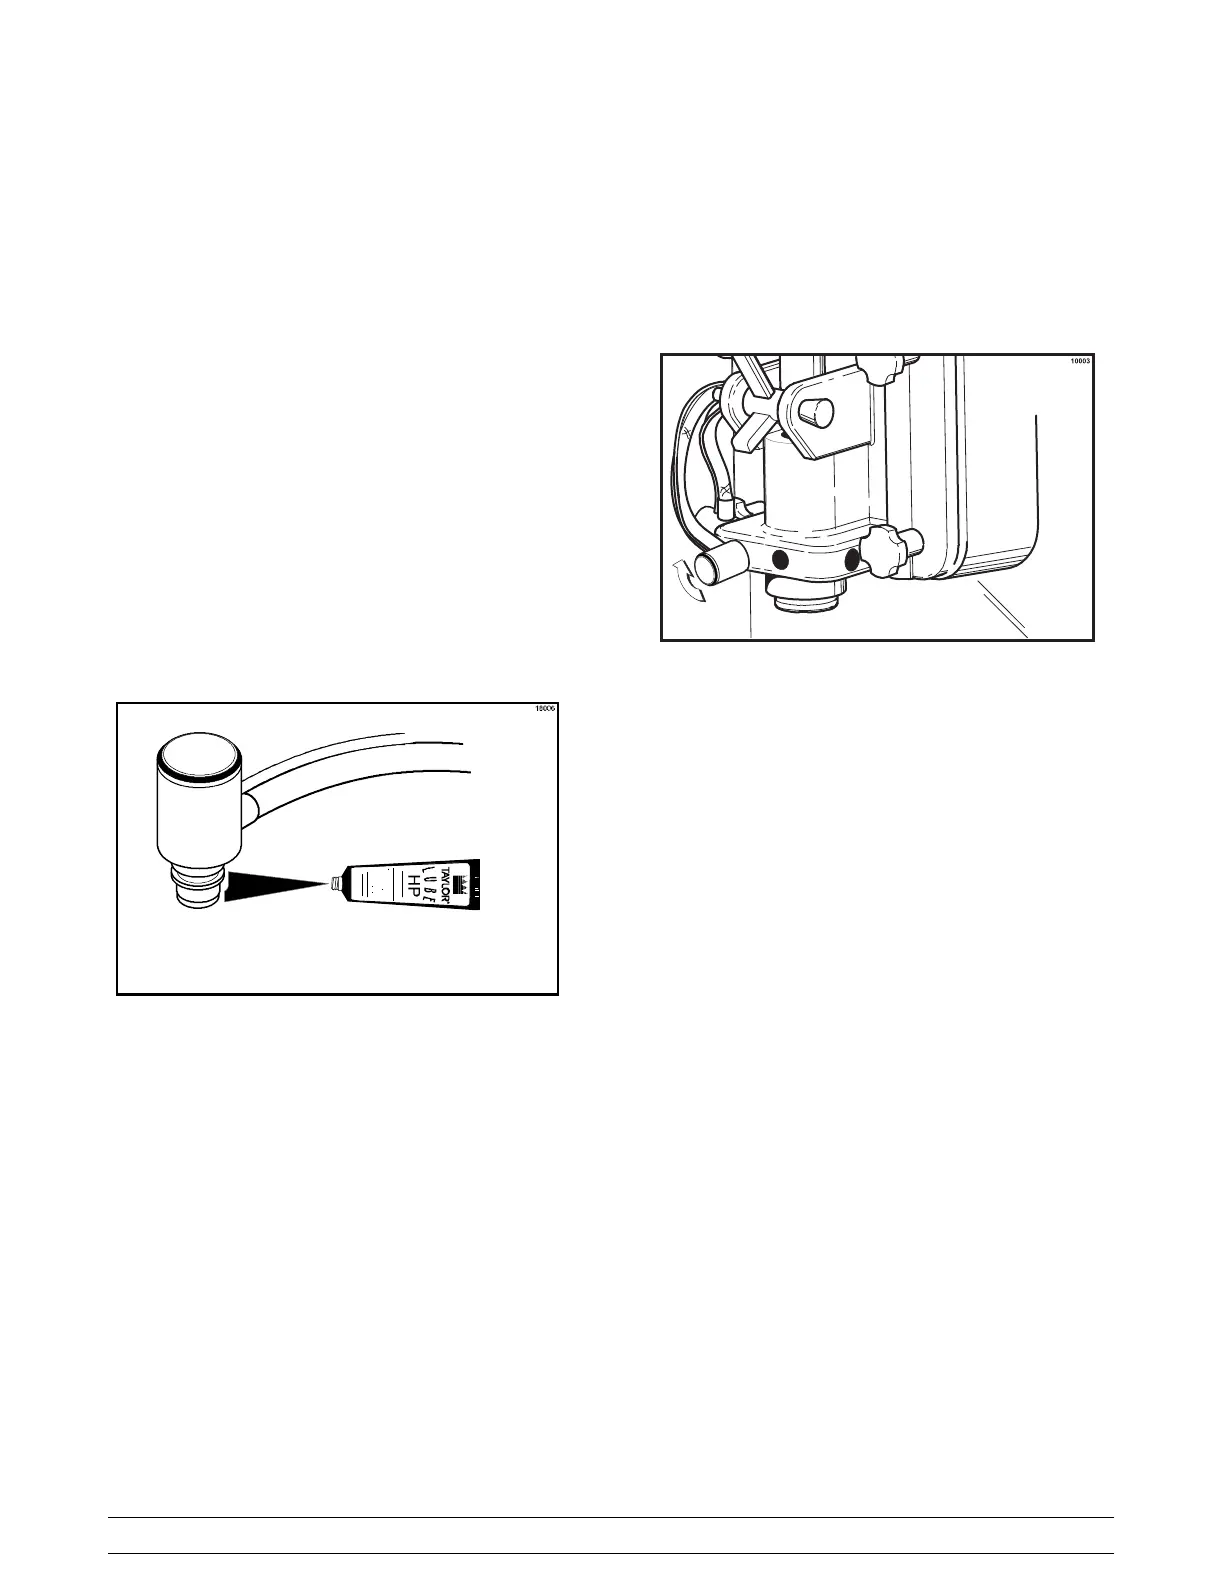
Step 7
If less than 1 fl. oz. (30 ml.) is received, the pressure
must be increased. Loosen the lock nut. Using a flat
blade screwdriver, turn the adjusting screw
CLOCKWISE.
Recheck the syrup calibration. Tighten the lock nut
after the correct calibration is achieved.
Step 8
If more than 1 fl. oz. (30 ml.) is received, the pressure
must be decreased. Loosen the lock nut and turn the
adjusting screw COUNTERCLOCKWISE to zero.
Remove the air line to the syrup tank to allow the
pressure in the tank to escape. Reconnect the air line.
Adjust the regulator to the new pressure setting and
recheck the syrup calibration. Tighten the lock nut.
Repeat the calibration procedures for each
additional syrup line.
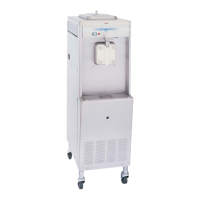
Step 9
Remove the syrup sampler . Lightly lubricate the o- ring
on each syrup line fitting.
Figure 100
Step 10
Attach the syrup lines to the freezer door. Insert the
syrup line fitting into the syrup port in the freezer door.
The flat side of the syrup line fitting must be aligned
with the pin in the syrup port. Rotate the syrup line
fitting upward to lock in place.
Figure 101
Note: Whenever a particular syrup line is not used,
the syrup hole plug found in the spare parts kit must be
installed. Place the syrup hole plug o- ring into the
groove of the syrup hole plug and lubricate. Align the
flat portion of the syrup hole plug with the locking pin
in the open syrup port of the freezer door. Insert the
syrup hole plug and turn slightly to lock in place.
Step 11
Clean the calibration cup and syrup sampler.
This Procedure Must be Performed Daily!