10
Model R280
Dispenser Start-up
Make sure power switch, located on the left portion of the operator panel, is turned off. Assemble the Dispenser, see
page 6. Plug the power cord into an approved outlet and turn the Dispenser on.
Note: Turn the Dispenser on a minimum of 90 minutes (depending on ambient temperature conditions) before loading
frozen product into the Dispenser. Once the temperature display has dropped to 10°F (-12°C), load frozen product into
the Dispenser and the Dispenser is ready to use.
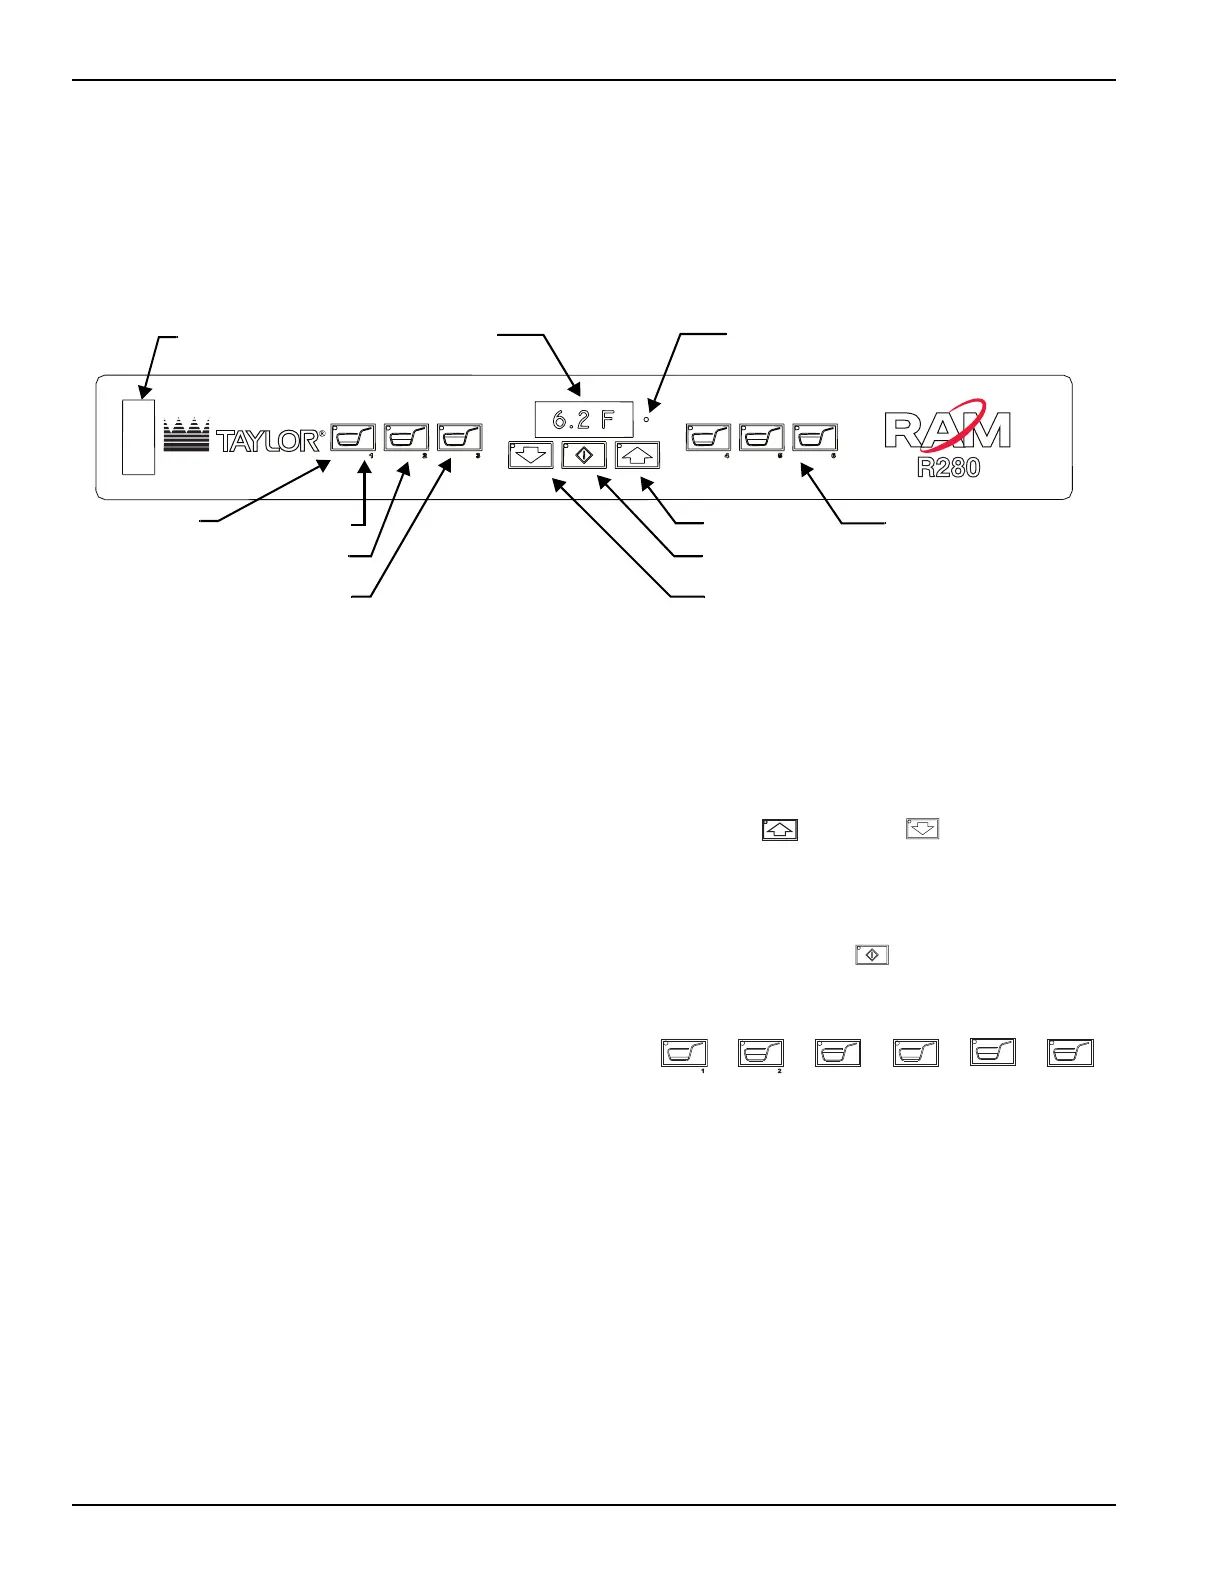
Figure-13
The operator panel consists of a power switch and three
groups of controls:
• Left hopper controls,
• Center system controls with data display
• Right hopper controls.
Each hopper is controlled as if it were an independent
Dispenser.
On power-up, the display will very briefly show the
following:
• Software name
• Software version
• Copyright notice, and then the main screen
(typically the Dispenser temperature).
The Dispenser will not respond to keypad selections
before the main screen is displayed.
The main screen will appear as shown above. The
number displayed in the center represents the interior
cabinet temperature.
The operator panel is used to make basket load size
selections and to access controller functions.
Note: The managers menu and diagnostic menu may
require a manager’s password to access the Functions.
By default, these passwords are disabled.
• Use the Up and Down arrow buttons to
access a desired function. (See User Function Menu
Structure on page 15 for a complete list of functions
and their descriptions.)
• Press the Enter button to select the desired
function.
• Basket size buttons also function as numbers:
Power Switch
Display
Power Light
Basket Size
Buttons
Up Button
Enter Button
Down ButtonLarge Loads
Medium Loads
Small Loads
Basket Size
Buttons
Left Small=1 Right Small=4
Left Medium=2 Right Medium=5
Left Large=3 Right Large=6)
5