UNIMASTER
4
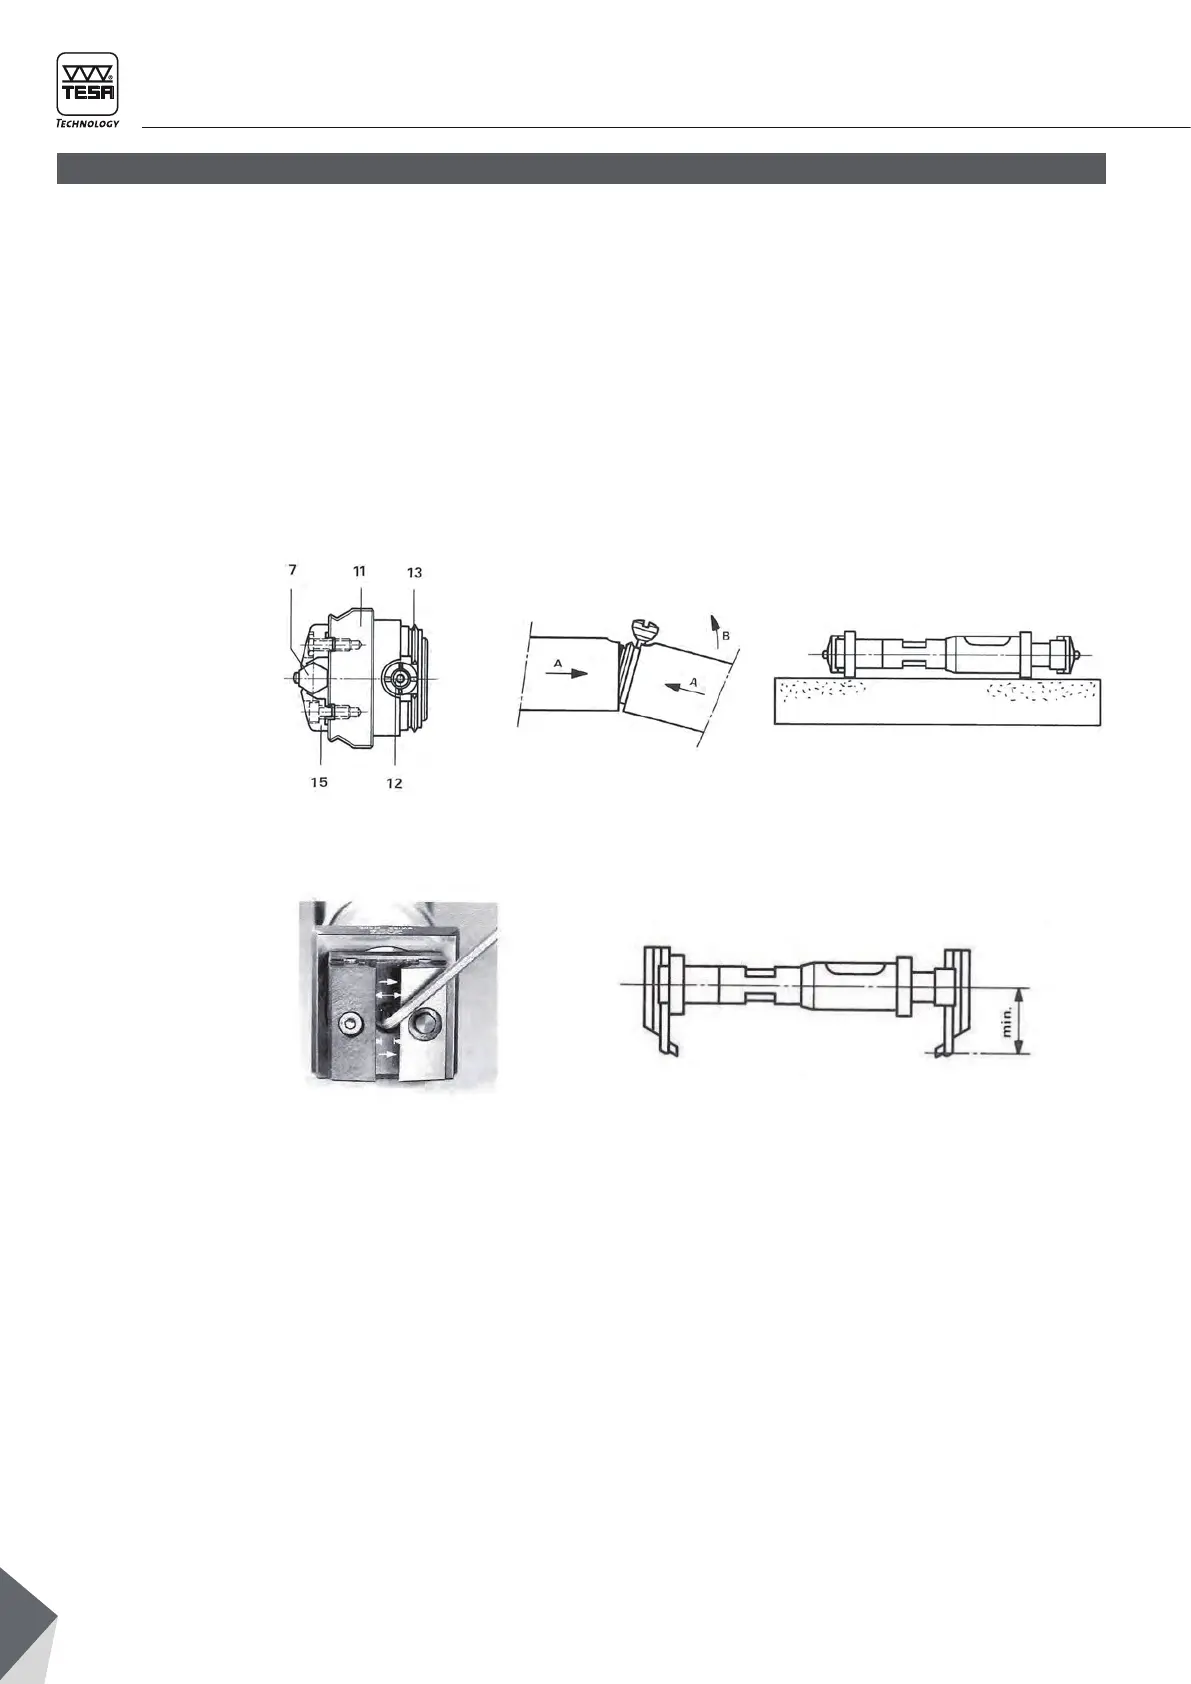
– Clean the contact surfaces of the measuring head
and the fixed stop.
– Using the special screwdriver provided, slacken
the nut (12) to free the snap ring (13).
– Line up the nut with the cutout in the measuring
head (10), tilt the two components as shown in
Fig. 5, and snap them together by pressing in the
direction of arrow A and by moving in direction B.
– Ensure that the supporting surfaces (11) are pa-
rallel, by placing the instrument on a flat surface
as shown in Fig. 6. Finally, tighten the nut (12) to
lock the snap ring.
2 ASSEMBLING THE MEASURING HEAD
– Remove the measuring arm from the mobile stop
(5), and set the instrument to measure either
internal or external dimensions, by turning the
screw as shown in Fig. 7.
• For internal measuring: turn screw to the
right.
• For external measuring: turn screw to the left.
– Position the measuring arms to bring the contact
points as near as possible to the centreline of the
instrument, as shown in Fig. 8. Tighten the fixing
clamps (15).
Fig. 4. Fig. 5. Fig. 6.
Fig. 7. Fig. 8.