Texi Fox 25
8
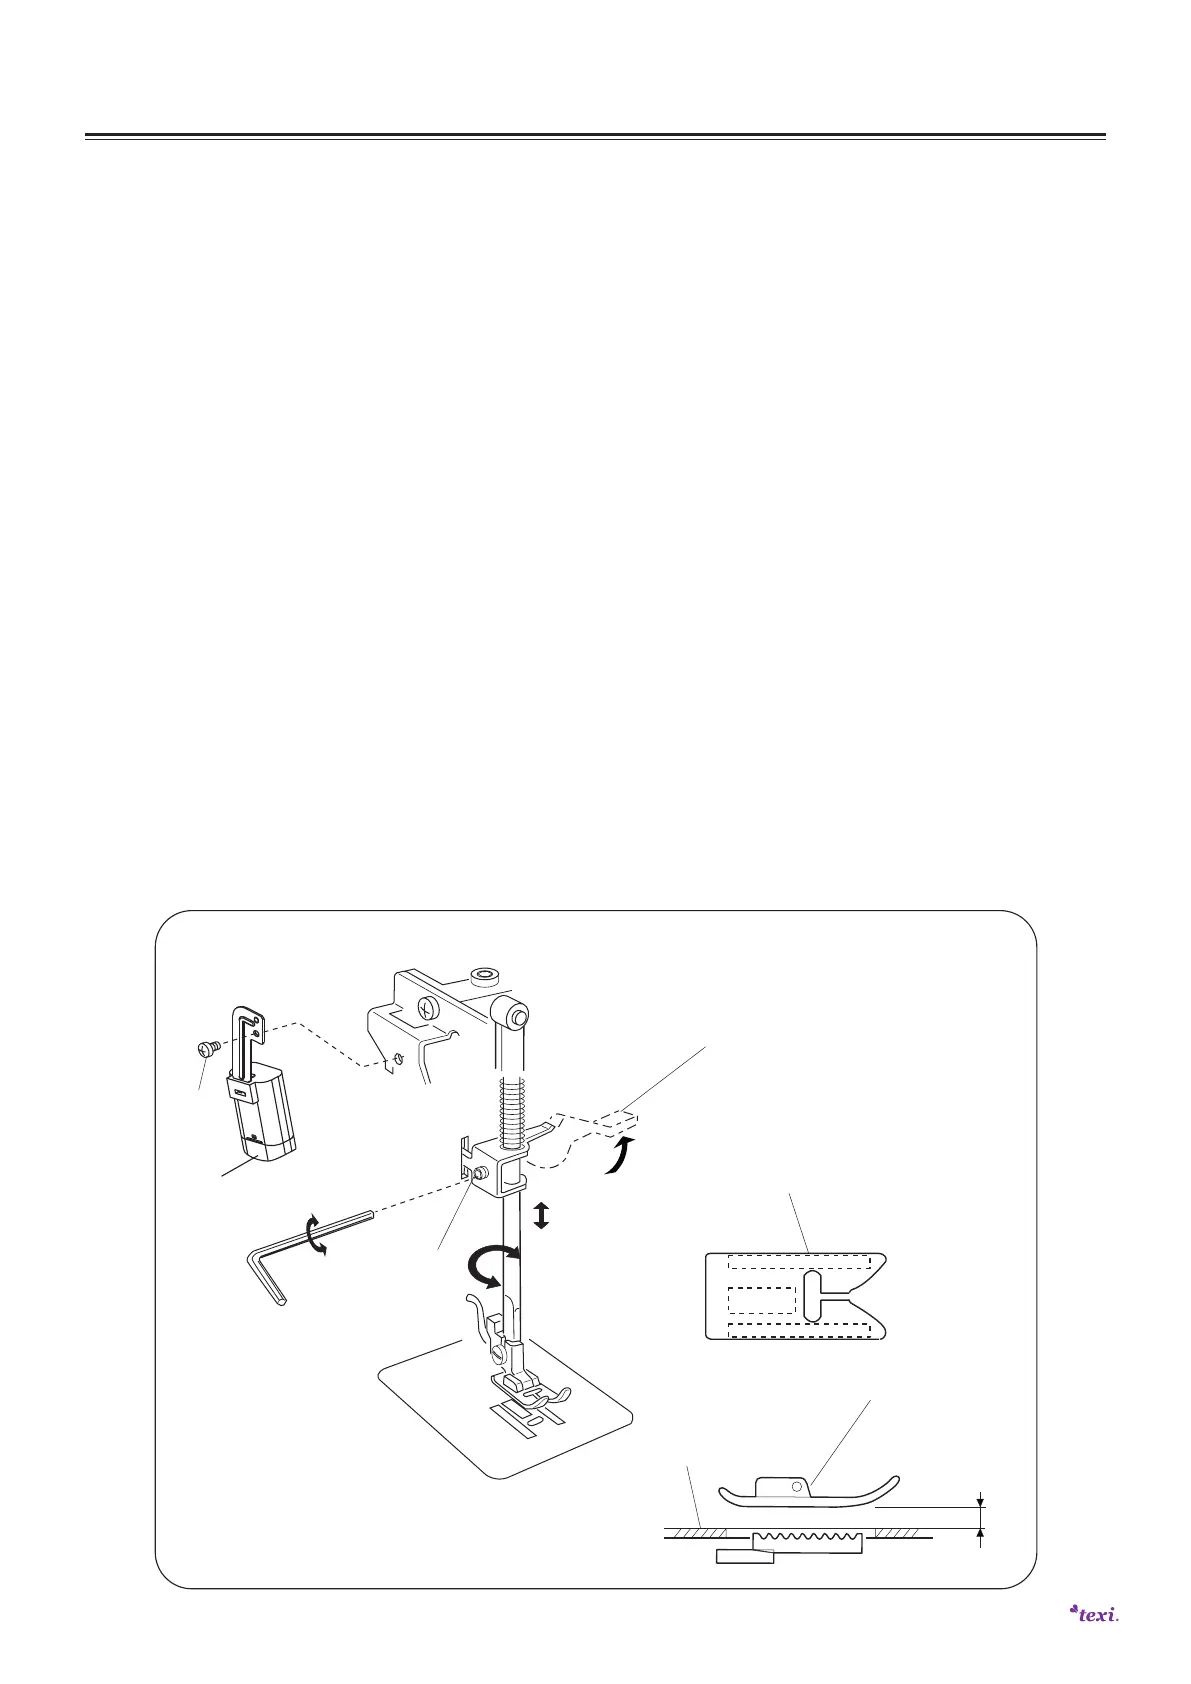
PRESSER BAR HEIGHT AND ALIGNMENT
TO CHECK:
1. The distance between the presser foot (D) and the needle plat (E) should be
between 5.5-6.0mm when lift the presser foot lever (A).
2. The presser foot should be cover the feed dog slots and parallel with it when
you put down the presser foot lever (A).
If it is not within the above limit, adjust as follows:
ADJUSTMENT PROCEDURE :
1. Remove the face cover (See page 2).
2. Loosen the setscrew (B) to remove the LED lamp.
3. Raise the presser foot lever (A) and loosen the setscrew (C) on presser bar
holder.
* Push up or down the presser bar to adjust the high of pr
esser foot.
* Horizontal rotation the presser bar to adjust the parallelism of presser
foot.
4. Tighten the setscrew (C) after adjustment.
5. Attach the LED lamp and the face cover.
NOTE: When you tighten the setscrew (C), make sure that both sides of the
presser foot are parallel to the feed dog slots (F) on the needle plate.
MECHANICAL ADJUSTMENT
LED lamp
5.5~6.0mm
D
E
C
A
B
F
 Loading...


