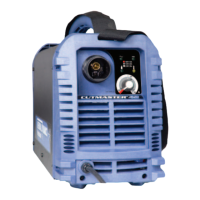
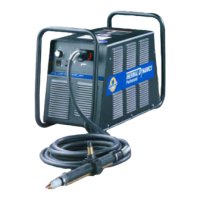
cutmaster 102
Manual 0-4998 7-5 PARTS REPLACEMENT
B. Main Transformer (T1) Replacement
Tools required: T20 Torx Driver
1. Remove the Cover per subsection 7.04A
2. Remove the two large and one small gas hoses
per subsection 7.05C
3. Remove the Gas Solenoid per subsection 7.05F
4. Disconnect the transformer wires from terminals
PRI 1 (A), PRI 2 (B) from the Capacitor PCB and
PRI 3 (D), PRI 4 (C), SEC1, SEC2 on the Main
PCB.
5. Disconnect J2 & J3 connectors from Main PCB.
6. Remove the two screws securing the Center
Chassis to the base.
7 Loosen the two screws securing the W1 contactor
to the base. Move the contactor out for clearance
for the Center Chassis.
8. Disengage the Front and Rear panels from the
base per section 7.04D.
9. Guide the Center Chassis towards the center of
the base to disengage the bottom locking tabs
securing the Chassis to the base.
10. Carefully guide the Center Chassis up far enough
to lay the Chassis down to the right side of the
unit.
11. Remove the two screws securing the Main Trans-
former to the base.
12. Remove the Main Transformer, carefully guiding
all its wires through from the right side of the
unit.
13. Install replacement Transformer by reversing the
above steps.
14. Reinstall the power supply cover
C. Main Transformer (T2) Replacement
Tools required: T20 Torx Driver
1. Remove the Cover per subsection 7.04A
2. Remove the two large and one small gas hoses
per subsection 7.05C
3. Remove the Gas Solenoid per subsection 7.05F
4. Disconnect the transformer wires from terminals
PRI 1 (A), PRI 2 (B), PRI 3 (D), PRI 4 (C), SEC1,
SEC2 on the 40A Power PCB.
5. Disconnect J2 & J3 connectors from Main PCB.
6. Remove the two screws securing the Center
Chassis to the base.
7. Loosen the two screws securing the W1 contactor
to the base. Move the contactor out for clearance
for the Center Chassis..
8. Disengage the Front and Rear panel from the
base per section 7.04D.
9. Guide the Center Chassis towards the center of
the base to disengage the bottom locking tabs
securing the Chassis to the base.
10. Carefully guide the Center Chassis up far enough
to lay the Chassis down to the right side of the
unit.
11. Remove the two screws securing the Main Trans
former to the base.
12. Remove the Main Transformer, carefully guiding
all its wires through from the right side of the
unit.
13. Install replacement Transformer by reversing the
above steps.
14. Reinstall the power supply cover
D. Output Inductor (L1)
Tools required: T20 Torx Driver
1. Remove the Cover per subsection 7.04A
2 Remove the two large and one small gas hoses
per subsection 7.05-C
3. Remove the Gas Solenoid per subsection 7.05F
4. Disconnect Output Inductor wires from Choke1
terminal on the Main PCB and from the ATC.
5. Disconnect J2 & J3 connectors from Main PCB.
6. Remove the two screws securing the Center
Chassis to the base.
7. Loosen the two screws securing the W1 contactor
to the base. Move the contactor out for clearance
for the Center Chassis.
8. Disengage the Front and Rear panel from the
base per section 7.04D.
9. Carefully guide the Center Chassis towards the
center of the base to disengage the bottom lock-
ing tabs securing the Chassis to the base.
10. Carefully guide the Center Chassis up far enough
to lay the Chassis down towards the right side
of the unit.
11. Remove the two screws securing the Output
Inductor to the base.
12. Remove the Output Inductor, carefully guid-
ing its wires through from the right side of the
unit.
 Loading...


