cutmaster 39
SERVICE 5-4 Manual 0-4976
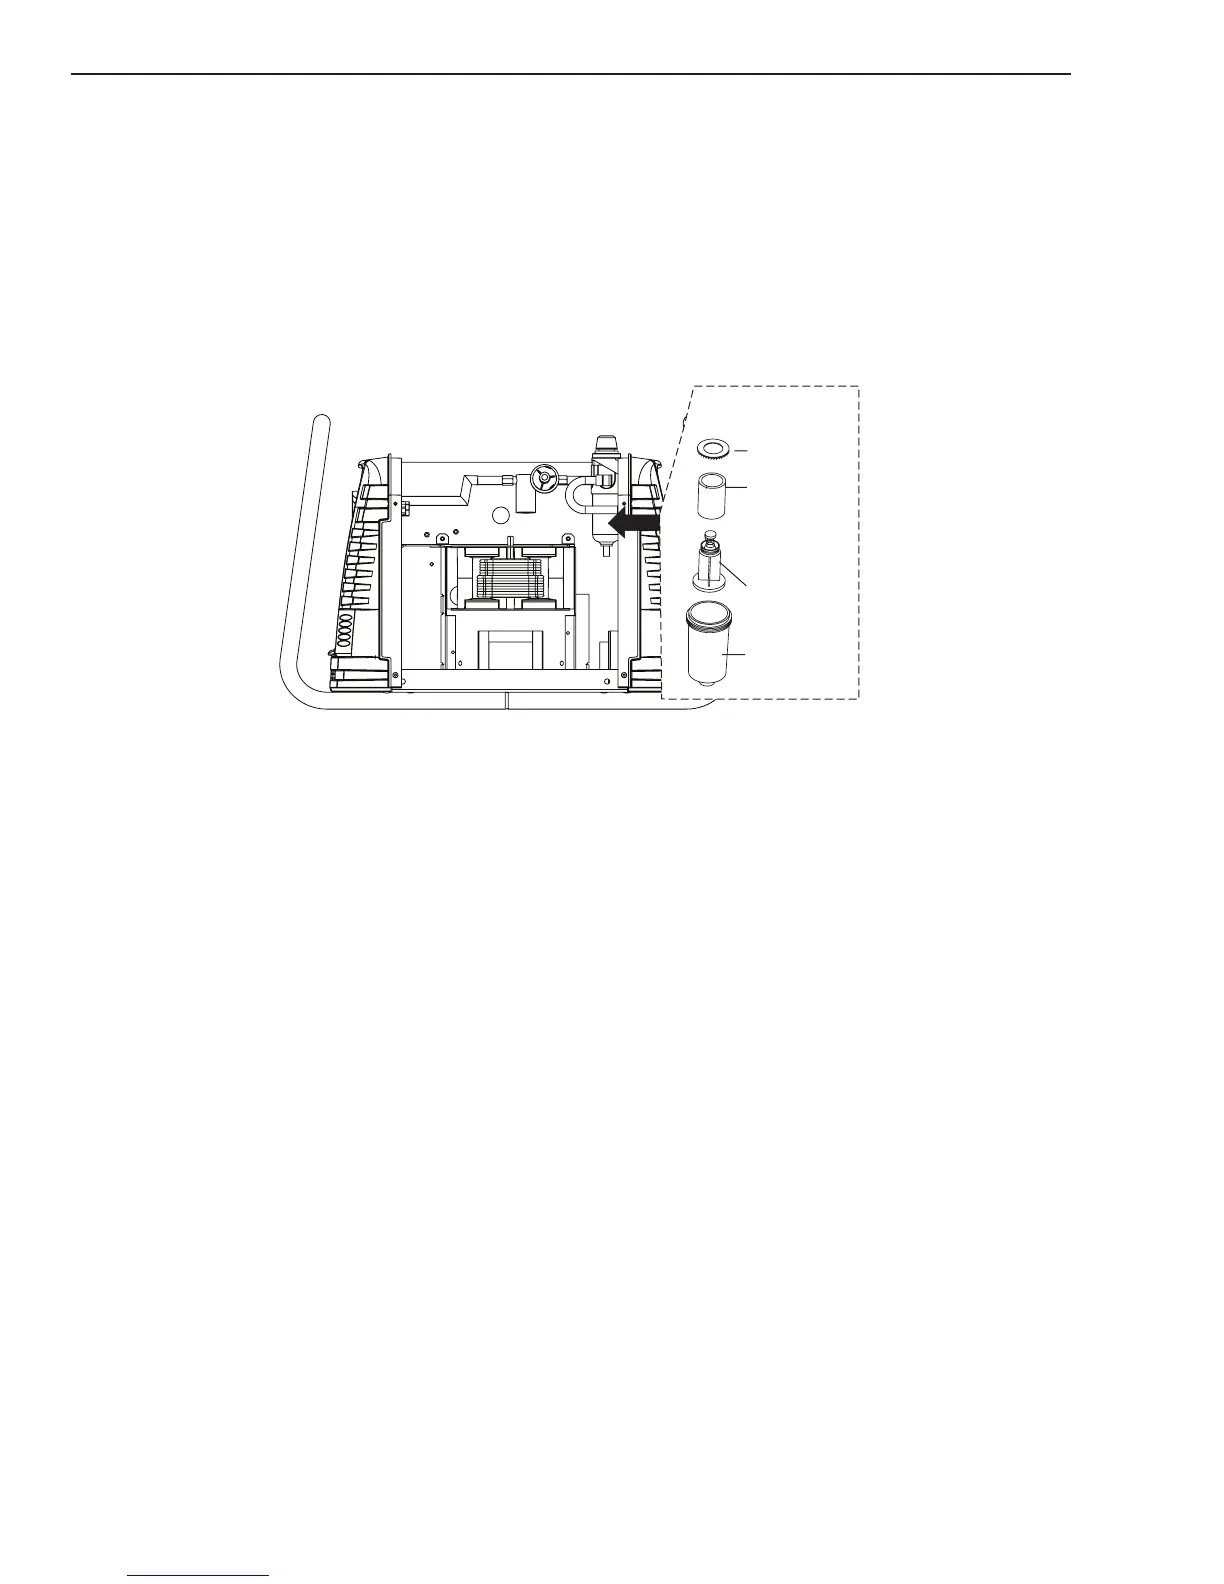
4. Pull the upper end of the drain tube off the fitting on the filter bowl
.
5. Unscrew the bowl. The filter element will be visible and still attached to the main body of the Regulator /
Filter.
6. Unscrew the filter element from the Regulator / Filter body. The filter element will come off with a spool and
some additional pieces.
7. Note the correct assembly of the filter / spool then remove the filter from the spool and either clean it or replace
it.
8. Screw the filter element and spool, with the baffle ring in place (teeth facing downward) back into the Regulator
body by compressing the spring on the spool. Tighten firmly by hand.
Art # A-07936
Replacement
Element
No. 9-0182
Ring
Spool
Bowl
Regulator / Filter Element Replacement
9. Clean the inside of the bowl if necessary. Check that the knurled valve on the bottom of the bowl is fully
open.
10. Reinstall the bowl. Reconnect the drain tube.
11. Reinstall the cover as follows:
a. Reconnect the ground wire, if necessary.
b. Set the cover onto the base so that it rests on the lower screws.
c. Tighten lower screws.
d. Reinstall and tighten the upper screws.
12. Turn on the air supply.