Manual 0-2683 15 TROUBLE-SHOOTING
3.6 Torch & Leads Troubleshooting
WARNINGS
Disconnect primary power to the system before dis-
assembling the torch, leads, or power supply.
DO NOT touch any internal torch parts while the
AC indicator light on the front panel of the power
supply is on.
Torch parts may get quite hot during normal opera-
tion. Always wear light cutting gloves when chang-
ing torch parts just after operating the Drag-Gun
system.
A. Checking the Center Insulator
The Center Insulator separates the negative and positive
charged sections of the torch. If the center insulator does
not provide adequate resistance, current which is intended
for the pilot arc may be dissipated into the torch head,
resulting in torch failure.
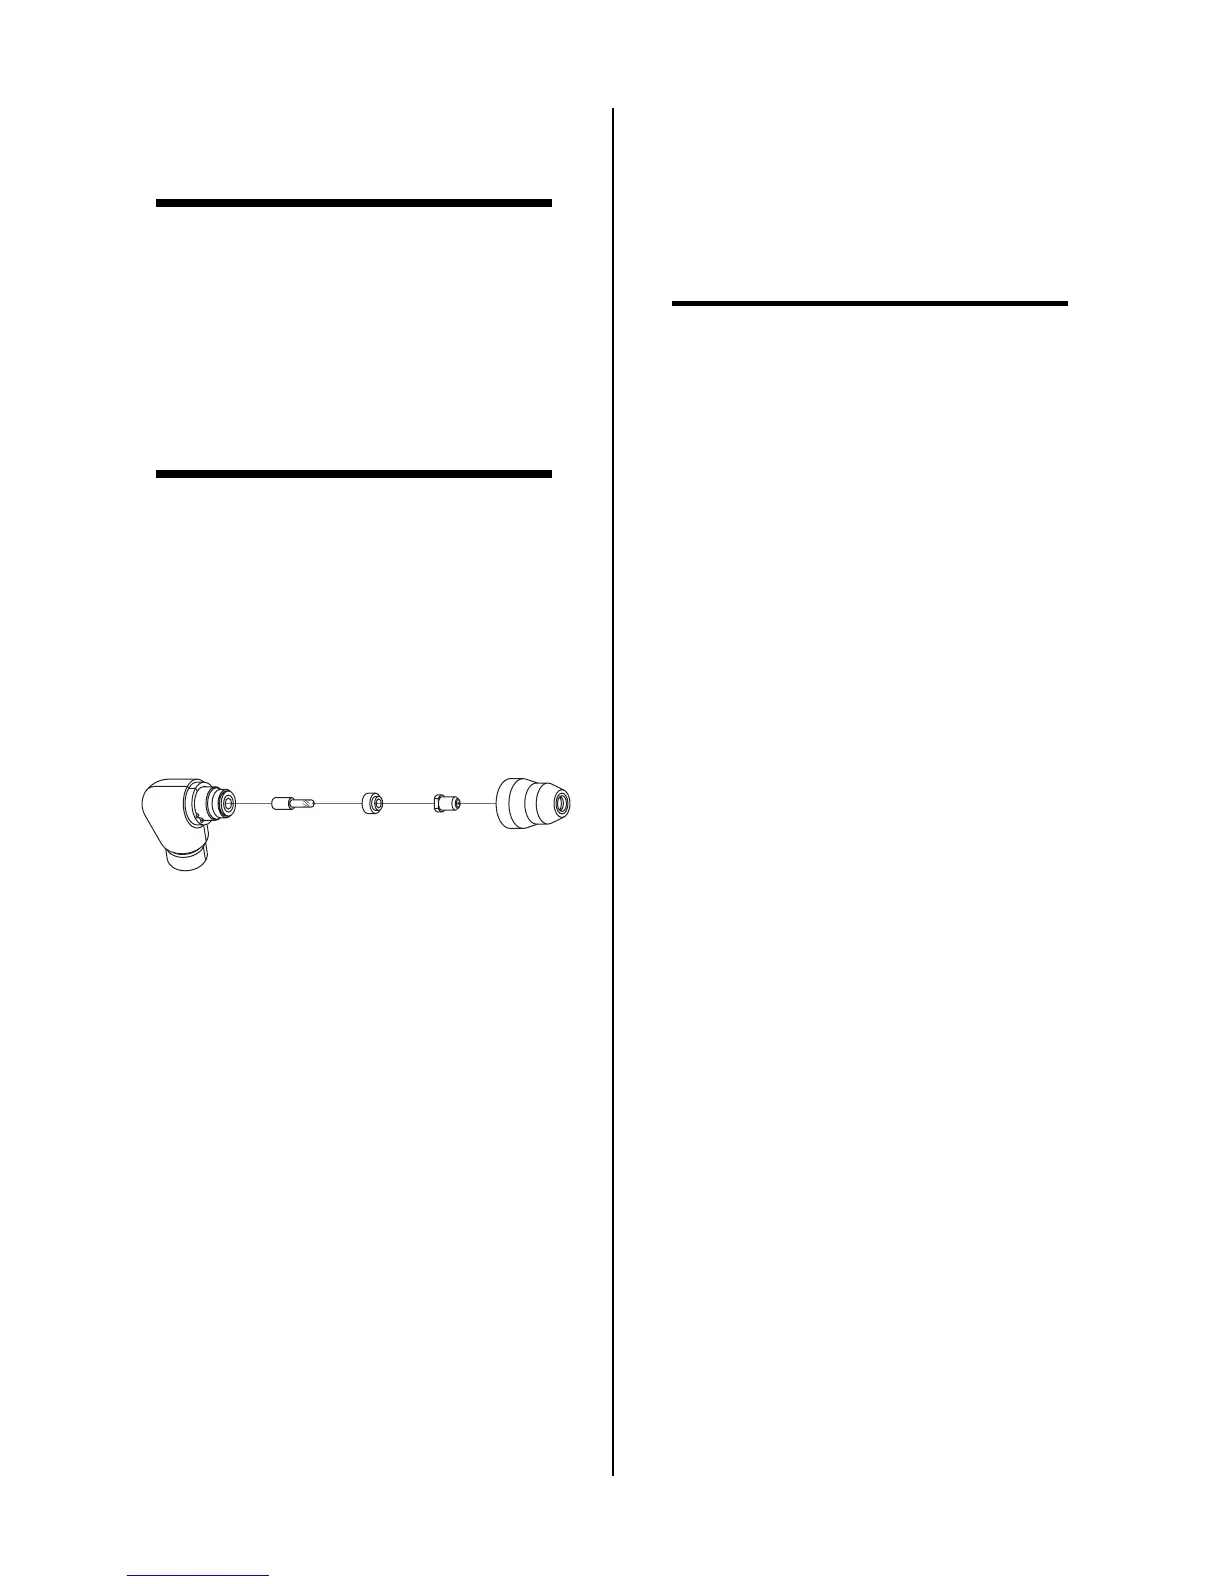
1. Remove the shield cup, tip, gas distributor, and electrode
from the torch.
Torch Head Assembly
Electrode
Tip
Standard
Shield Cup
Gas
Distributor
PCH-10
A-02007
Figure 3-1 PCH-10 Torch Head Parts Removal
2. Disconnect the torch lead from the power supply to
isolate the torch from power supply circuits. Refer to
Appendix I for Leads connections.
3. Using an ohmmeter (set to 10K or higher), check for
continuity between the electrode seat (negative) and the
brass threads of the torch assembly. Infinite resistance
(no continuity) should be found. If there is continuity
between the two, remove the torch head from the lead
and check the torch head separately.
B. Checking Torch Lead
If the torch head assembly is okay, check the torch lead by
measuring the resistance between the positive pilot lead
connector and the negative lead fitting. If continuity is
found, the insulation between the torch leads is breaking
down and the torch and leads assembly should be replaced.
NOTE
The lead cannot be replaced without replacing the
torch assembly as well.
If no continuity is found, check the resistance between the
negative plasma lead fitting and the electrode seat in torch
head. If no continuity is found, replace the torch and leads
assembly.
C. Checking Pilot and Switch Control Wires
Check the pilot and switch control wires for continuity
from one end of the torch lead to the other. If no continuity
exists, replace torch and lead assembly.
D. Reassembling Torch and Leads
Replace parts as required, then recheck the torch head,
and lead connections to confirm proper measurements. If
each component is okay, reassemble torch and leads.
 Loading...