Manual 0-2683 23 REPLACEMENT PROCEDURES
4.12 Transformer/Ferrite Core
Assembly Replacement
WARNINGS
Disconnect primary power at source before assem-
bling or disassembling t he power supply.
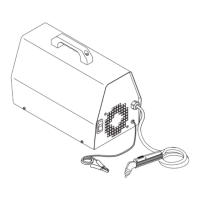
1. Remove cover/handle from unit per subsection 4.2.
2. Wire connections are as follows:
Connector Location
L1 E6 on PCB
L2 E1 on PCB
L3 E2 on PCB
L4
Brass Torch
Lead Fitting
3. Disconnect wire connections. Pull L4 connector
through loose tie wrap if available.
4. Remove two Ferrite Core Assembly screws which
hold the Transformer/Ferrite Core Assembly in
position. Remove Transformer/Ferrite Core As-
sembly from unit.
5. Install replacement Transformer/Ferrite Core As-
sembly by reversing steps 1-4, keeping in mind the
following:
a. Pull L4 through loose tie wrap if available.
b. Position wire connector L4 so that it runs along
side the Transformer, NOT across the top of the
Transformer or near any metal parts.
4.13 Input Voltage Changeover (For
208/230 VAC Service Only)
All 208/230 VAC units are factory set for 230 VAC. To
switch to 208VAC input power operation, complete the
following:
WARNINGS
Do not touch live electrical parts.
Disconnect primary power at source before assem-
bling or disassembling the power supply, torch parts
or torch and leads assemblies.
1. Remove cover/handle from unit per subsection 4.2.
2. Locate the wiring on the end of the Capacitor.
3. Remove tie wrap and orange sleeving from wire
#208VAC.
4. Remove wire #230VAC from Capacitor and replace
with wire #208VAC.
5. Slide orange sleeving over wire #230VAC, fold over
and secure with a tie wrap.
WARNING
Do not leave other input wire unprotected inside
unit.
6. Reinstall cover.
 Loading...