29
CUSTOMER/OPERATOR SERVICE
Manual 0-2577
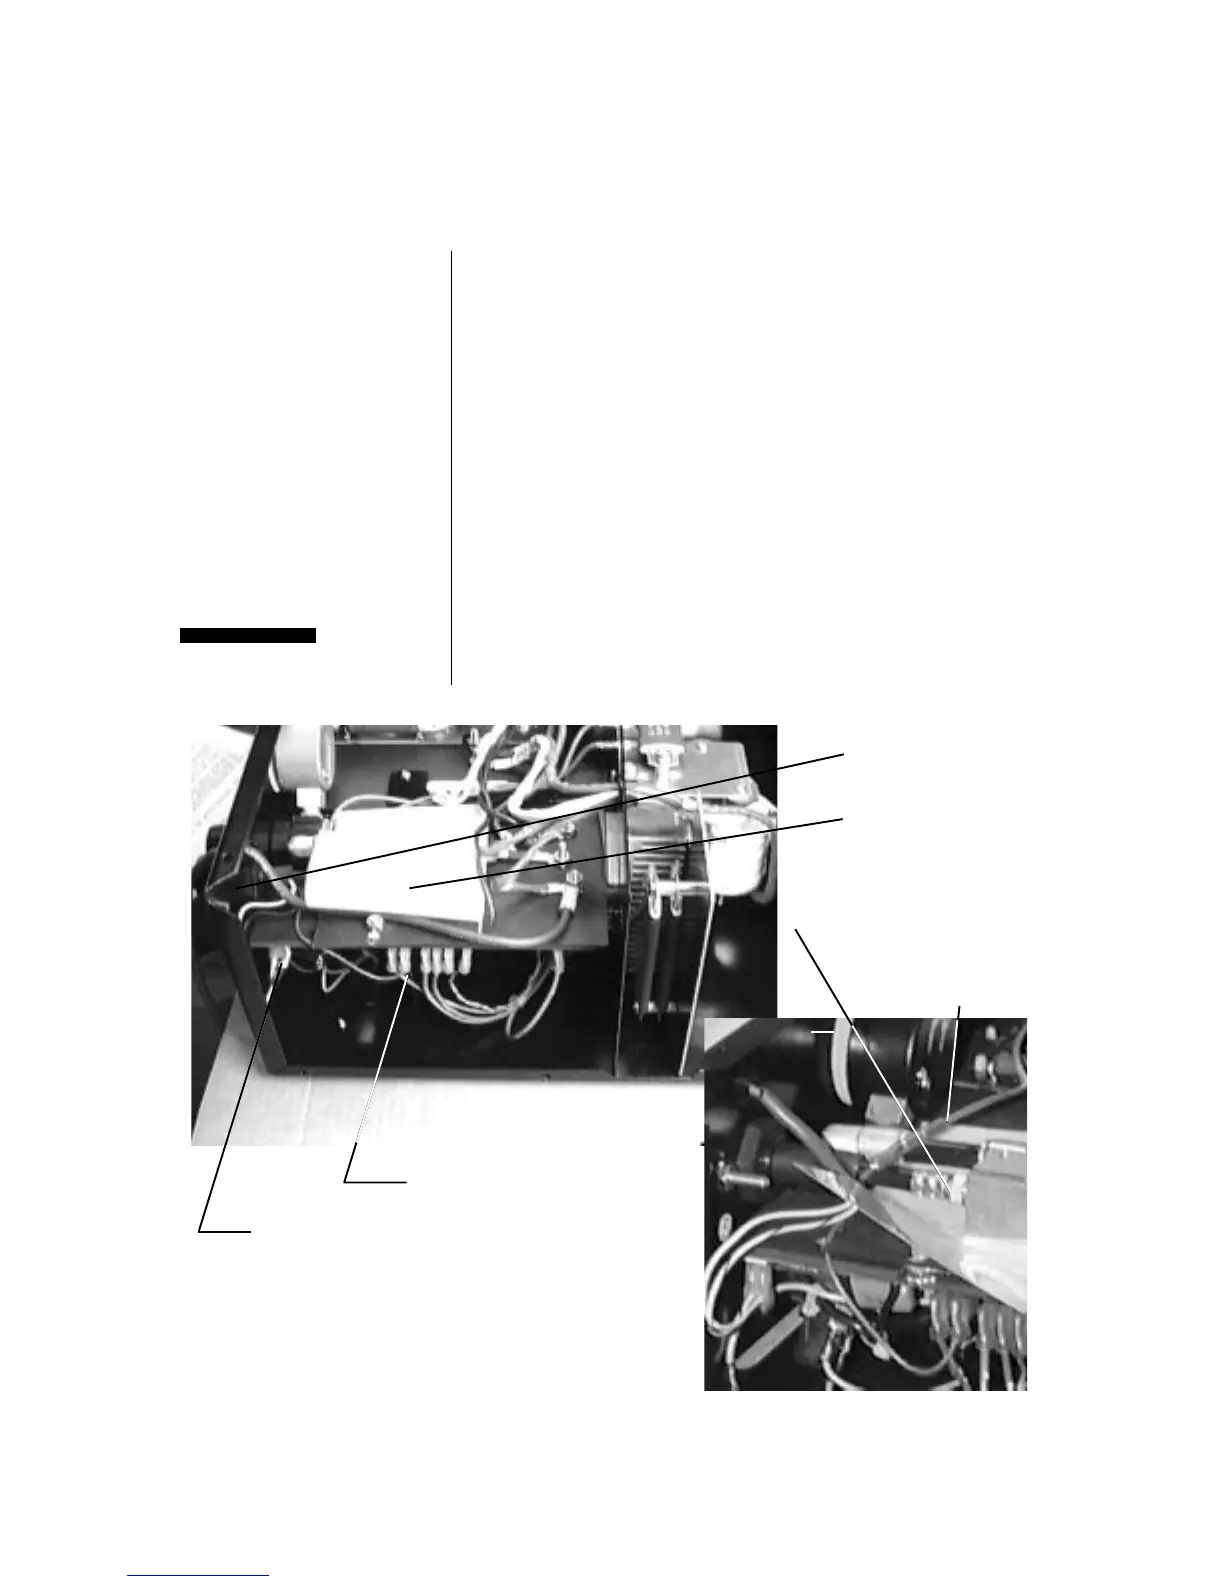
The torch bulkhead is located directly behind the torch lead
panel strain relief. Refer to Photo 4-A and:
1. Remove the nylon screw holding the protective insulating
sheet to the bulkhead.
2. Loosen the torch lead strain relief nut inside the front panel.
Do not remove the strain relief from the leads. Replacement
torch leads are provided with strain reliefs.
3. Disconnect the two pin torch switch connector (white and
black wires) and the red pilot wire (terminal 2) from the
main pcb side connectors.
4. Use a 3/8 in open end wrench to loosen the negative lead
fitting to the brass torch bulkhead.
Be sure all wires are outside the protective insulating sheet when
it is reinstalled (as seen in Photo 4-A). High voltage is present on
the torch negative lead.
LocateTorch
Bulkhead
Replace Leads
CAUTION
Photo 4-A Torch Lead Bulkhead Connections
Torch Lead Strain Relief
Protective insulating sheet.
Red pilot wire (#2)
Two Pin Torch Switch Connector
EMC drain wire to
chassis ground
Use 3/8 in wrench to remove
torch negative lead.